
Location Details: Contents, Activity and Settings
Esta página aún no está disponible en tu idioma.
Every location has its own details window on the web: its settings, what’s stored in it right now, and every job that has used it over time, with their moves, photos and notes.
🧭 Summary
Section titled “🧭 Summary”Open any location from its site’s page in the web app to see three tabs:
-
Details — the location’s name, type, place on the site grid, a note for your crew, and the status it gives everything moved into it. You can also move it to another site or delete it from here.
-
Contents — every label stored in the location right now, grouped by job.
-
Activity — a timeline of which jobs have been here and when, plus every label that came in or left, and the location photos and notes from every job.
The panel on the left always shows the location’s QR code, its name, its coordinates and site, and a Print code button.
New to sites and locations? Start with Warehousing with ContentsPal. To add, import, print and arrange locations on a site, see Managing Your Site’s Locations.
⚙️ Prerequisites
Section titled “⚙️ Prerequisites”-
Access to the ContentsPal web app. The location details window is web only; the mobile app has its own location screen (see Custody Locations Tab and Warehouse Mode).
-
A site with at least one location (see Setup Locations).
-
Who can do this: any member of your organization can view and change a location’s details, move it or delete it. It isn’t limited to admins.
🚀 Step-by-Step Instructions
Section titled “🚀 Step-by-Step Instructions”1. Open a Location
Section titled “1. Open a Location”-
Click Sites in the side menu.
-
Click Manage Locations on the site you want.
-
Open the location in any of these ways:
-
Click the location’s name in the table.
-
Click ⋯ at the end of its row, then Edit Location.
-
Click its number in the Labels column to open it straight on the Contents tab.
-
Click the location on the Grid View. When All levels are shown and a spot holds more than one level, pick the level from the list that appears.
-
In Grid view, click it in the Not on the grid list under the map.
-
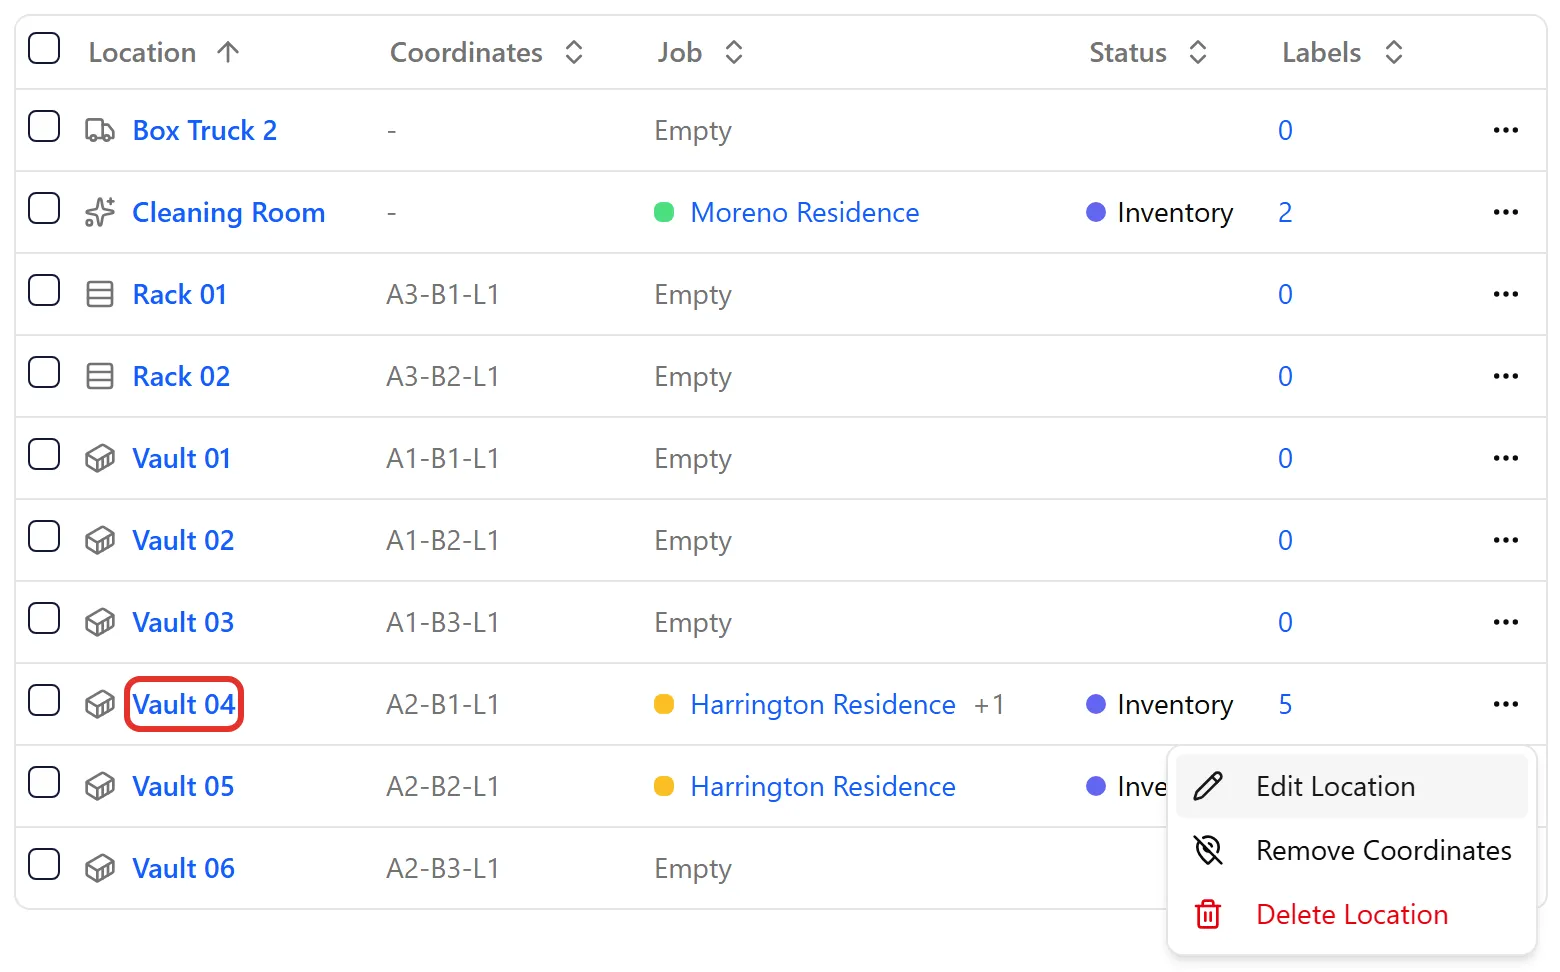
2. Details
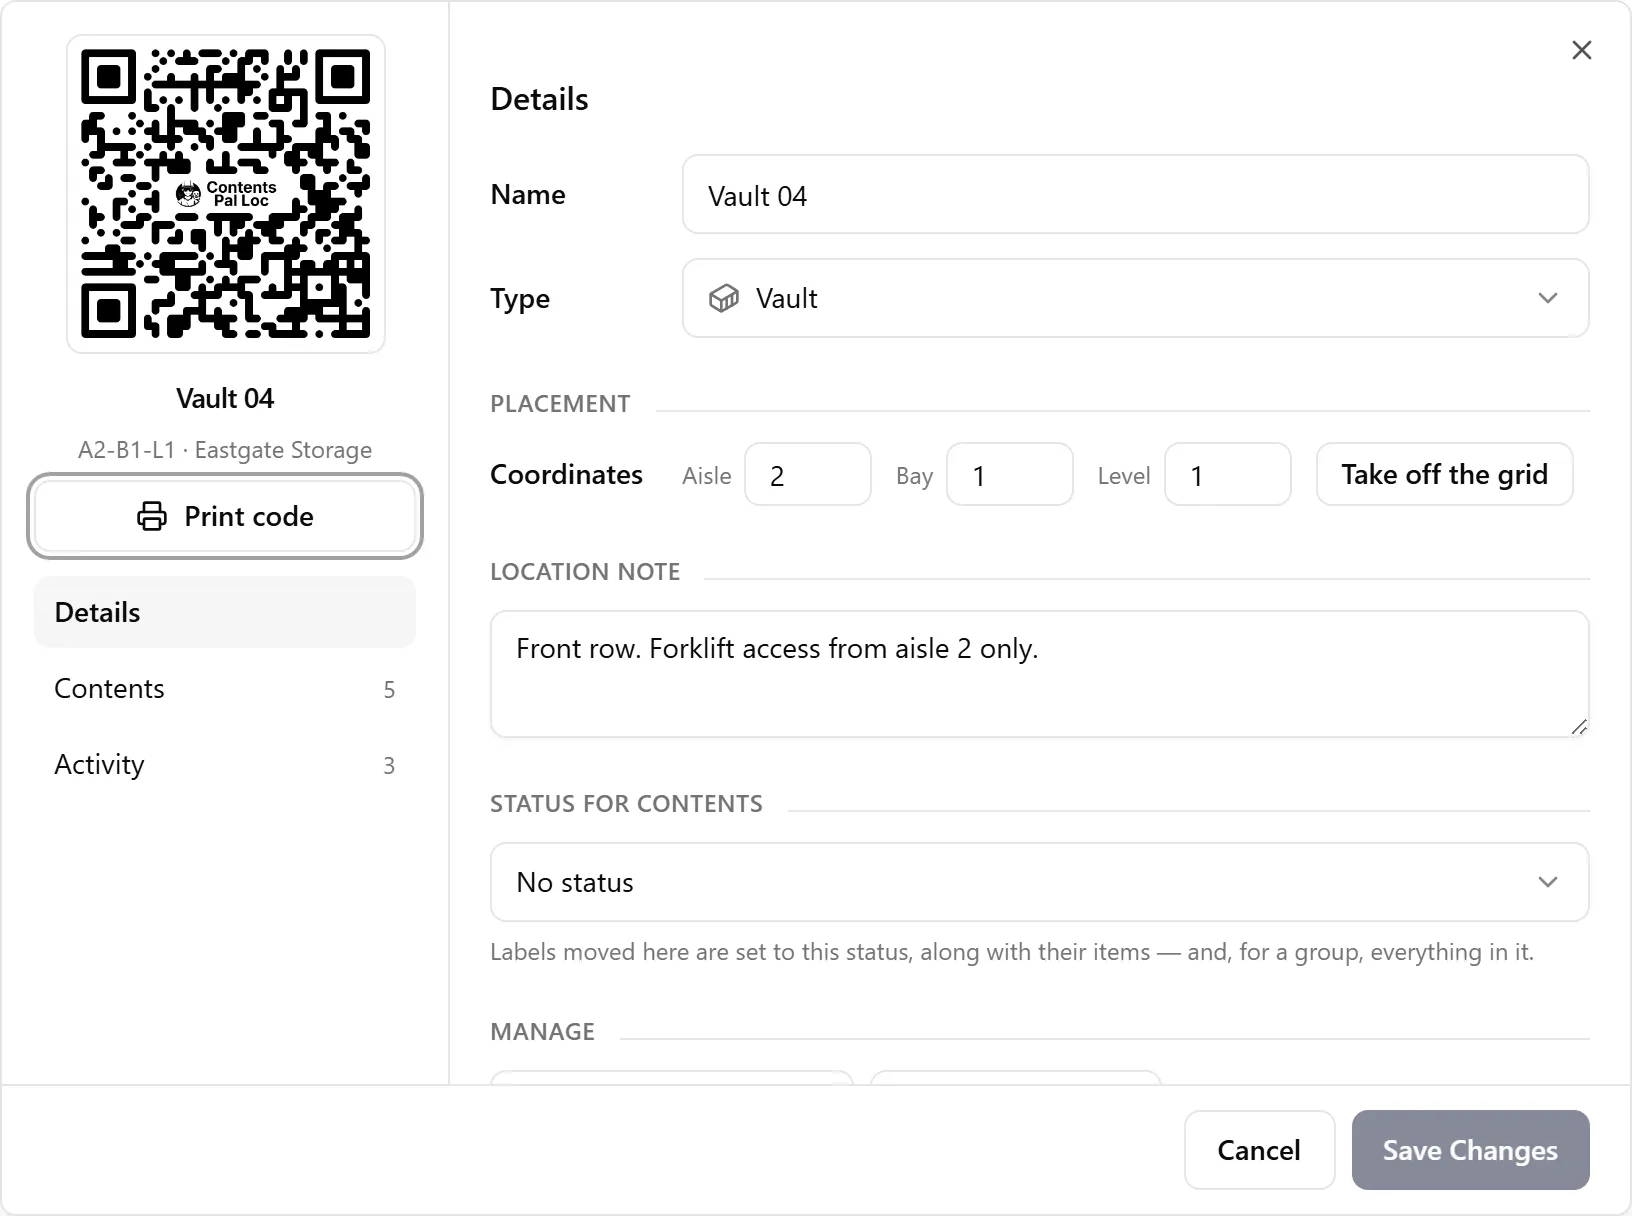
Section titled “2. Details”The Details tab opens first.
-
Name — what your team calls the location. It’s printed under the QR code.
-
Type — Vault, Rack, Pallet, Rail, Bin, Vehicle, Cleaning or Other. The type sets the icon shown next to the location; it doesn’t change how the location works.
-
Placement — shown only when the site uses a coordinate grid. Enter the Aisle, Bay and Level, or click Take off the grid to keep the location without a spot on the map (it then reads Not on the grid, and Place on the grid puts it back).
-
Location note — access instructions, condition, or anything the crew should know.
Changes aren’t saved until you click Save Changes. While anything is unsaved, the bottom of the window reads Unsaved changes; Cancel (or closing the window) discards them.
ContentsPal won’t let you save coordinates that don’t work — the message under the coordinates tells you why:
-
another location is already at that spot (… is already at A2-B1-L1.),
-
the spot is blocked on the site’s grid,
-
the aisle, bay or level is beyond the site’s size, or
-
one of the three numbers is missing.
3. Set a Status for Contents
Section titled “3. Set a Status for Contents”A location can set a status on everything moved into it. For example, a cleaning room can mark contents Needs Cleaning, and a vault can mark them Storage.
-
On the Details tab, choose a status under Status for contents. Pick No status to have the location leave statuses alone.
-
Click Save Changes.
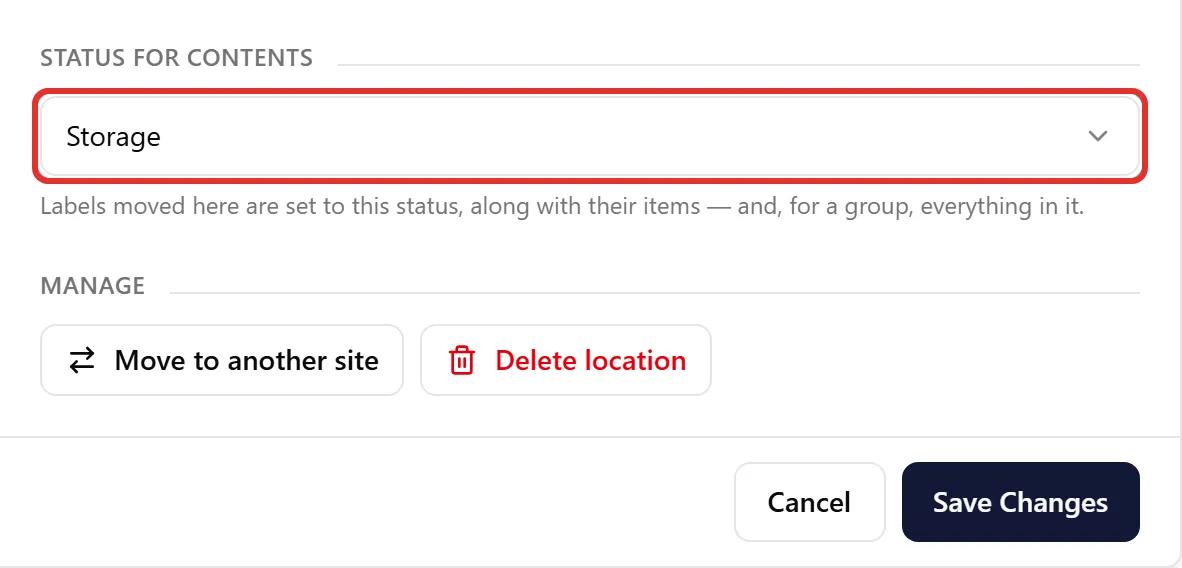
Labels moved into the location from then on take its status, along with their items — and, for a grouping label such as a pallet, everything in the group.
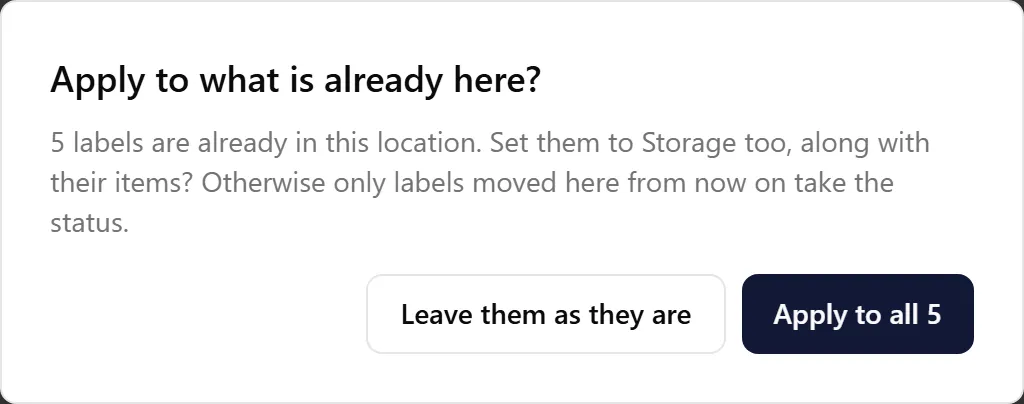
If labels are already stored in the location when you choose a new status, ContentsPal asks Apply to what is already here?:
-
Apply to all N — sets every label already in the location (from any job) and their items to the new status.
-
Leave them as they are — saves the status without touching the labels already here; only labels moved in later take it.
4. Contents
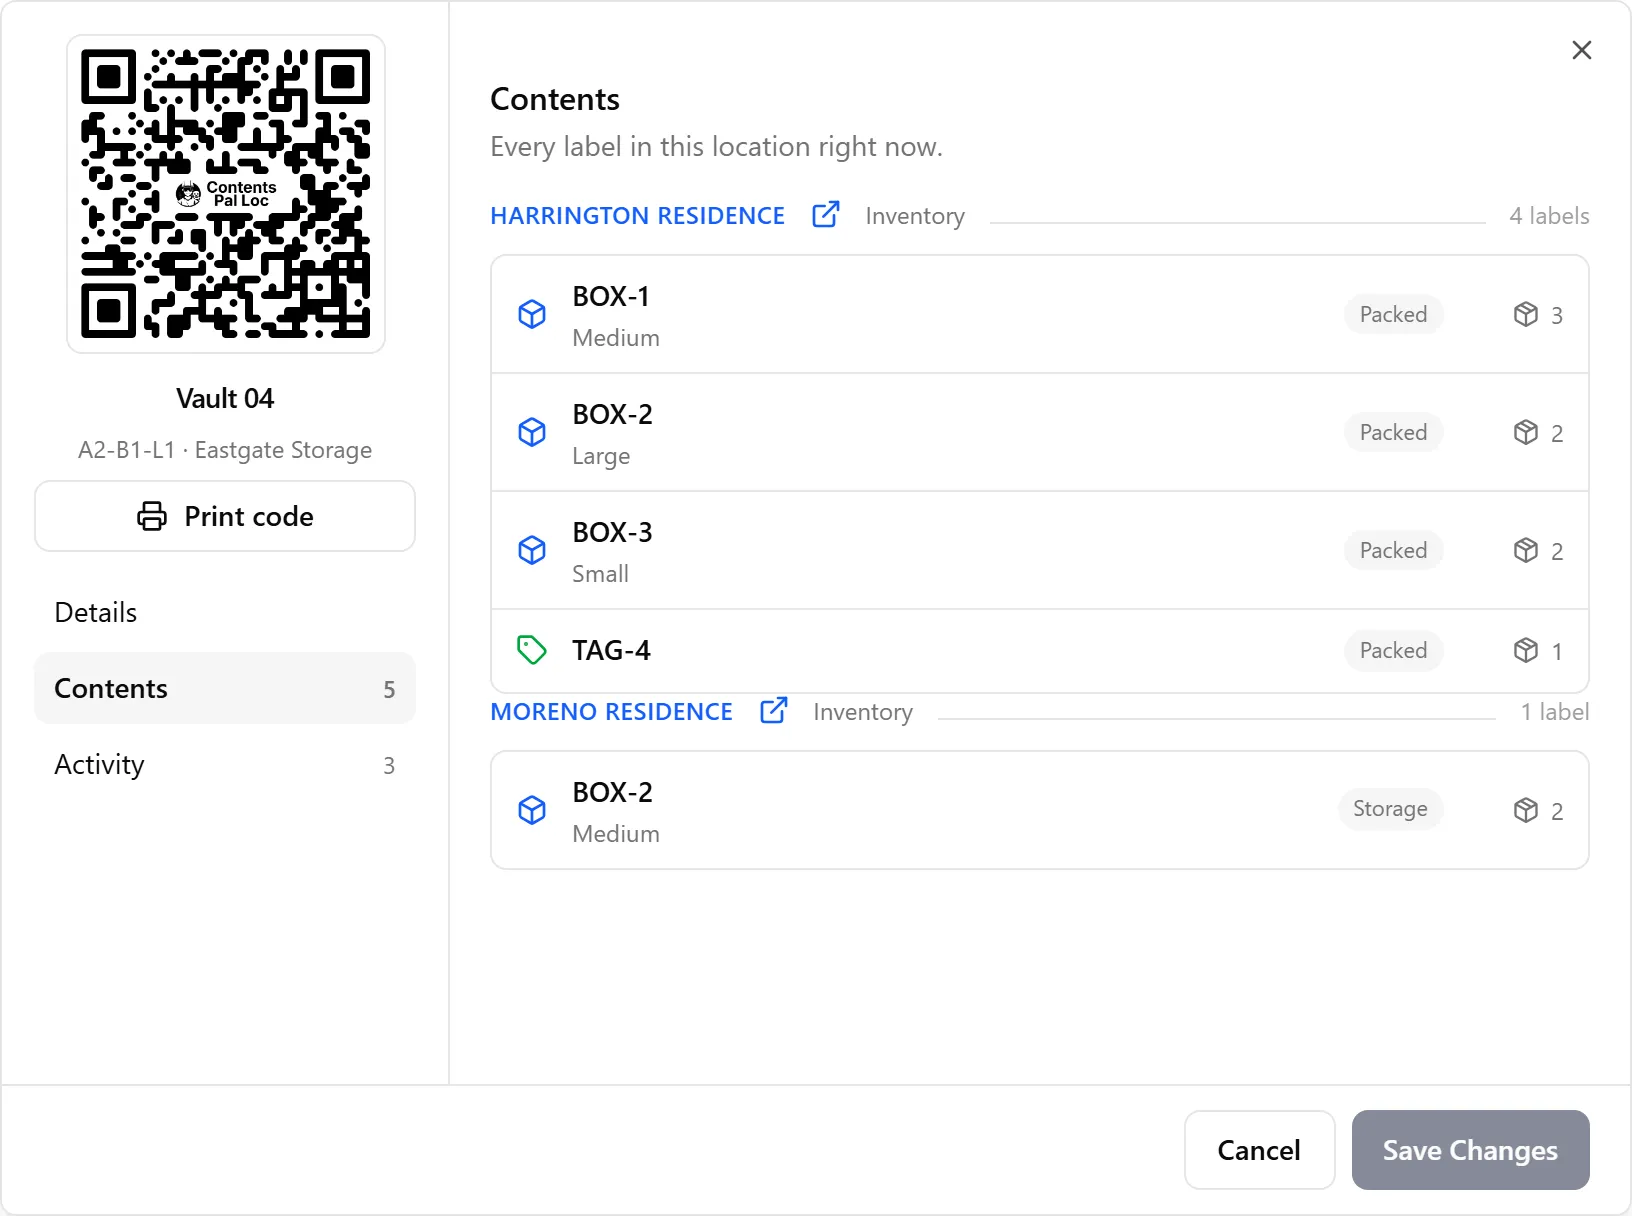
Section titled “4. Contents”The Contents tab lists every label stored in the location right now. The number next to the tab name is how many labels are here.
-
Labels are grouped by job, the job with the most labels first. Each group shows the job’s name, its job status and how many of its labels are here.
-
Each label shows its type icon, its name, its box size, its current status and how many items it holds.
-
Click a job’s name to open that job.
A location can hold labels from several jobs at once — they are all listed here.
5. Activity
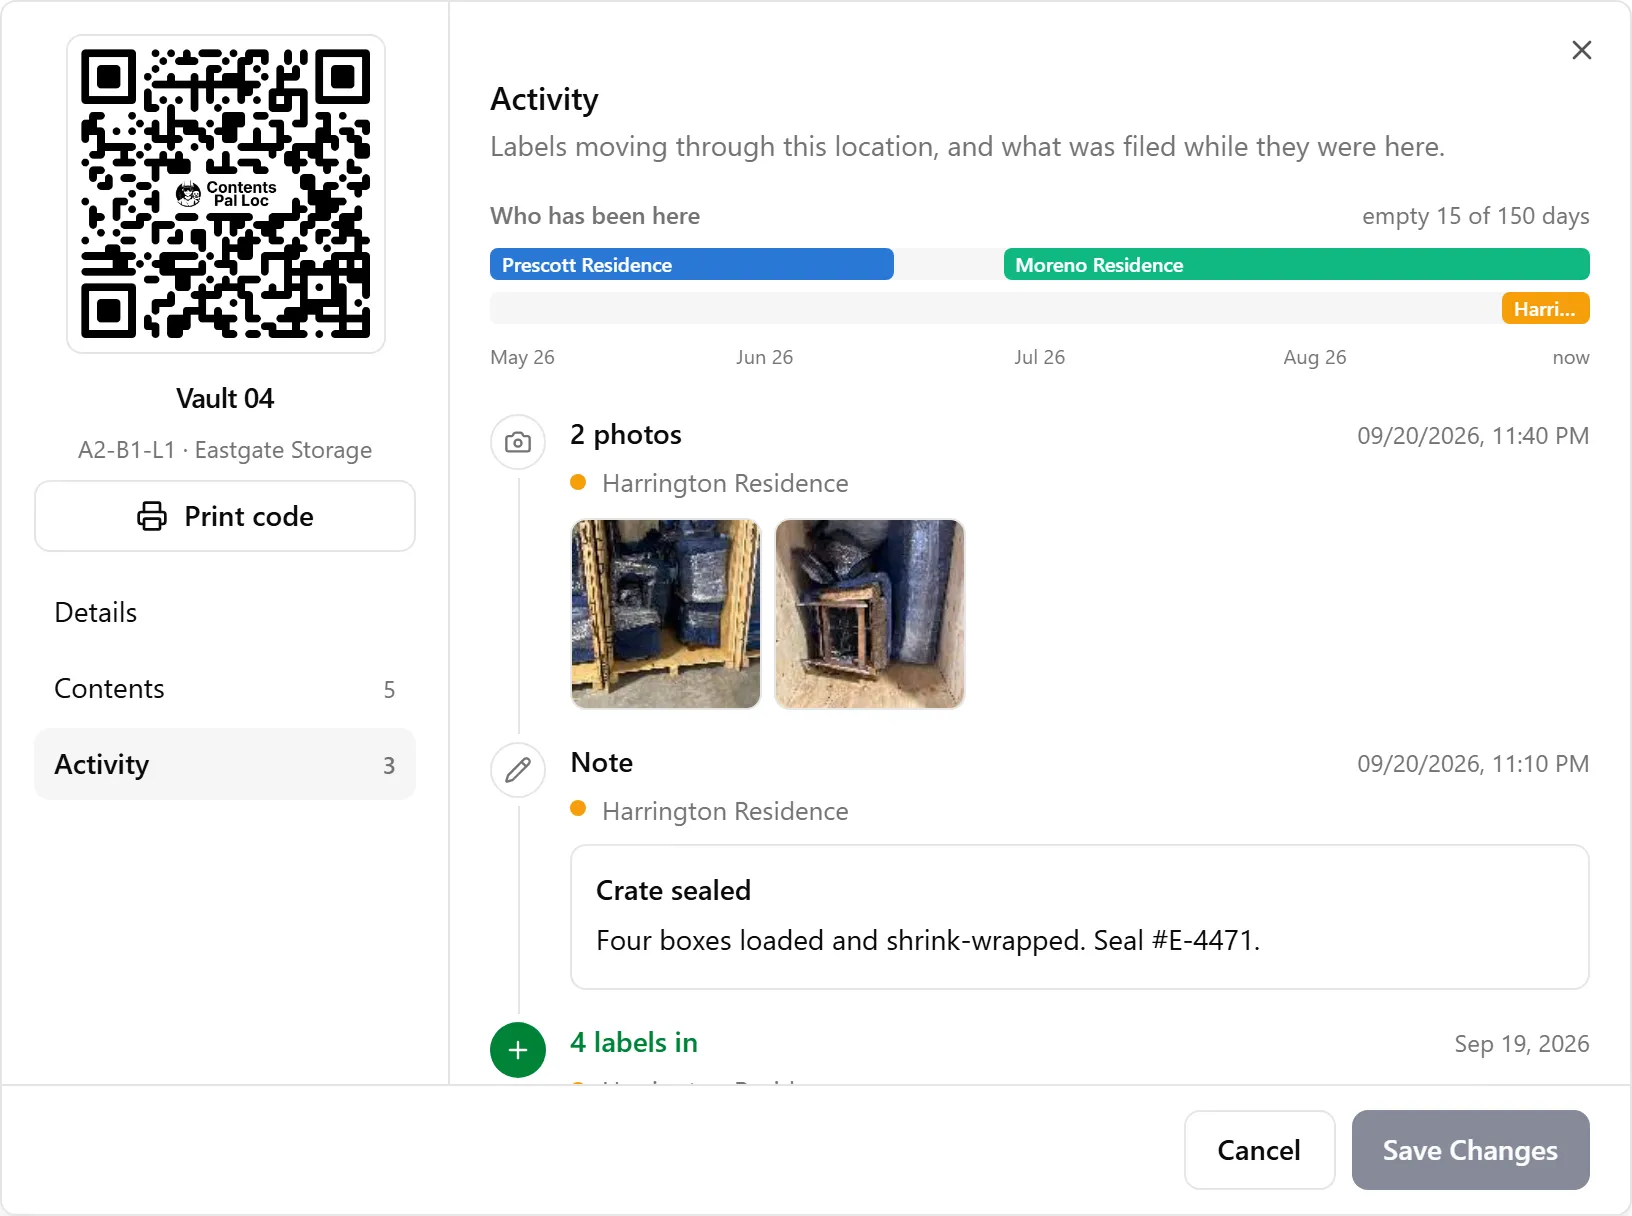
Section titled “5. Activity”The Activity tab is the location’s history across every job that has used it. The number next to the tab name is how many stays it has had (one per job, per stretch of time).
Who has been here
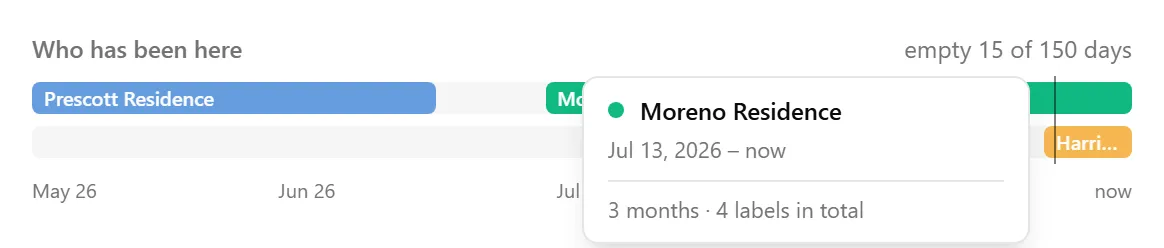
Section titled “Who has been here”The bar at the top shows which job was in the location and when, one color per job, from the first time the location was used up to now. When two jobs overlap, they’re shown on separate rows. On the right, it tells you how many of those days the location sat empty (or that it has been in use all of them).
-
Hover over a bar to see the job, its dates, how long it stayed and how many labels it had here in total.
-
Hover over the space between bars to see, for that date, which jobs had labels here and how many — or Empty.
The activity list
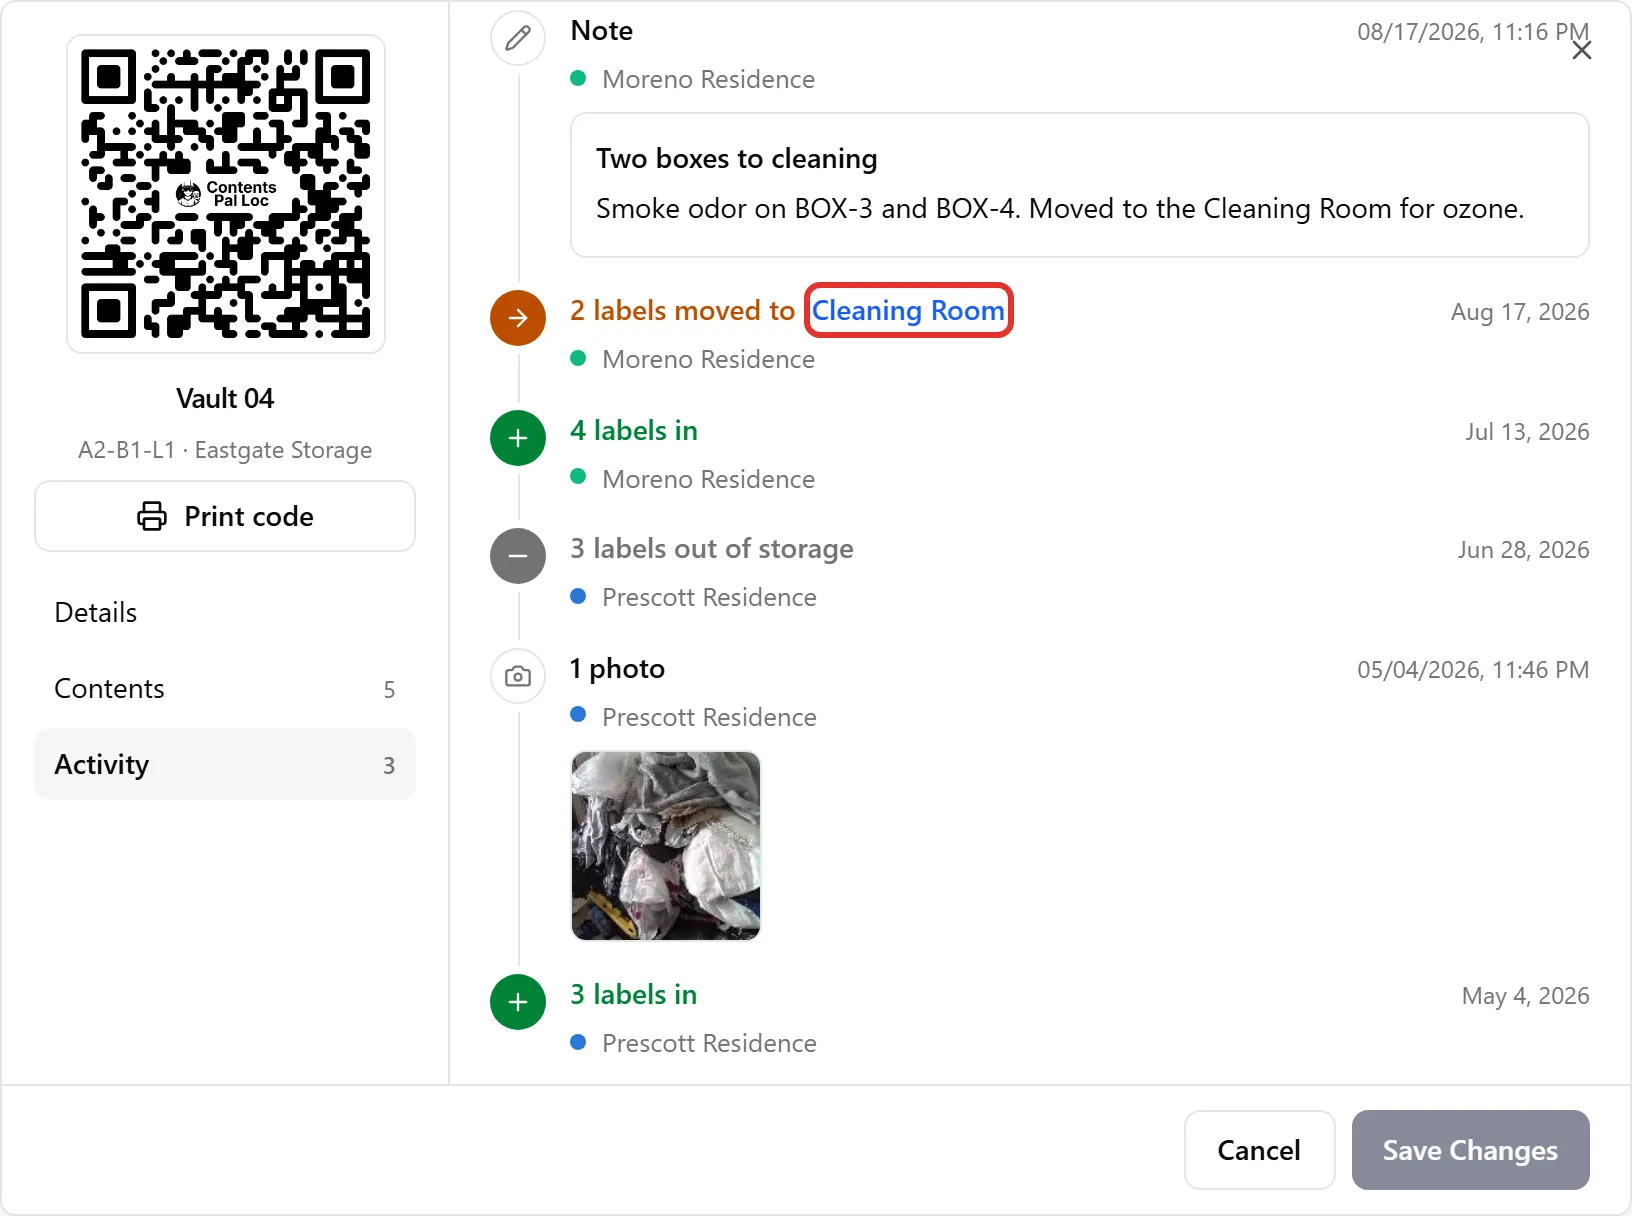
Section titled “The activity list”Below the timeline is everything that happened in the location, newest first, each with the job it belongs to:
-
N labels in — labels moved into the location.
-
N labels moved to location — labels that left for another location. Click the location’s name to open it. If it’s on another site, ContentsPal switches to that site and highlights it.
-
N labels out of storage — labels that left storage altogether, for example when they were delivered.
-
Photos and notes about the location, from every job that has used it. Click a photo to open it full size.
Labels a job moved the same way on the same day are combined into one entry. Hover over a move’s date to see the exact time.
Location photos and notes are added for a job — in the mobile app, on the job’s Custody tab under Locations, or on the job’s Documentation tab. The Activity tab only shows them; see Location (Vault) Photos and Custody Locations Tab.
6. Move a Location to Another Site
Section titled “6. Move a Location to Another Site”Use this when a vault, rack or truck physically moves to a different building.
-
On the Details tab, scroll down to Manage and click Move to another site.
-
Pick the Site.
-
Click Move location.
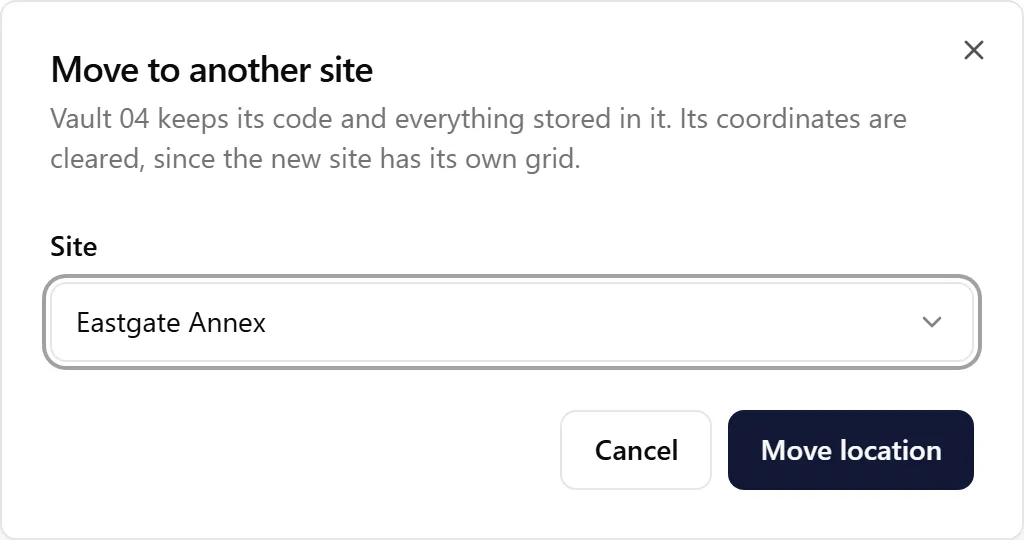
The location keeps its code and everything stored in it, and its activity history goes with it. Its coordinates are cleared, since the new site has its own grid — give it a spot on the new site afterwards. If your organization has only one site, there’s nowhere to move it.
To move many locations at once, select them in the site’s table and use Edit Locations → Move to Another Site (see Managing Your Site’s Locations).
7. Delete a Location
Section titled “7. Delete a Location”-
On the Details tab, scroll down to Manage and click Delete location (or use ⋯ → Delete Location in the site’s table).
-
Check the location’s name and tag. If labels are stored in it, a warning tells you how many.
-
Click Delete Location to confirm.
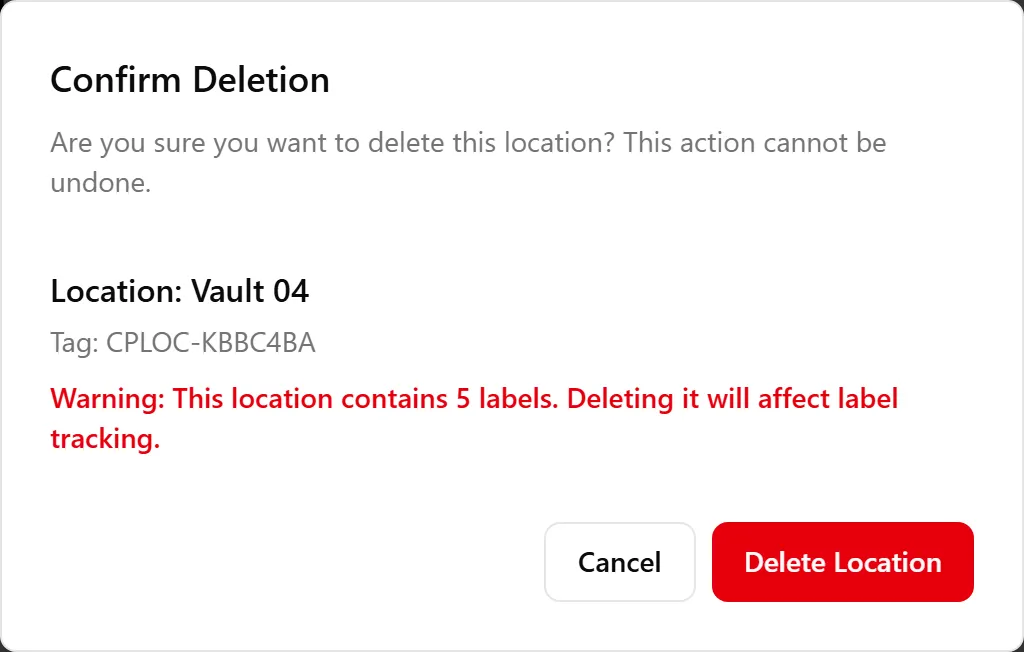
Deleting a location is permanent — it can’t be undone. Scanning its code in the mobile app shows Location not found, its Contents and Activity are gone from the site page, and labels that were in it are not moved anywhere: jobs show that location as Deleted location on their Custody tab’s Locations view and in their Documentation tab.
🔍 How This Differs From a Job’s Custody → Locations Tab
Section titled “🔍 How This Differs From a Job’s Custody → Locations Tab”| Location details (Sites page) | Custody → Locations (on a job) | |
|---|---|---|
| Point of view | One location, every job that has used it | One job, every location it has used |
| Shows | Labels from all jobs, the location’s settings, all jobs’ photos and notes | Only that job’s labels, photos and notes |
| Changes you can make | Name, type, placement, note, status for contents; move or delete the location | Add notes for the job |
See Custody Locations Tab for the job’s side.
✅ Best Practices
Section titled “✅ Best Practices”-
Give every stop a status that makes sense. A cleaning room set to Needs Cleaning and vaults set to Storage keep statuses right without anyone editing labels by hand.
-
Apply a new status to what’s already there when you’re correcting a location’s setup, so older labels match the new ones.
-
Use the location note for things that don’t change from job to job — access, forklift-only, temperature. Job-specific notes belong on the job.
-
Move, don’t delete. A moved location keeps its code and history; a deleted one breaks both.
🧩 Troubleshooting
Section titled “🧩 Troubleshooting”Save Changes is greyed out: Nothing has changed yet, or the coordinates can’t be saved — read the message under Coordinates, or click Take off the grid.
I don’t see Placement: The site doesn’t use a coordinate grid. Click the pencil next to the site’s name and turn on Use Coordinate System to place locations on it.
I set a status but the labels already in the location didn’t change: You chose Leave them as they are. The prompt only appears when the status changes, so set No status and save, then choose the status again, save, and pick Apply to all. Or update the labels from each job’s Custody tab.
A label I moved in doesn’t have the location’s status: Statuses are applied when labels are moved into the location by scanning or with a move. Set the label’s status from the job’s Custody tab, or re-apply the location’s status as above.
Activity says “Nothing has happened in this location yet”: No labels have been moved into it, and no job has added photos or notes for it.
A job shows “Deleted location”: That location was deleted while the job’s labels were in it, or after. Move the labels to a current location from the job’s Custody tab or by scanning.
There’s no Sites item in the side menu: Sites aren’t available for insurance adjuster organizations or in Franchise HQ mode.
There’s nowhere to move a location: Your organization has only one site. Add another site first.