
Report Cover Page
Esta página aún no está disponible en tu idioma.
Your PDF reports open with a cover page showing the job’s photos, the claim details and a map of the loss. Choose what it shows for a single report, or set the default for your whole organization.
What’s on the Cover Page
Section titled “What’s on the Cover Page”The cover is the first page of the PDF. The report itself starts on page two.
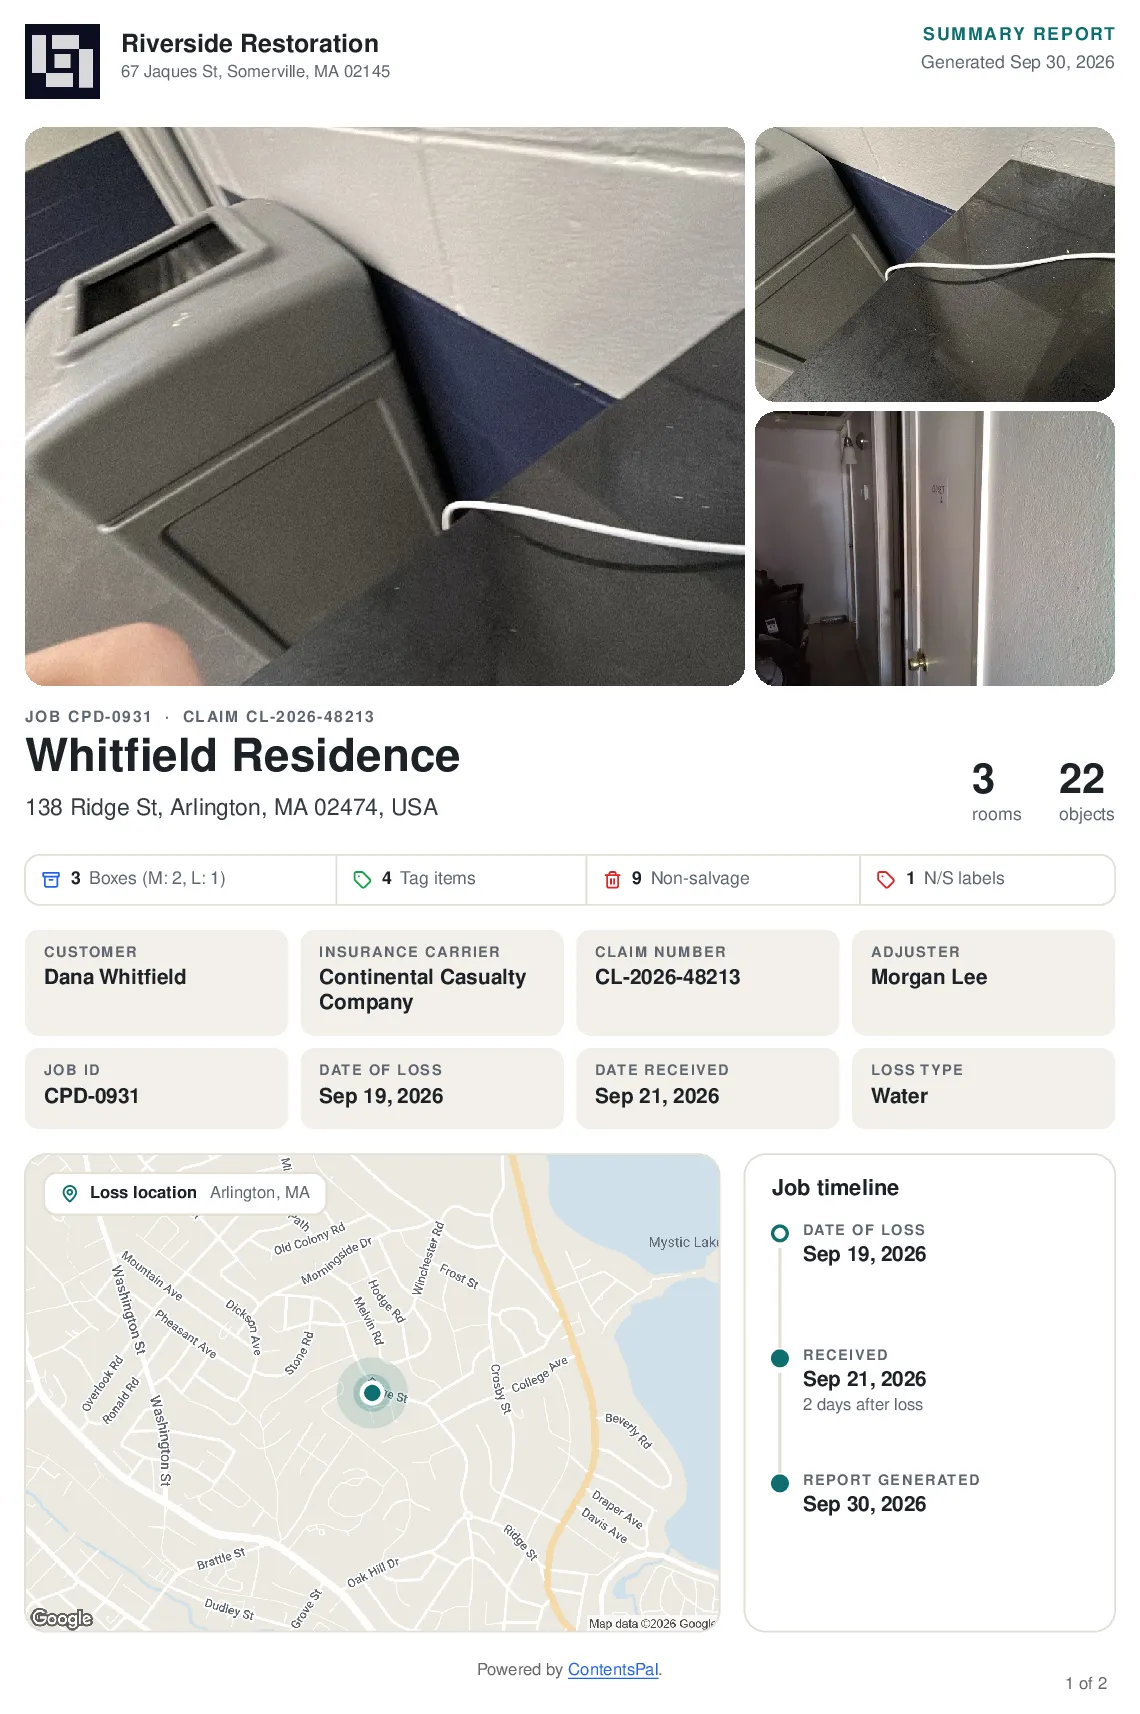
From top to bottom, it shows:
-
Your organization — logo, name, address and phone number, with the report’s name and the date it was generated on the right. These come from Organization → Settings → Details, and they appear when Show organization logo is ticked in the report options.
-
Cover photos — up to three photos of the property (see “Where the Photos Come From” below).
-
The job — job ID and claim number, the job name and the loss address, with the number of rooms and items in the report on the right (the Custody Report counts labels instead).
-
Totals — boxes, tag items, textiles and non-salvageable counts, depending on what the report covers. Item reports also list their top rooms when there’s space on the page.
-
Claim details — customer, insurance carrier, claim number, adjuster, job ID, date of loss, date received and loss type. Anything that isn’t filled in on the job shows as “Not provided”.
-
Loss-location map — a map centred on the job’s loss address.
-
Property view — for organizations with property details turned on, when ContentsPal finds the home at the job’s address, the map becomes a satellite view with the building outlined and a strip showing bedrooms, bathrooms, living area, floors and year built. Untick Property satellite view & facts under Cover page to show the regular map instead.
-
Job timeline — date of loss, date received (with how many days after the loss that was), the packout and packback dates when they’re set, and the date the report was generated.
Cover photos, Loss-location map and Job timeline are optional sections: you can turn each one off, and the cover rearranges around the sections you keep. The job details and claim details are always shown.
Which Reports Have a Cover Page
Section titled “Which Reports Have a Cover Page”Every PDF job report opens with this cover:
-
Salvageable, Non-Salvageable, Replacements and Custom Inventory Reports
-
Photo Report and Job & Room Photo Report
-
Job Summary Report
-
Custody Report
-
Valuation Report
-
Instant Estimate PDF
Spreadsheet (XLSX) exports, the XactContents Spreadsheet and the Total Loss Carrier Spreadsheet have no cover page. The Vault Summary has its own cover for each vault, with a large QR code, and the settings in this article don’t change it.
New Cover vs. Classic Cover
Section titled “New Cover vs. Classic Cover”There are two covers:
-
New cover page — the full-page cover described above, with photos, a map and the claim details.
-
Classic cover page — the original first page: your logo, the report title and a list of job details, with the report starting right below it on the same page.
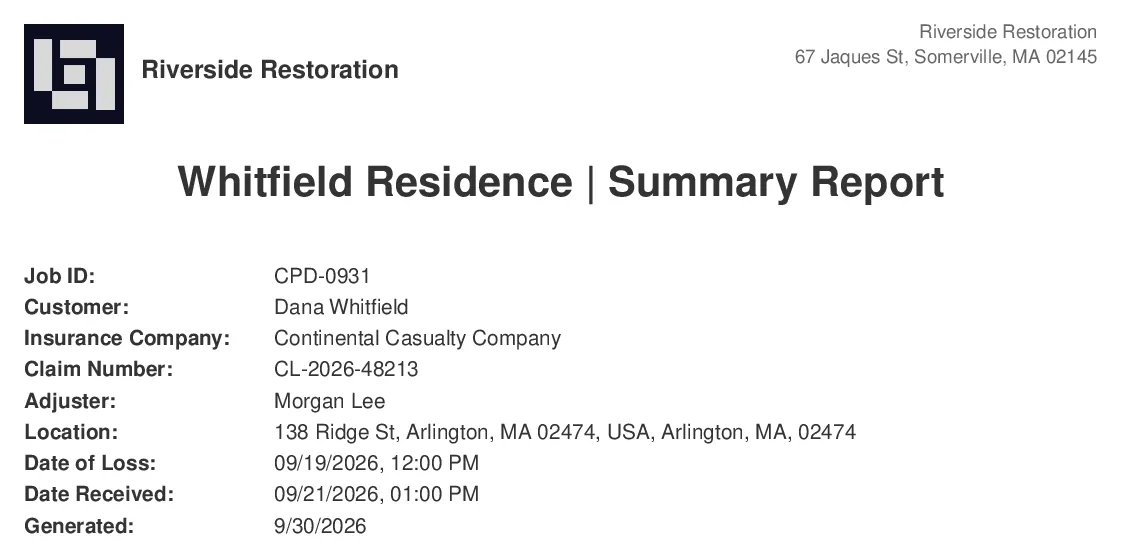
Your organization’s setting decides which one your reports use (see “Setting the Default for Your Organization” below), and anyone can switch a single report to the other.
Choosing the Cover for One Report
Section titled “Choosing the Cover for One Report”When you generate a PDF report, you can change its cover without affecting anyone else’s reports.
-
Open your job in the web app and click the Reports tab.
-
Click Generate Report and choose a report.
-
Open Advanced Options (some reports show their options straight away).
-
Under General Options, click Cover page. The label next to it shows which cover the report will use: New or Classic.
-
Tick Use classic cover page for the classic cover, or leave it unticked and choose the sections the new cover shows: Cover photos, Loss-location map and Job timeline.
-
Click Generate Report.
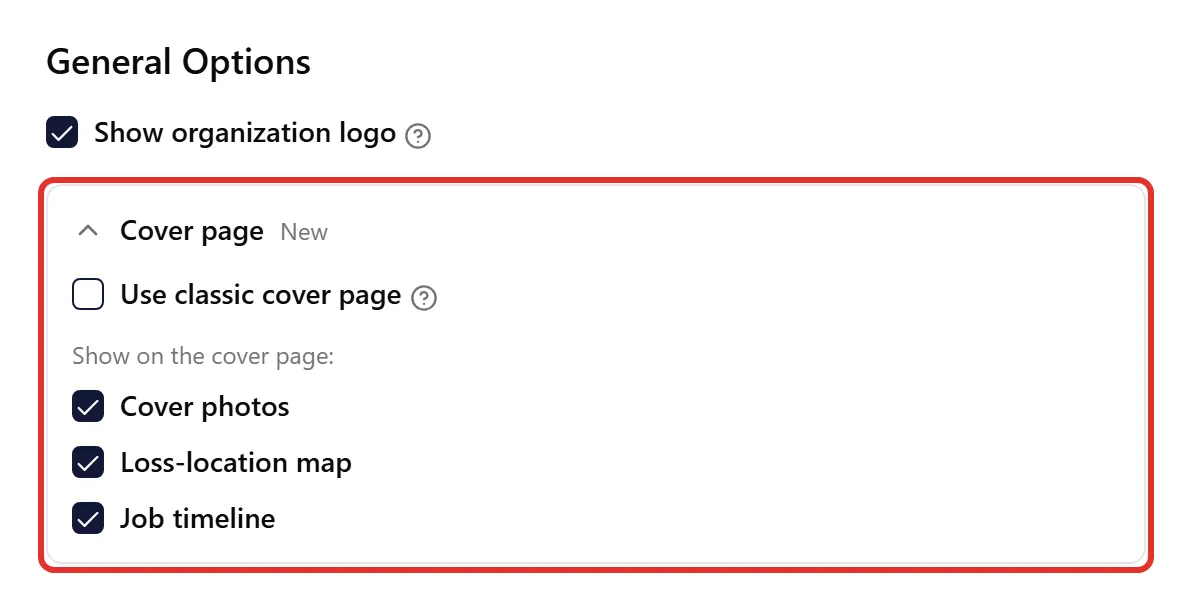
The checkboxes start from your organization’s defaults. What you change here applies to this report only — the next time you open the report options, they’re back at your organization’s settings.
The Cover page section only appears for PDFs: switch a report to XLSX and it’s hidden.
Setting the Default for Your Organization
Section titled “Setting the Default for Your Organization”Owners and admins can choose the cover every report starts with, so nobody has to change it report by report.
-
Click Organization in the side menu, then open the Settings tab.
-
Select Reporting in the left sidebar.
-
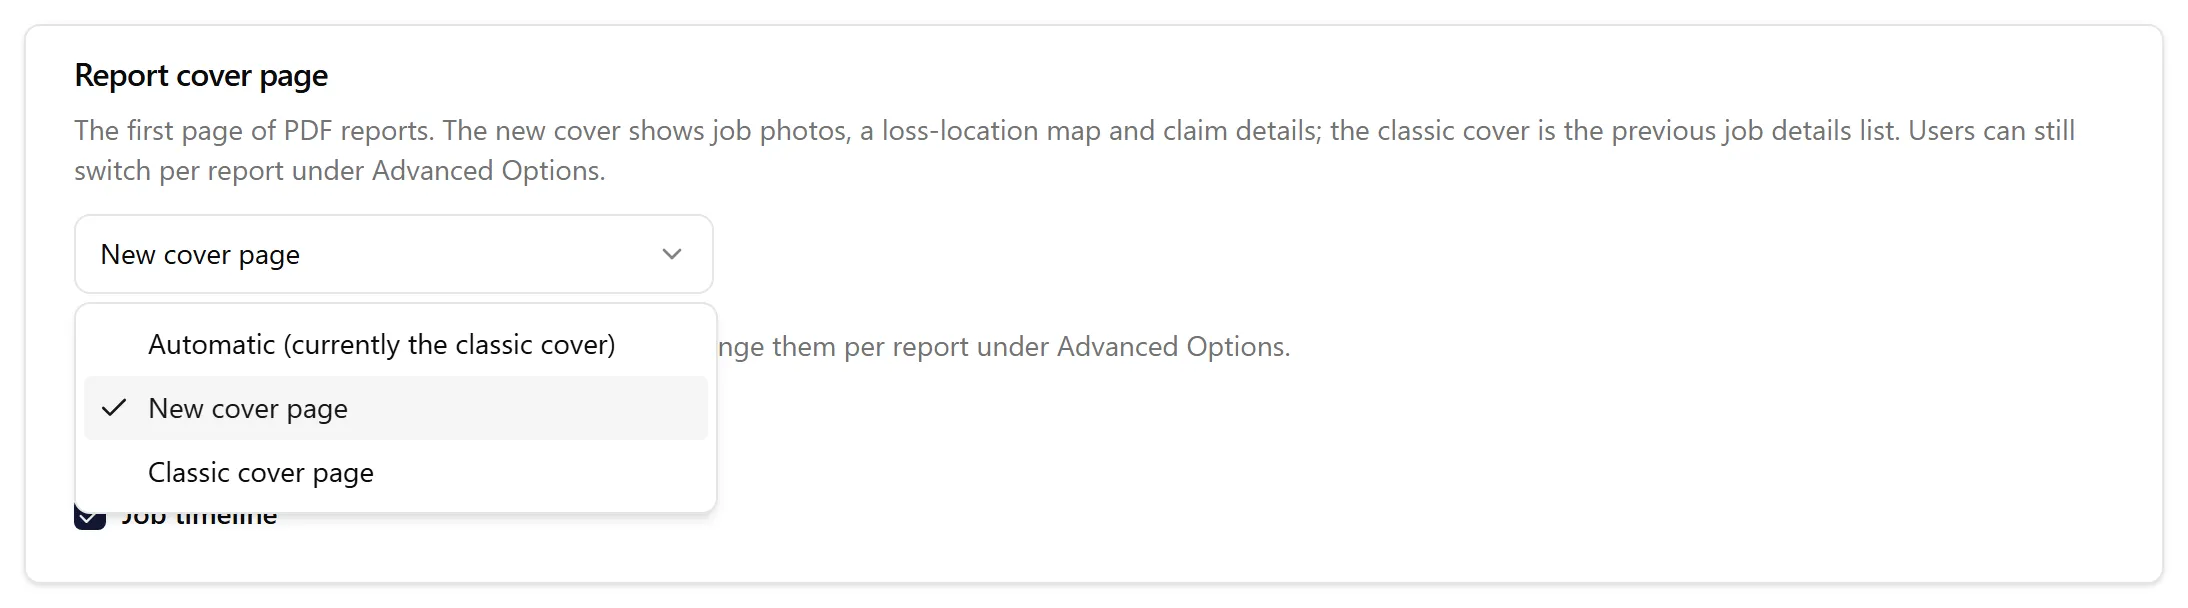
At the top, the Report cover page card shows your organization’s cover. Pick one from the dropdown:
-
New cover page — PDF reports use the new cover.
-
Classic cover page — PDF reports use the classic cover.
-
Automatic — ContentsPal chooses (see below).
-
-
When your organization uses the new cover, tick or untick the sections it shows by default: Cover photos, Loss-location map and Job timeline.
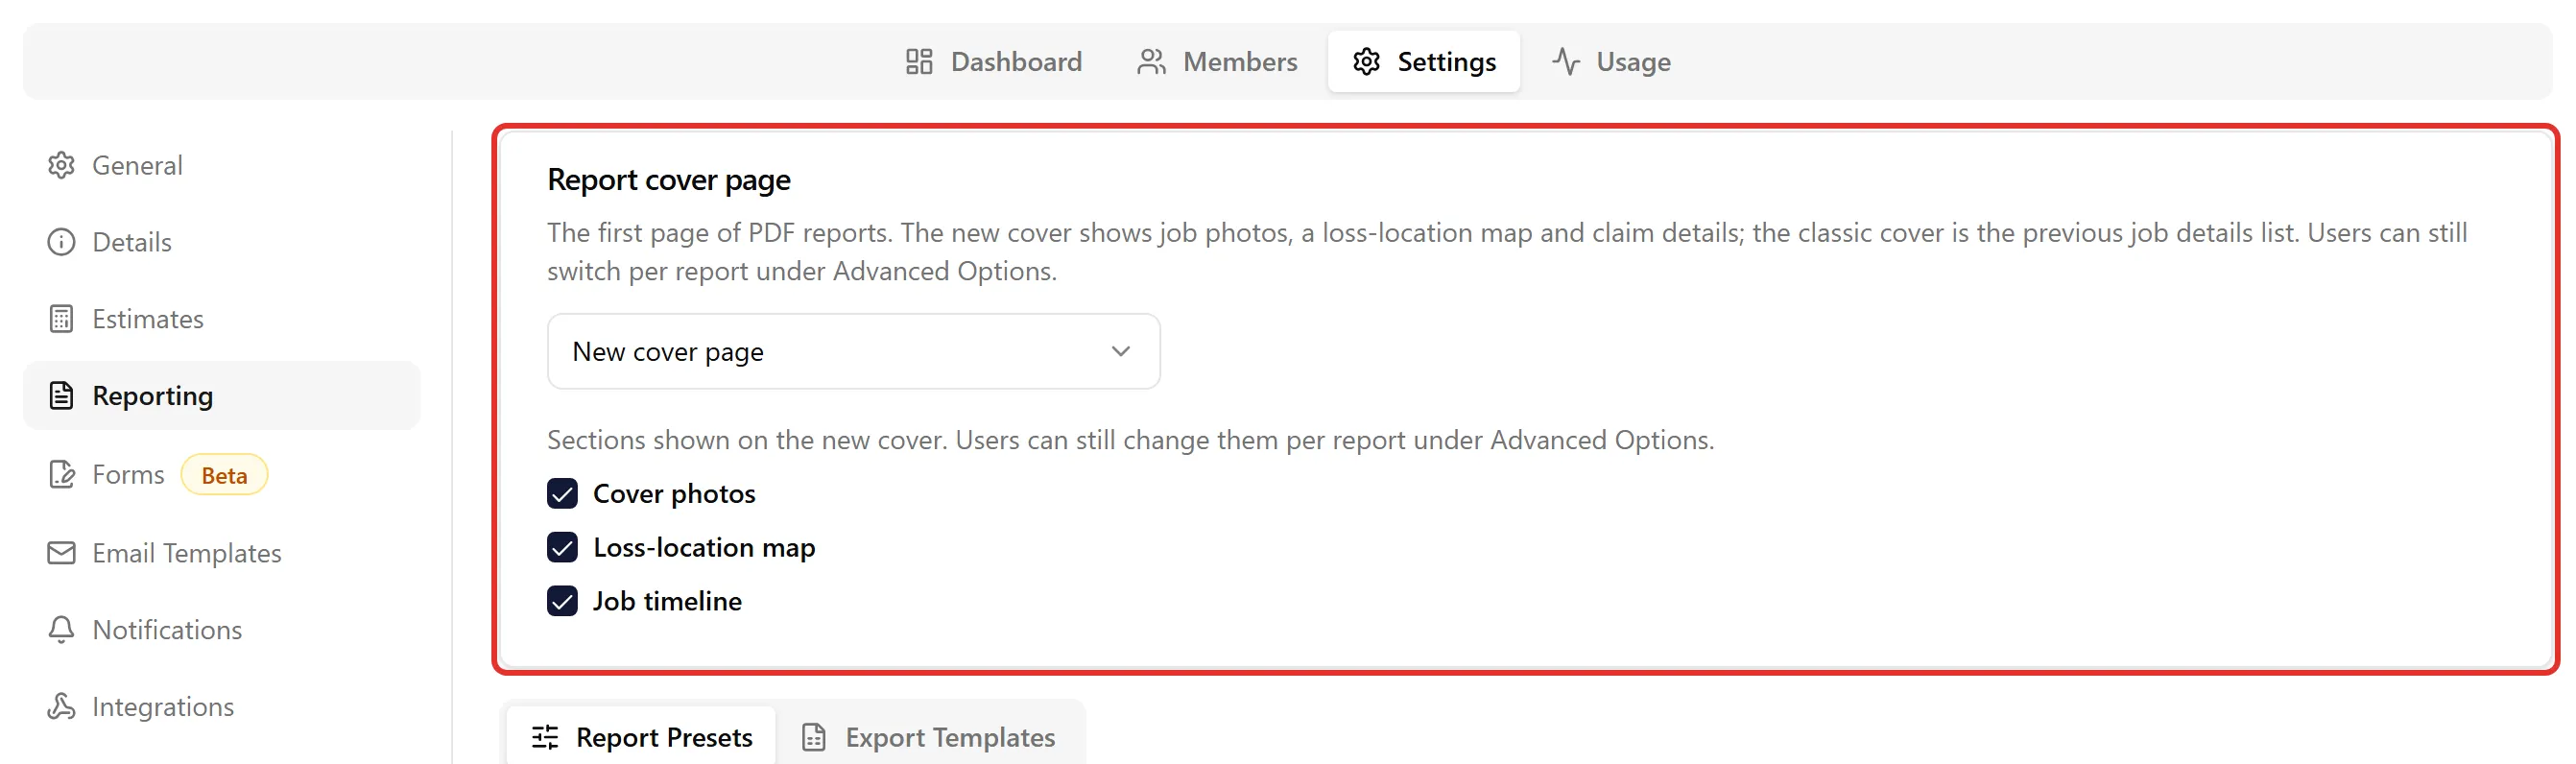
Each change saves as soon as you make it and applies to every report generated afterwards — from the web app, from the mobile app, and reports that are emailed when they’re ready. Reports you already generated don’t change. Anyone generating a report can still pick a different cover or sections for that report.
What “Automatic” means
Section titled “What “Automatic” means”We’re moving organizations to the new cover page in stages. Until your organization picks a cover, the setting reads Automatic, and its label tells you which cover you get today — for example “Automatic (currently the classic cover)”. When your organization’s turn comes, your reports switch to the new cover on their own.
-
Want the new cover now? Choose New cover page.
-
Want to keep the classic cover, even after the switch? Choose Classic cover page.
-
Changed your mind? Choosing Automatic again hands the choice back to ContentsPal.
The cover defaults live in this card, not in Report Presets — customizing a report preset doesn’t change its cover.
Who can change it
Section titled “Who can change it”Only organization owners and admins can open Organization → Settings. Everyone else in the organization gets the cover the organization chose, and can still change it for a report they’re generating.
Where the Photos Come From
Section titled “Where the Photos Come From”The cover uses up to three photos from the job’s Documentation tab — never item photos:
-
The main photo is the job photo you starred, or the first job photo if none is starred.
-
The second photo is a room photo — a starred room photo first, otherwise one that isn’t tagged as exterior.
-
The rest are filled from the job’s other job and room photos.
Photos you’ve hidden from reports (the eye toggle in the bottom-left of the photo) aren’t used, except a starred job photo. Photos have to be sharp and full-size — small, low-resolution photos are skipped. If the job has no suitable photos, the cover leaves the photo section out.
To choose the main photo, hover over a job photo in the Documentation tab and click the star (Star photo) in its top-right corner. A starred room photo is featured on the cover and becomes that room’s thumbnail.
Getting the Best-Looking Cover
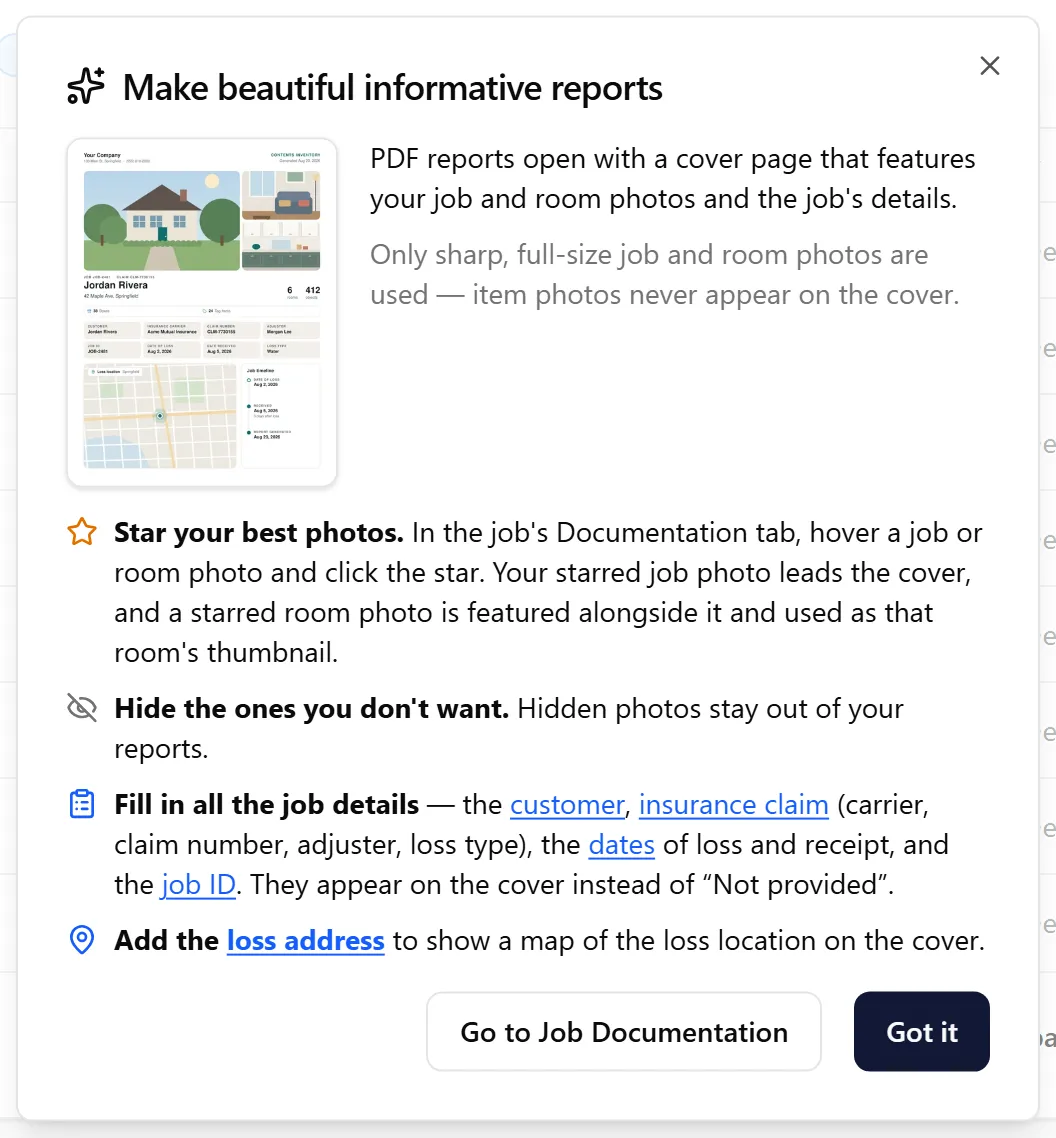
Section titled “Getting the Best-Looking Cover”When your organization uses the new cover, the job’s Reports tab shows a Make beautiful reports button next to Generate Report. It opens a checklist of what the cover uses, with links straight to the job’s settings:
-
Star your best photos in the Documentation tab, and hide the ones you don’t want in reports.
-
Fill in the job details — the customer, the insurance claim (carrier, claim number, adjuster, loss type), the dates of loss and receipt, and the job ID. Empty details show as “Not provided”.
-
Add the loss address in the job’s Location settings. Without it, there’s no map.
-
Set the loss and received dates in the job’s Dates settings to fill in the timeline. Missing dates show as “Not set”. Set Packout and Packback there too to add those steps to the timeline; they’re left off until set.
Troubleshooting
Section titled “Troubleshooting”The cover has no photos
The job has no job or room photos, they’re all hidden from reports, or they’re too small. Add a full-size property photo as a job photo in the Documentation tab and star it. Also check that Cover photos is ticked under Cover page.
The cover has no map
Add the loss address in the job’s Location settings, and check that Loss-location map is ticked under Cover page.
My logo isn’t on the cover
Tick Show organization logo in the report options, and check that your organization has a logo under Organization → Settings → Details.
My reports still use the classic cover
Your organization is set to Classic cover page, or to Automatic while it’s still on the classic cover. An owner or admin can choose New cover page under Organization → Settings → Reporting — or untick Use classic cover page under Cover page for a single report.
I don’t see the Report cover page setting
Only owners and admins can open Organization → Settings. Ask one of them to change it, or change the cover for your own reports under Cover page.
Related Articles
Section titled “Related Articles”-
Reports Overview — how to generate and access reports
-
Customizing Reports for Your Organization — default report options for your team
-
Photo Report — item photos, room by room
-
Job Summary Report — a one-page overview of the job