
Photo Report
Esta página aún no está disponible en tu idioma.
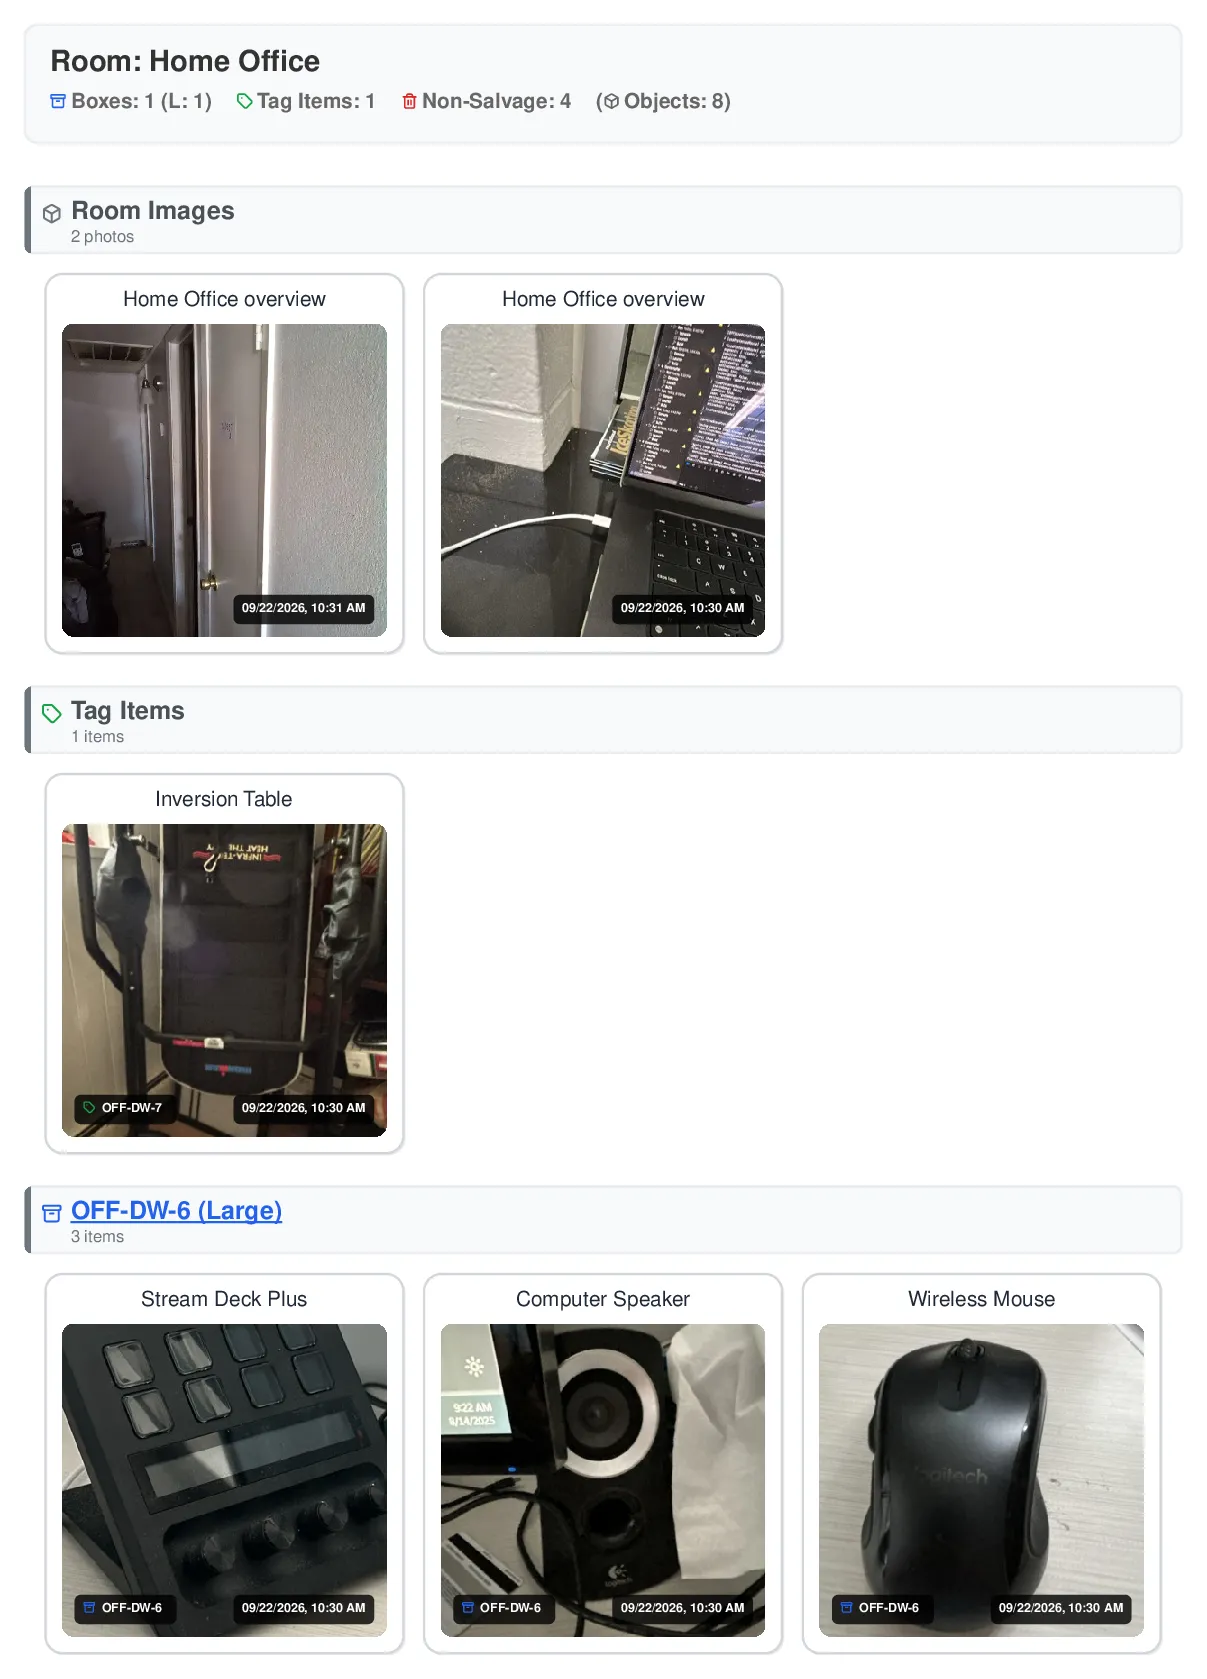
A photo-focused report showing job, room, and item images. Fully customizable to include salvageable and/or non-salvageable items.
What’s Included
Section titled “What’s Included”The Photo Report provides:
-
Item Photos: Large, high-quality images of each inventoried item grouped by room
-
Job & Room Photos: Optional job and room documentation photos
-
Optional Overlays: Quantity, cost, timestamp, and label information
-
Customizable Content: Choose which types of items to include
Sometimes called a “Presentation Report,” this format is ideal for visual documentation of damaged or inventoried items.
Available as: PDF only (photo reports focus on high-quality images)
When to Use This Report
Section titled “When to Use This Report”Best for:
-
Visual presentation of damaged items
-
Sharing with policyholders or adjusters who want to see items
-
Claims documentation with photo evidence
-
Presenting inventory in a visual format
Not ideal for:
-
Detailed data lists (use Salvageable or Custom Inventory Report)
-
Spreadsheet analysis (use Spreadsheet exports)
-
Quick overviews without photos (use Job Summary Report)
How to Generate
Section titled “How to Generate”-
Open your job in the web app
-
Click the Reports tab (top right)
-
Click Generate Report
-
Select Photo Report from the list
-
Customize your options (see below)
-
Click Generate Report
Note: Most photo reports open as soon as they’re ready. Large jobs (1000+ items), or reports split into a separate file per room, are generated in the background and emailed to you when ready.
Customization Options
Section titled “Customization Options”Show Organization Logo
Section titled “Show Organization Logo”Default: Enabled
Adds your organization’s logo to the report.
Show Summary Section
Section titled “Show Summary Section”Default: Enabled
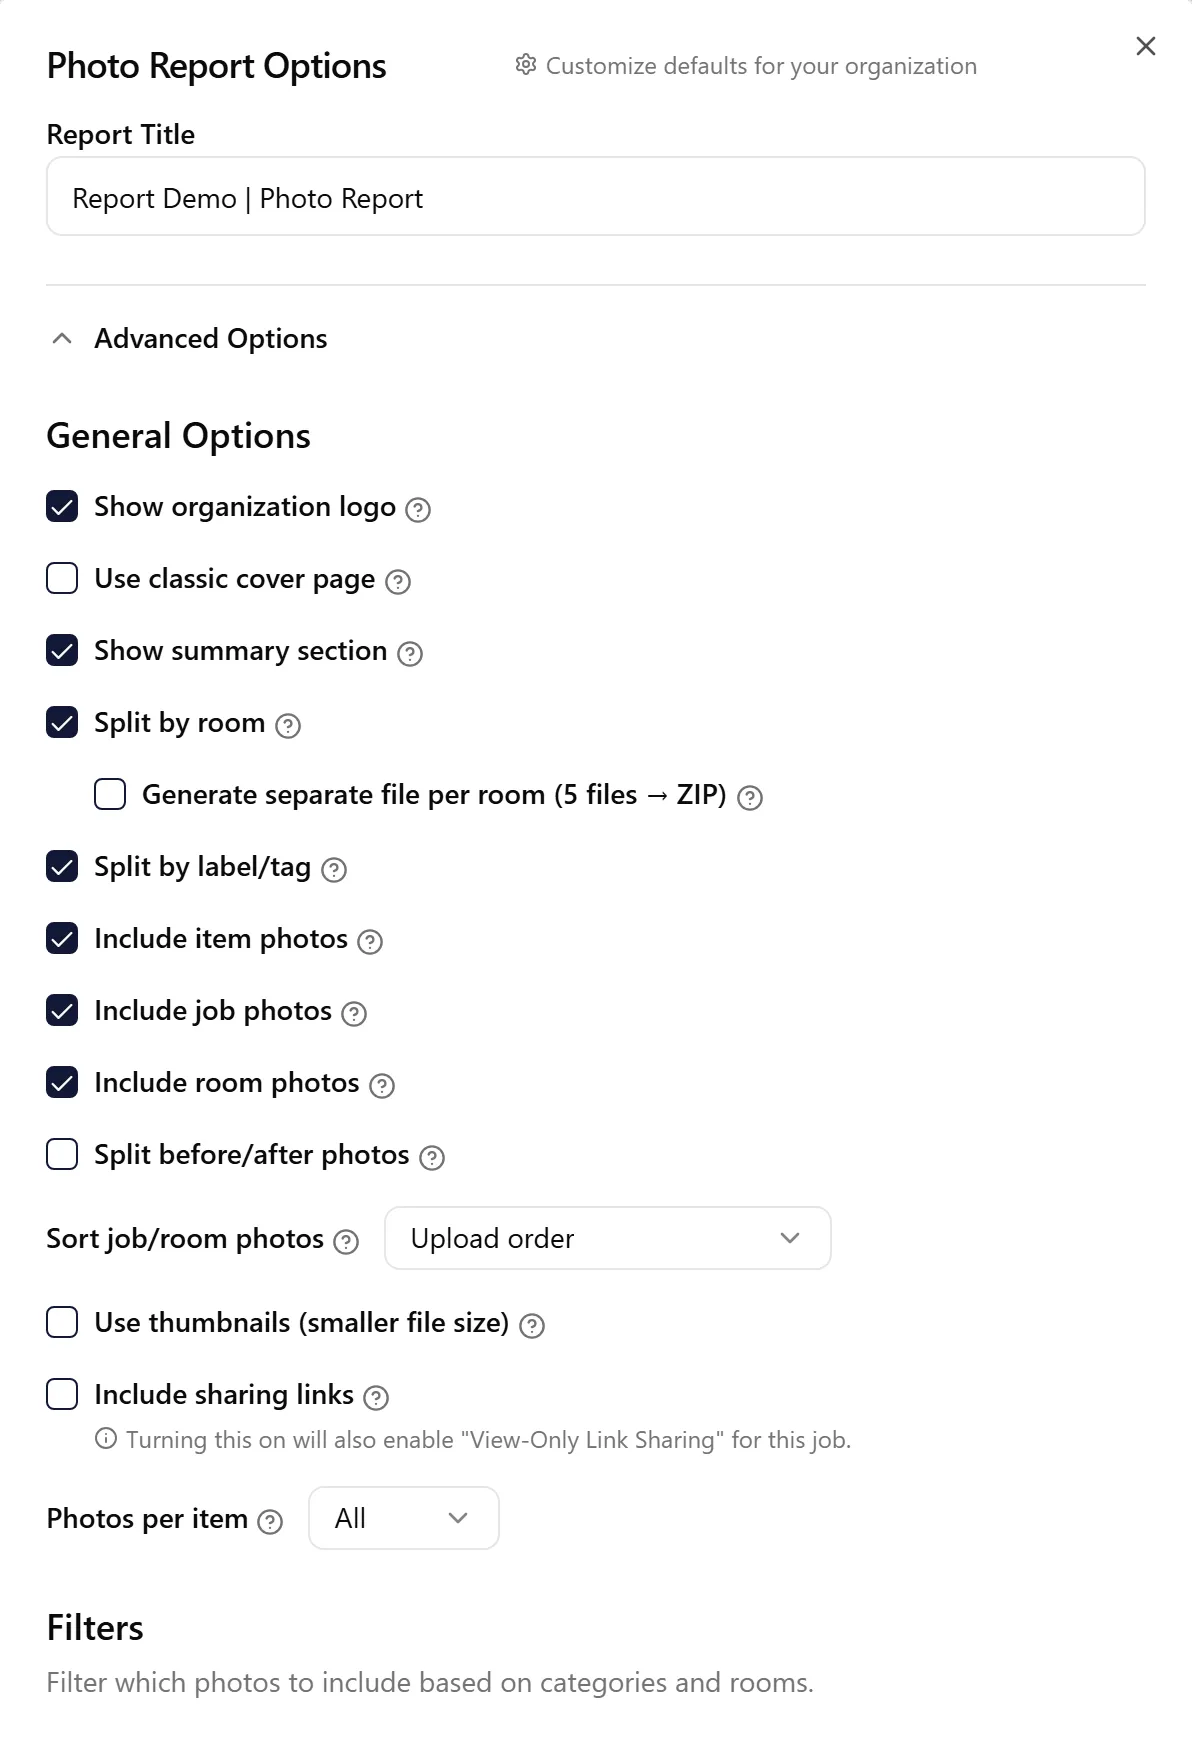
Includes a summary section with total counts and statistics, and the same metrics in each room header when Split by Room is enabled.
Split by Room
Section titled “Split by Room”Default: Enabled
Organizes photos into separate sections for each room. Optional to create a file per room (Generate separate file per room, delivered as a ZIP by email)
Split by Label
Section titled “Split by Label”Default: Enabled
Organizes photos by box or bag labels.
Split by Before and After
Section titled “Split by Before and After”Default: Disabled
Within each job and room photo section, automatically separates photos into Before and After groups based on a gap in capture time — for example, photos taken on a later return visit. Useful for documenting the state of a space before and after work was performed.
Note: This option only appears when Include Job Photos or Include Room Photos is enabled, since it groups job and room documentation photos.
Sort Job/Room Photos
Section titled “Sort Job/Room Photos”Default: Upload order
Sets the order of job and room photos within each group: Upload order, Capture time (newest first), Capture time (oldest first), or Title (A→Z). Appears when job or room photos are included.
Include Item Photos
Section titled “Include Item Photos”Default: Enabled
Shows photos of individual inventory items.
Include Job Photos / Include Room Photos
Section titled “Include Job Photos / Include Room Photos”Default: Both enabled
Two separate toggles to include or exclude job-level and room-level documentation photos.
Use Thumbnails (Smaller File Size)
Section titled “Use Thumbnails (Smaller File Size)”Default: Disabled
Reduces image size to create smaller PDF files:
-
Enabled: Smaller file size (useful for 15MB email limits)
-
Disabled: Full-size, high-quality images
Include Sharing Links
Section titled “Include Sharing Links”Default: On if the job’s view-only link sharing is already turned on
Adds clickable links to the photos in the PDF. Turning this on also turns on view-only link sharing for the job, so only users who can manage the job can enable it.
Photos per Item
Section titled “Photos per Item”Default: All
Limits how many photos are shown for each item (All, 1, 3, or 6). Appears when Include Item Photos is enabled.
Item Filters
Section titled “Item Filters”Default: All items with photos included
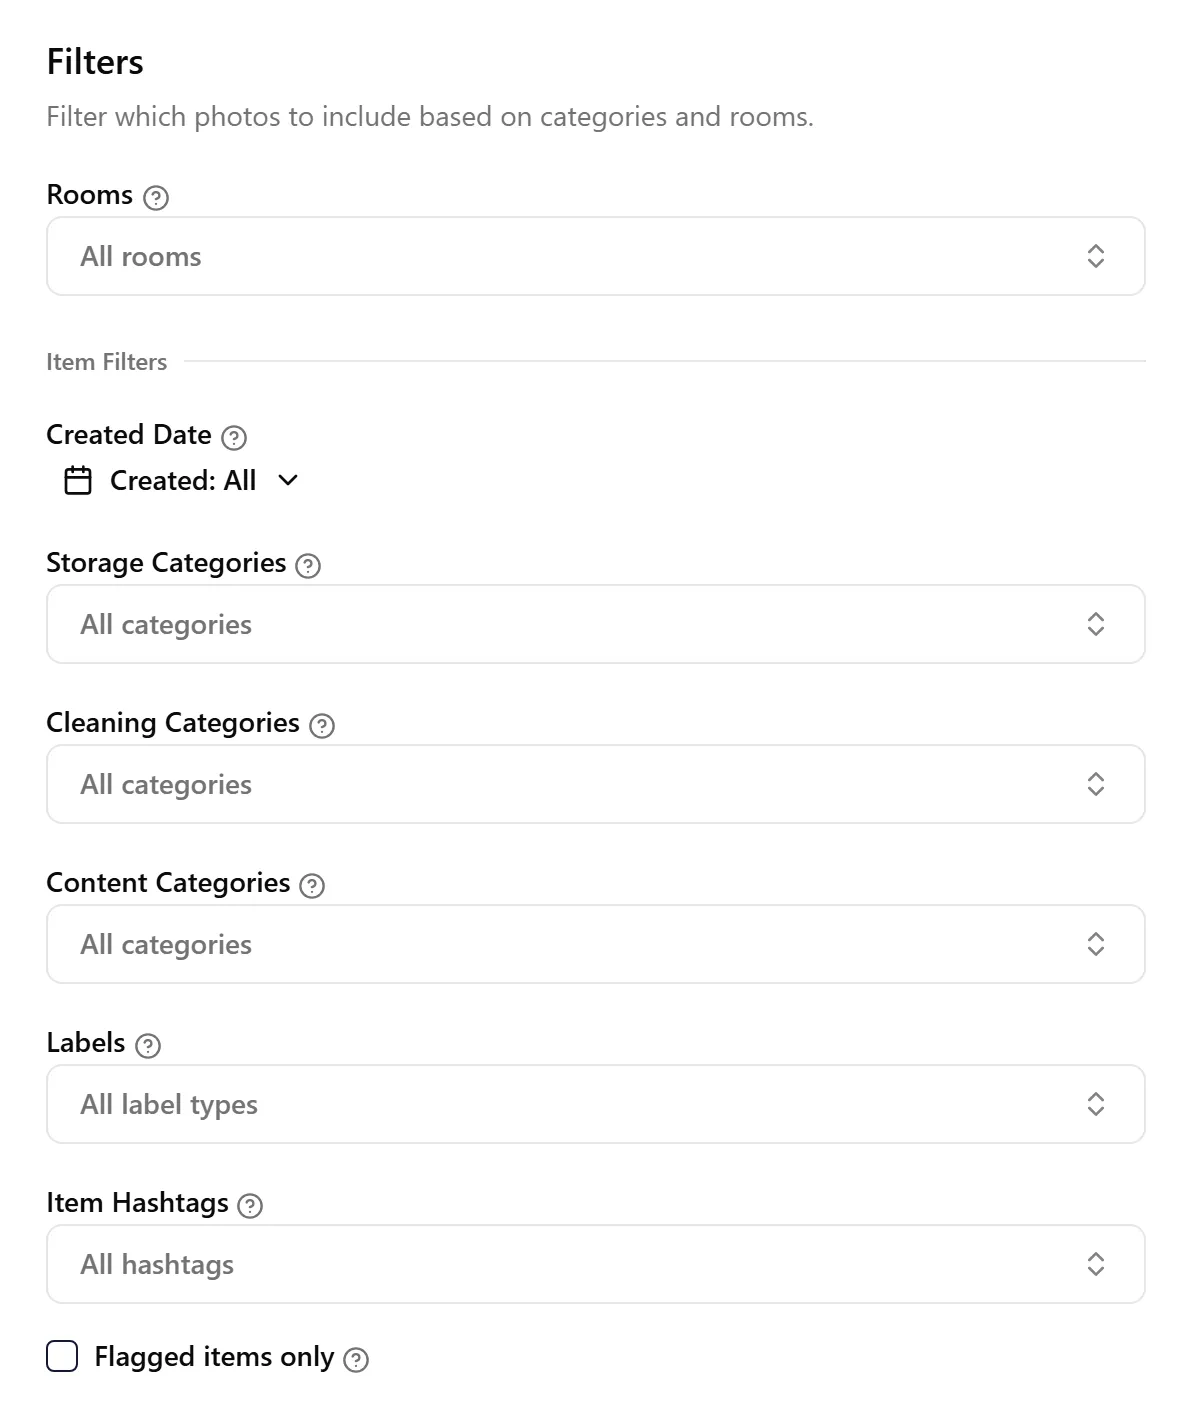
Use filters to include only specific items in the report. Leave filters empty to include all items with photos.
Available filters:
-
Rooms: Filter by specific rooms. Select “No Room” to include unassigned items. This filter also applies to room documentation photos
-
Created Date: Include only items created within a date range
-
Storage Categories: Filter by where items are stored (Storage, Left On Site, Third Party, Non-Salvage, Other)
-
Cleaning Categories: Filter by cleaning requirements (As Is, Needs Cleaning, Biohazard, Unknown)
-
Content Categories: Filter by content type (e.g., Electronics, Kitchenware)
-
Labels: Filter by label type (Box, Tag, Textile, Garment Bag, Non-Salvageable, Other, or No Label)
-
Item Hashtags: Include only items with specific hashtags
-
Flagged items only: Include only items flagged for review
When you select multiple options in a filter, the report includes items matching any of those selections.
Job & Room Photo Filters
Section titled “Job & Room Photo Filters”Default: All documentation photos included
Use filters to control which job and room photos appear in the report.
Available filters:
-
Include Job Photos / Include Room Photos: The toggles above turn job-level and room-level photos on or off
-
Rooms: The shared Rooms filter also limits room photos to the selected rooms
-
Photo Hashtags: Filter by photo hashtags (e.g., “Exterior”, “Source-of-Loss”, “Equipment”)
Hidden photos: Any job or room photo you’ve marked as hidden (using the eye toggle in the bottom-left of the photo in the job’s Documentation tab) is automatically left out of this report, regardless of the filters above. The photo still appears in the job — it’s only excluded from reports.
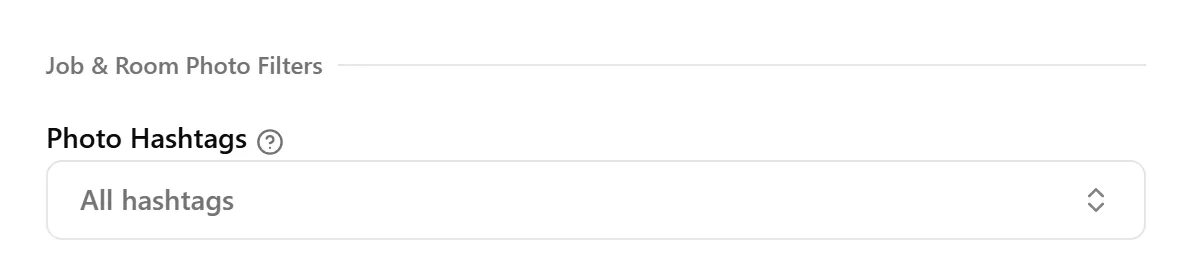
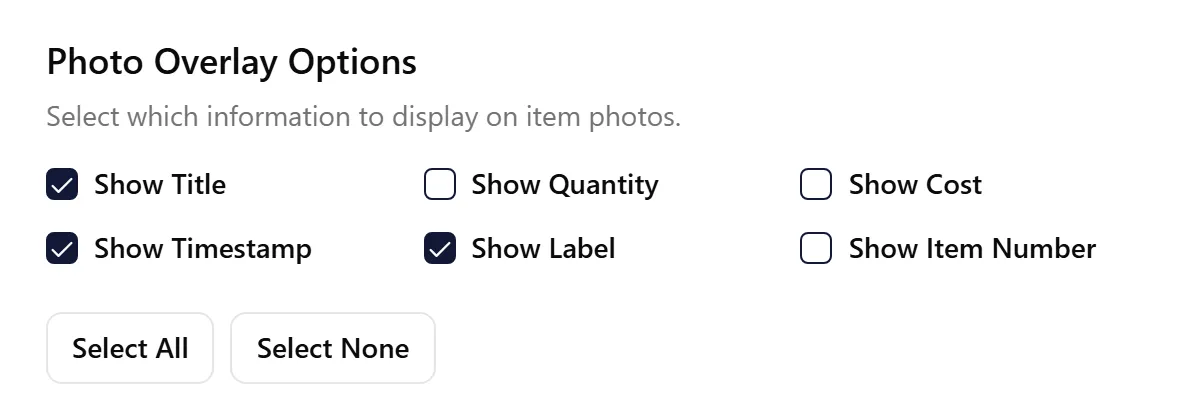
Photo Information Overlays
Section titled “Photo Information Overlays”Toggle what information appears on each photo:
-
Show Title: Display the item name (on by default)
-
Show Quantity: Display item quantity
-
Show Cost: Display replacement cost
-
Show Timestamp: Display when photo was taken (on by default)
-
Show Label: Display box or tag label (on by default)
-
Show Item Number: Display the item number before the item name
All overlays are optional and can be enabled/disabled independently.
Item Details
Section titled “Item Details”Default: All disabled
Prints item information as text under the item name, above its photo, rather than on top of the image. Use this when the photo alone doesn’t tell the whole story — for example, recording why an item was marked non-salvageable so an adjuster can see the reason next to the picture.
Available fields:
-
Description
-
Brand
-
Model
-
Condition
-
Comments
Each selected field is printed as a labelled line beneath the item name. Fields with no value on a given item are simply left out, and long text is trimmed to fit the card, so keep comments brief and to the point.
When an item has several photos, they are grouped together in one bordered block and the details appear once beneath the item name — not repeated under every photo. If an item has enough photos to span more than one block, the details appear on the first one.
This section only applies to item photos and appears when Include Item Photos is enabled. Job and room documentation photos are not affected.
Tip: Combine this with a Storage Categories filter set to Non-Salvage to produce a photo report of only non-salvageable items, each with the comment explaining why.
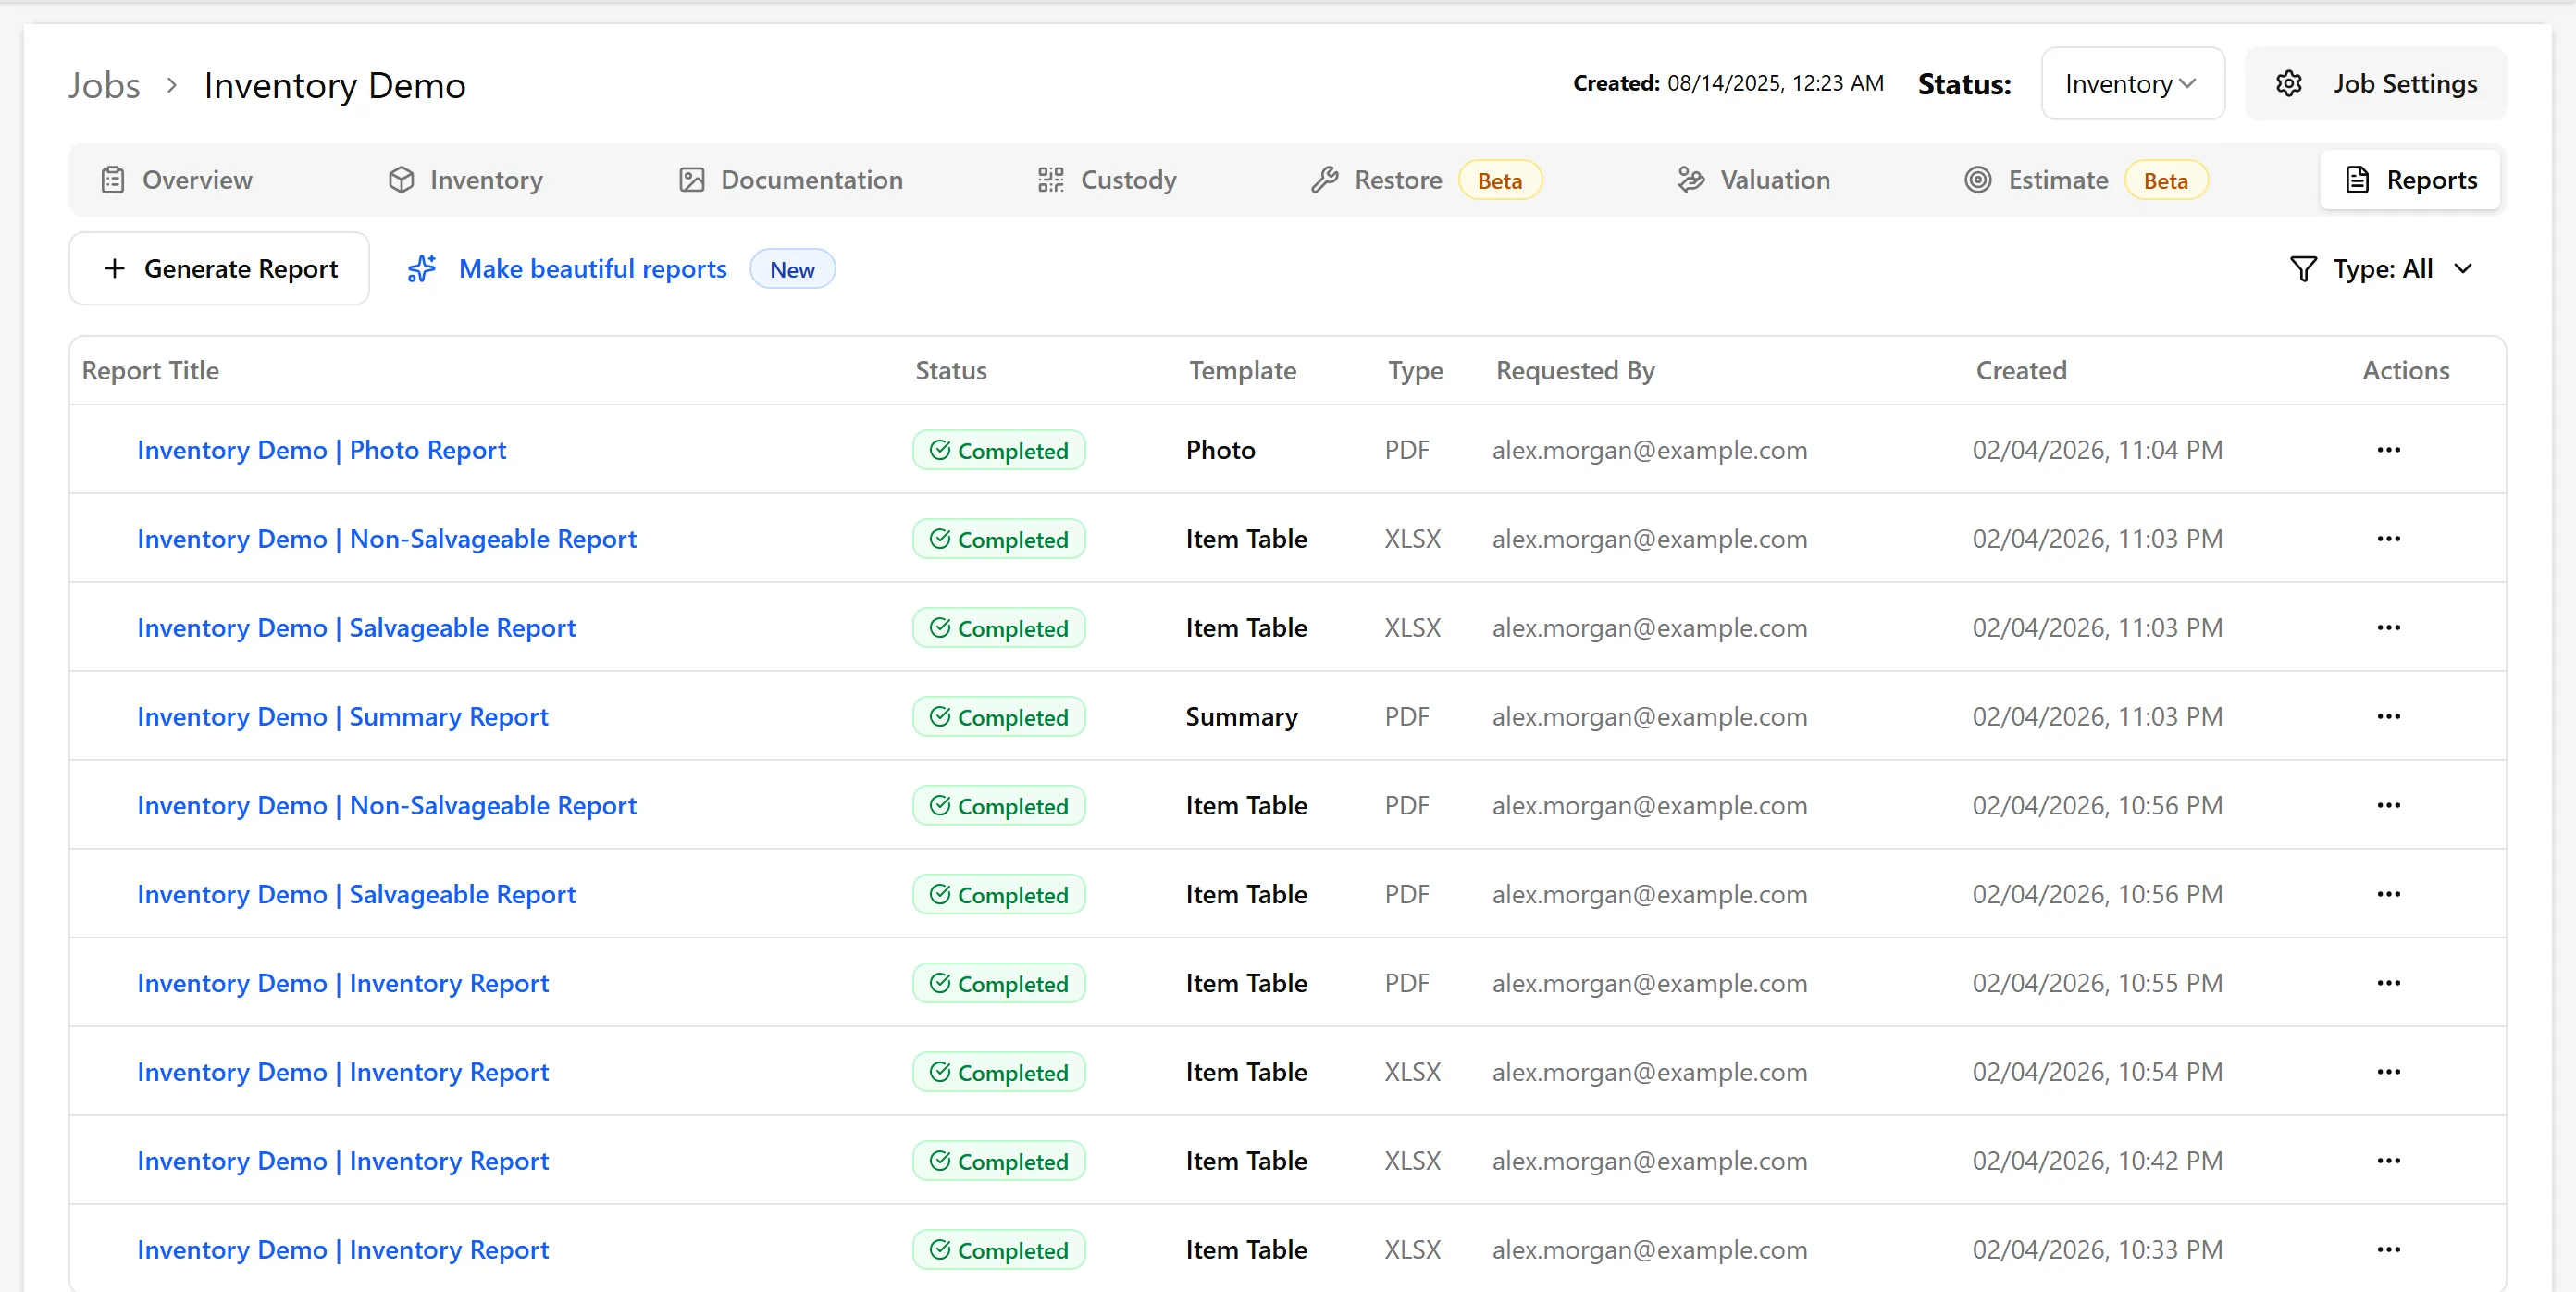
Viewing Report History
Section titled “Viewing Report History”All generated photo reports are stored in the Reports tab where you can:
-
Download reports again anytime
-
See generation status
-
Track when reports were created
-
Use thumbnails if you need to email the report and stay under size limits
-
Split by room for large jobs to make navigation easier
-
Include timestamps for documentation and claim timeline purposes
-
Turn on the Comments item detail when an adjuster needs the reason an item was marked non-salvageable
-
Star a property photo in the job’s Documentation tab to use it on the report’s cover page — see Report Cover Page for how the cover picks its photos
Troubleshooting
Section titled “Troubleshooting”Report file size is too large
-
Enable “Use Thumbnails” option
-
Use filters to include fewer items, or lower Photos per Item
-
Split by room with separate files to generate multiple smaller reports
-
Exclude non-salvageable items if not needed
Photos are poor quality
-
Avoid using “Use Thumbnails” unless necessary
-
Check original photo quality in the job
-
Ensure photos were uploaded at sufficient resolution
Missing photos in the report
-
Verify items have photos attached
-
Check if filters are excluding items
-
Ensure “Include Item Photos” is enabled
-
Check whether the photo was hidden from reports (eye-off icon, bottom-left of the photo) in the Documentation tab
Photos aren’t in the order I took them
-
Job photos come first, then each room in alphabetical order by name, with unassigned items last. Numbers in room names sort as numbers (“Bedroom 2” before “Bedroom 10”), so to follow your walkthrough you can start each room name with a number (for example “1 Exterior”, “2 Entry”, “3 Kitchen”). There’s no setting to reorder rooms in the report.
-
Job and room photos follow Sort Job/Room Photos — choose Capture time (oldest first) to show them in the order they were taken.
-
Item photos are in item-number order, which is normally the order the items were added. With Split by Label on, they’re grouped by label first: tagged items, then each box, textiles, non-salvageable items, and other items.
-
For one continuous run of items across the whole job, turn off Split by Room and Split by Label. Job and room photos still come before the items.
Email hasn’t arrived
-
Check spam/junk folder
-
Wait up to 10-15 minutes for large reports
-
Check Reports tab - download directly if marked as completed
Related Articles
Section titled “Related Articles”-
Job & Room Photo Report - Documentation photos only
-
Salvageable Report - Detailed item lists
-
Job Summary Report - Quick overviews