
Warehousing with ContentsPal
ContentsPal tracks where every box, tag and pallet is stored, from the truck to the cleaning room to a vault, so you always know what’s where, for which job, and since when.
🧭 What Warehousing Means in ContentsPal
Section titled “🧭 What Warehousing Means in ContentsPal”Every place contents sit is a location: a vault, a rack, a truck, the cleaning room. When your crew scans a label into a location, ContentsPal records where it went and when. Over a job, those scans add up to a dated chain of custody for every label, and a live picture of what’s in your warehouse right now.
🧱 The Building Blocks
Section titled “🧱 The Building Blocks”-
Site: a physical facility, such as a warehouse or a contents yard. Create one site per building.
-
Location: a place inside a site where contents are stored or processed. Each location has a Type (Vault, Rack, Pallet, Rail, Bin, Vehicle, Cleaning, or Other) that tells your team what it is.
-
Coordinates (optional): an aisle, bay and level that put a location on the site’s floor map. Useful for vaults that get moved around the floor.
-
Labels: the boxes, tags and grouping labels (such as pallets) your crew creates during packout. Items follow their label, and grouped labels move together, so you move labels, not individual items.
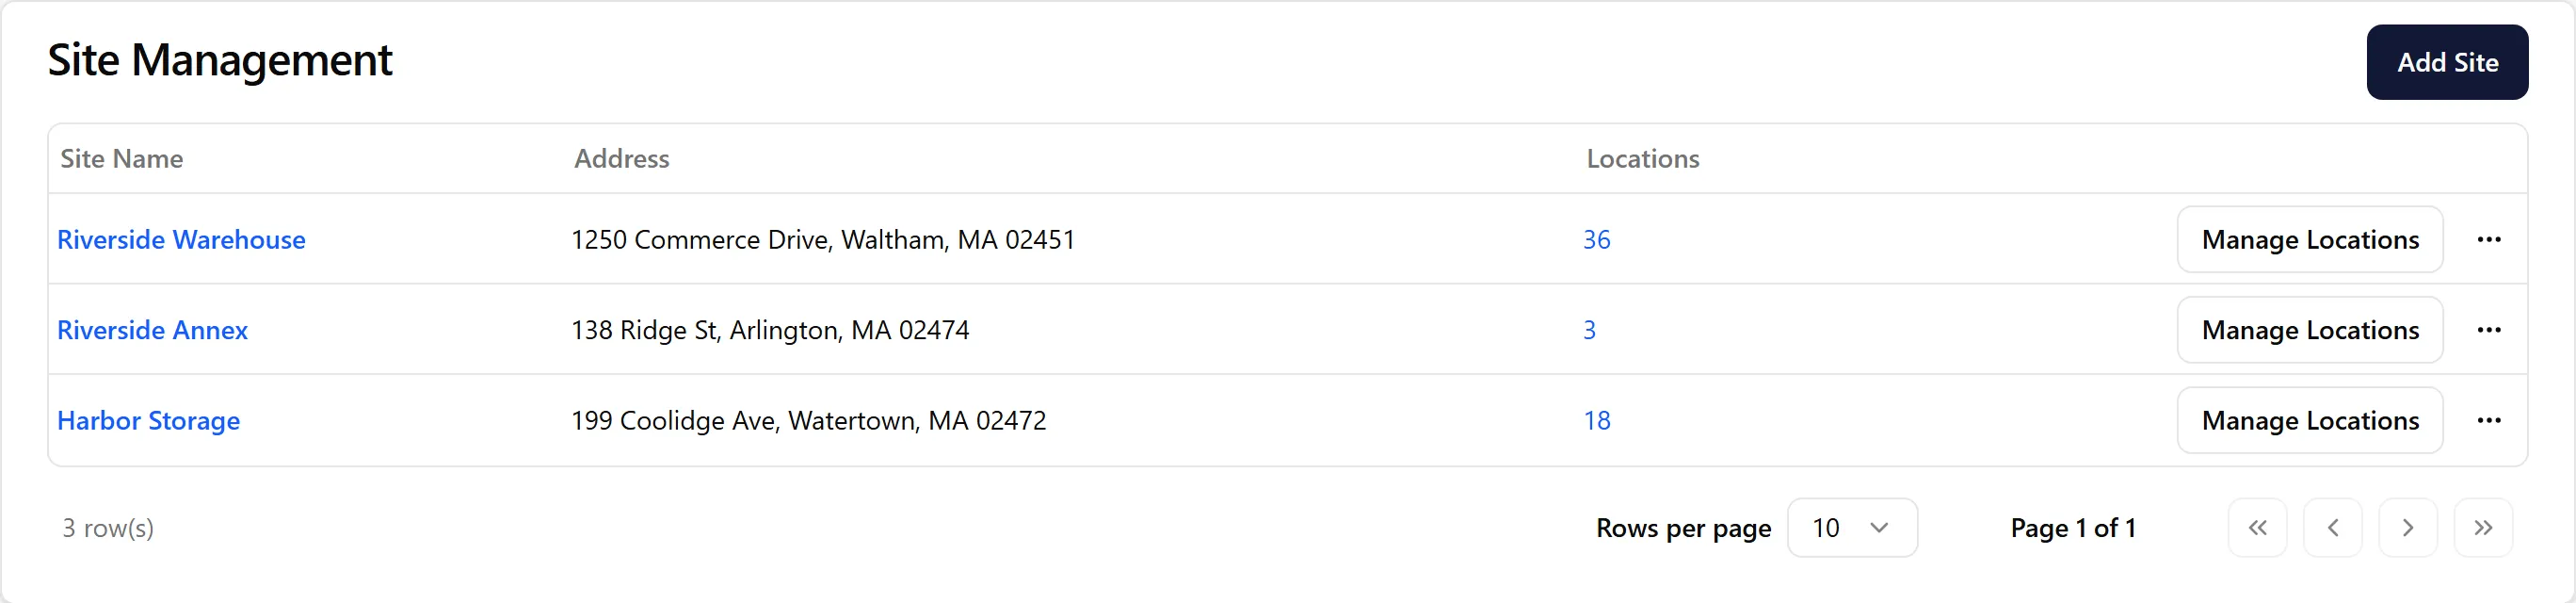
All of your sites are on the Sites page in the web app.
🎁 What You Get
Section titled “🎁 What You Get”-
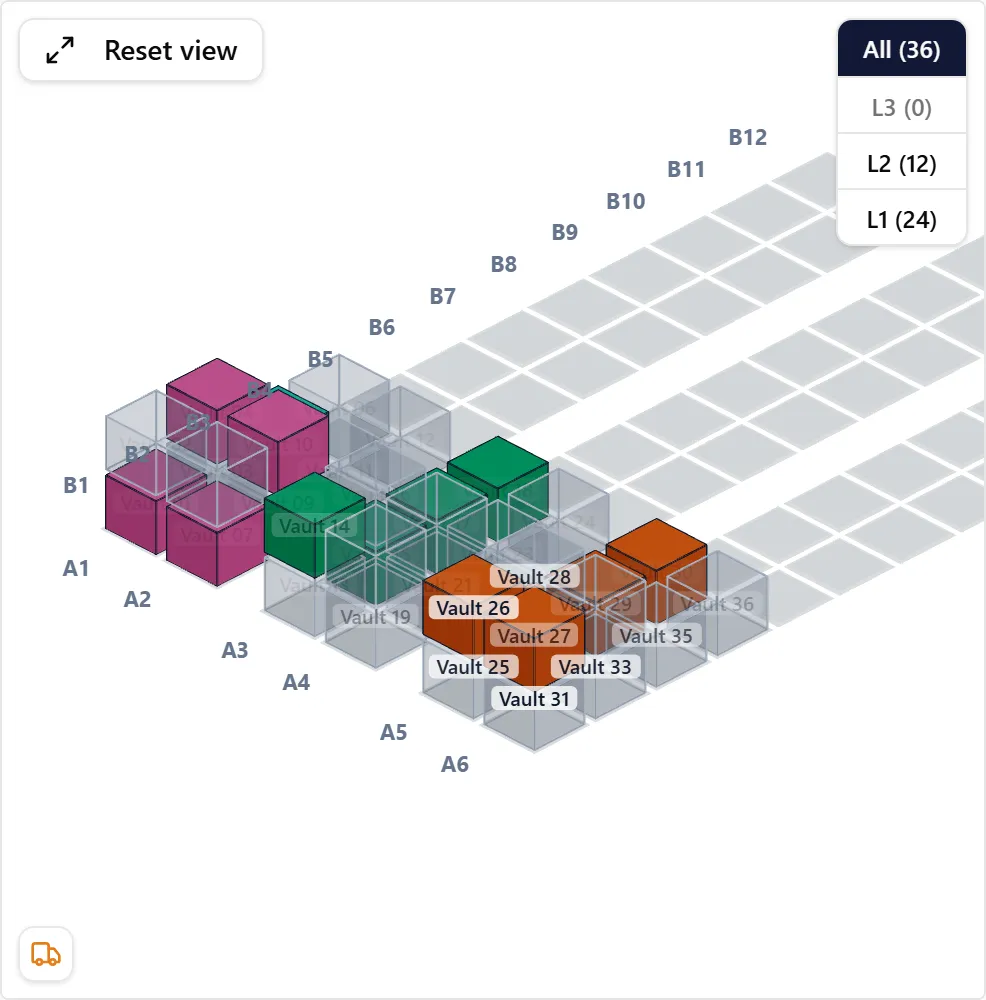
A live floor map of each site, in 2D, 2.5D or 3D, showing which locations are in use and by which job.
-
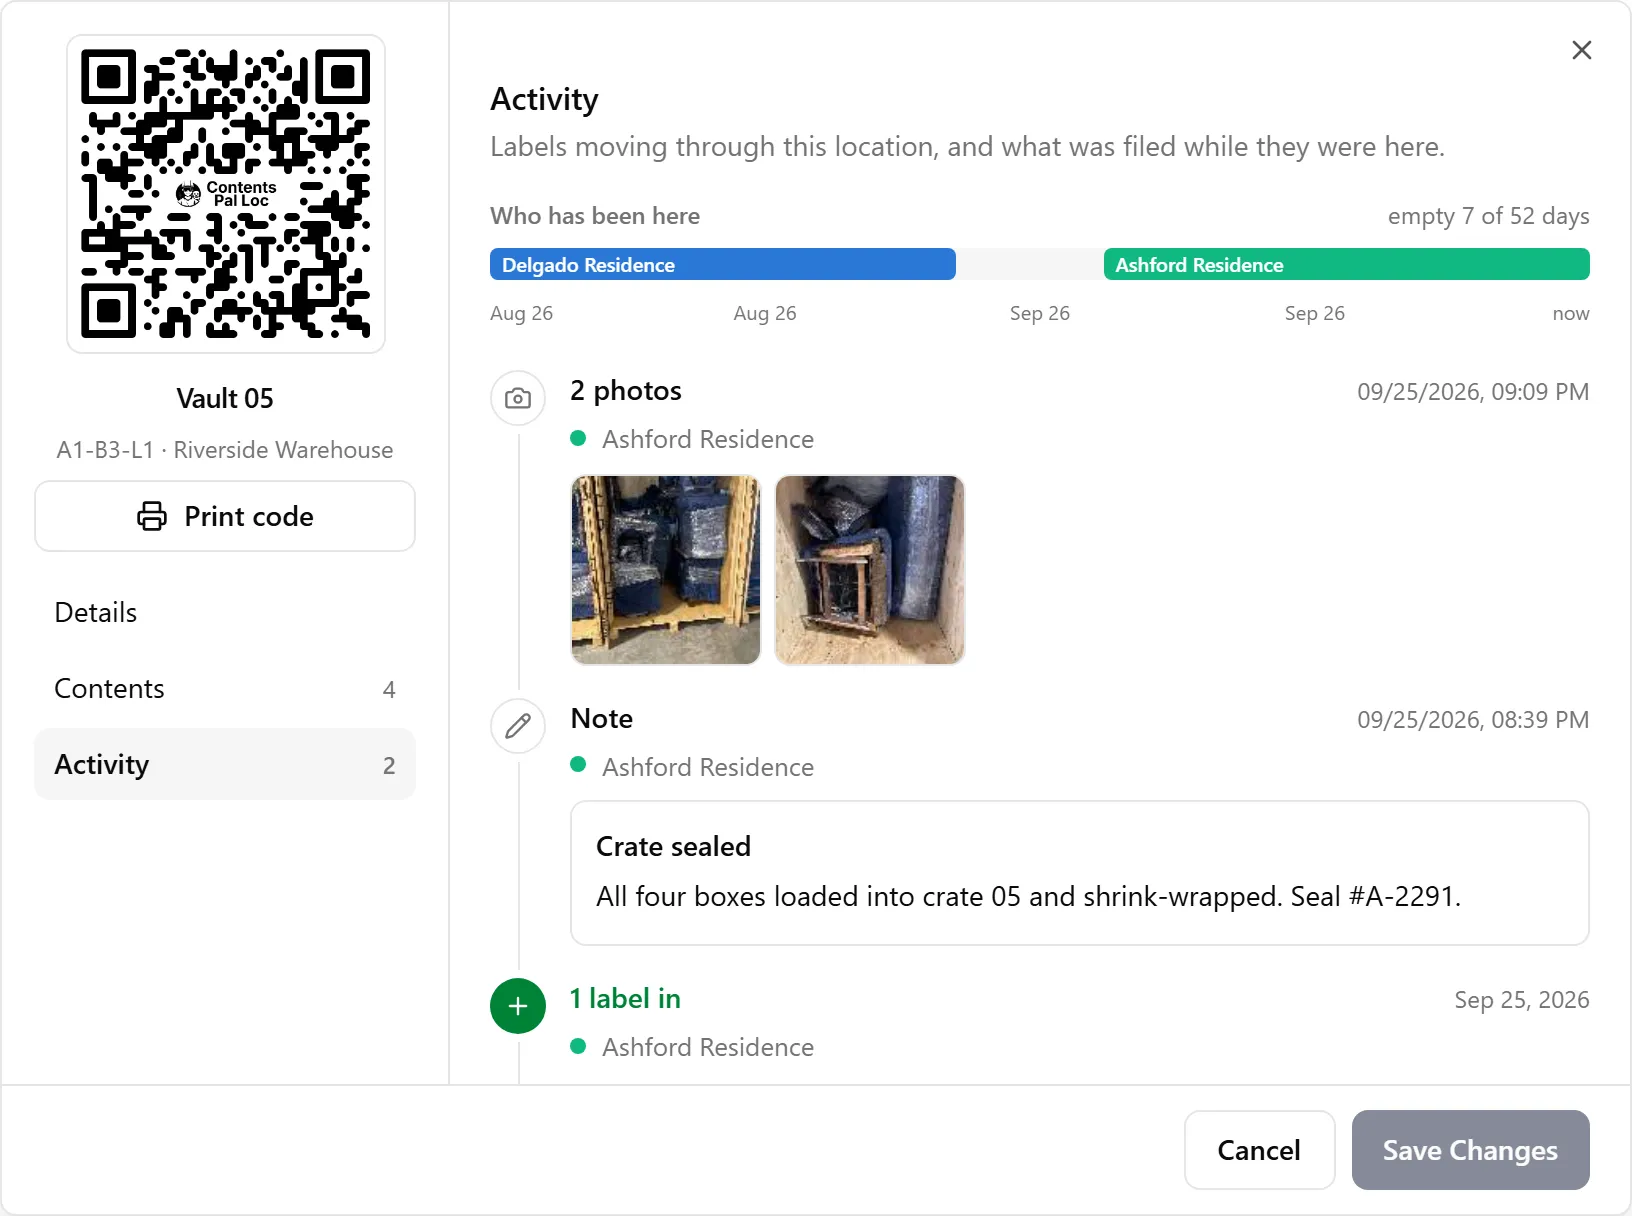
Contents and activity for every location: what’s stored there now, and which jobs and labels have been there over time.
-
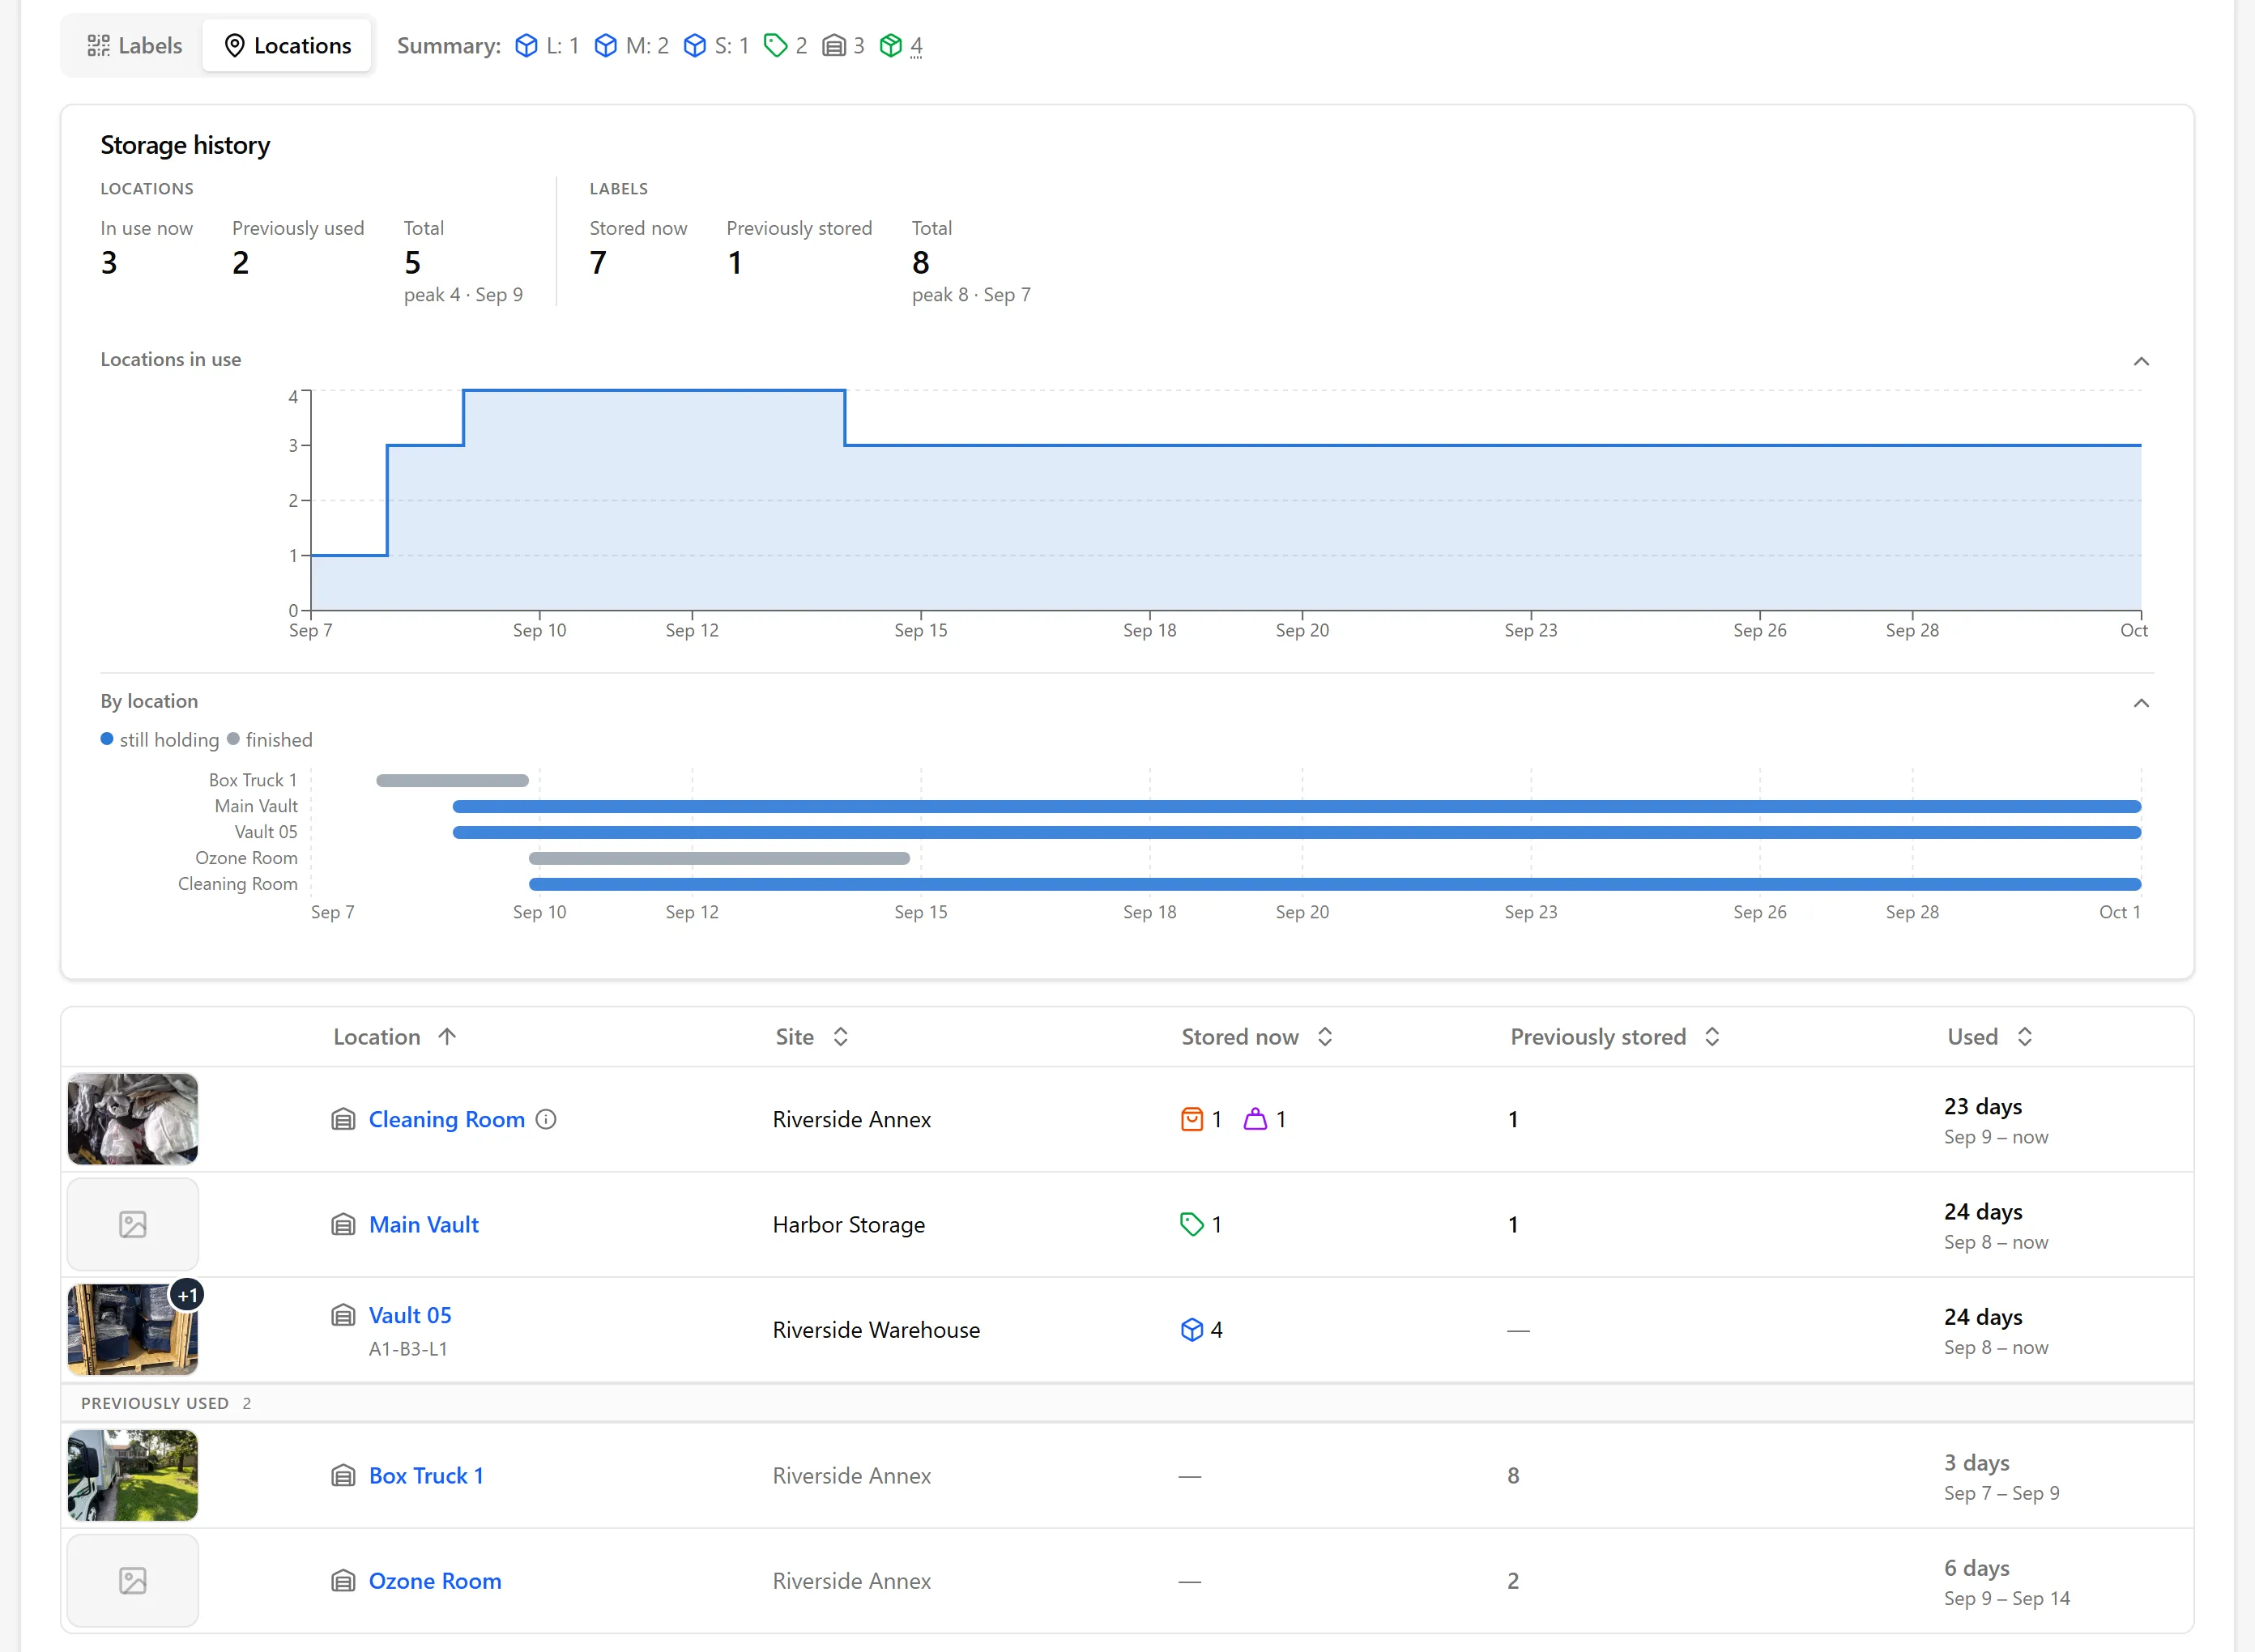
A storage history for every job on its Custody tab: every location the job has used, and when.
-
Location photos and notes your team adds for each job.
-
Locations that set a status: a location can set a status on what’s scanned into it. For example, a cleaning room can mark contents Needs Cleaning.
-
Vault Summary sheets: a printable cover page for each vault, with a QR code and the vault’s contents, to post on the vault.
👥 Who Does What, Where
Section titled “👥 Who Does What, Where”| Task | Web app | Mobile app |
|---|---|---|
| Create and delete sites and locations | ✅ | ❌ |
| Set up the grid and print location QR codes | ✅ | ❌ |
| Import or export locations from a spreadsheet | ✅ | ❌ |
| See a site’s floor map | ✅ | ✅ (Warehouse mode) |
| Scan labels into and out of locations | ❌ | ✅ |
| Set a label’s location from the job’s Custody tab | ✅ | ✅ |
| Move a vault to a new spot | ✅ | ✅ (Warehouse mode) |
| Edit a location’s coordinates or site | ✅ | ✅ |
| Add location photos and notes | ✅ | ✅ |
| See a job’s storage history | ✅ | ✅ |
| Print Vault Summary sheets | ✅ | ❌ |
In practice, managers set things up and keep an eye on the floor from the web app, and the crew works the floor with the mobile app. Warehouse mode turns the mobile app into a warehouse tool: scan a vault to see what’s inside, scan labels in and out, and view the site as a 2D or 3D grid.
Permissions: any member of your organization can create, edit and delete sites and locations, not just admins. Warehouse mode is a personal setting on each device; admins can lock the app mode from the web app so members can’t switch it.
🏁 Your Starting Point
Section titled “🏁 Your Starting Point”New restoration organizations start with a site called Main Warehouse that has one location, Vault 1. Rename it to match your building and add your own locations, or click Add Site on the Sites page to set up a new site step by step (site, locations, layout, labels).
Deleting a location is permanent, and a deleted site can’t be restored from the app. Contact support if you delete one by mistake.
🔄 A Typical Flow
Section titled “🔄 A Typical Flow”-
Set up your site and its locations in the web app, then print the location QR codes and post them on the vaults, racks and rooms.
-
Pack out at the customer’s home. Items go into boxes, tags and pallets, each with its own label.
-
Scan labels into the truck, then into the cleaning room or straight into a vault. Each scan records where the label is and when, and a cleaning room can set the contents to Needs Cleaning.
-
Rearrange the floor in Warehouse mode: scan a vault, then scan the code at its new spot, and the floor map updates for everyone.
-
Print a Vault Summary for each vault and post it on the vault, so anyone can scan it to see what’s inside.
-
Pack back: scan the labels out of storage and mark them Delivered.
➡️ Where to Go Next
Section titled “➡️ Where to Go Next”-
Setup Locations: create sites, locations and coordinates.
-
Grid Editor: draw your floor plan, walkways and levels.
-
Managing Your Site’s Locations: the site page — table, filters, 2D/3D grid and batch actions.
-
Location Details: Contents, Activity and Settings: what a location holds and who has used it.
-
Import and Export Locations: bring in a list of locations or export them to a spreadsheet.
-
How to Print Labels: print labels for boxes and tags.
-
Managing Custody Labels and Grouping Custody Labels: work with boxes, tags and pallets.
-
Warehouse Mode: run the floor from the mobile app.
-
Moving Labels Between Locations (Mobile) and Update an Item’s Status and Location During Cleaning: scan labels between locations.
-
Custody Locations Tab: see where a job is stored.
-
Location (Vault) Photos: add photos of a location.
-
Vault Summary Report: print a sheet for each vault.