
Managing Your Site's Locations
Open a site from Sites to see every location in it: what each one holds, for which job, and where it sits on the grid. From there you can add, move, retype, print and delete locations.
🧭 Opening a Site
Section titled “🧭 Opening a Site”-
In the web app, click Sites in the side menu.
-
On the Site Management page, click Manage Locations next to a site (or click its name or its number of locations).
The site’s page opens. Click Site Management at the top to go back to the list of sites.
New to sites and locations? Start with Warehousing with ContentsPal for the big picture, and Setup Locations to create your first site.
🧱 The Top of the Page
Section titled “🧱 The Top of the Page”
-
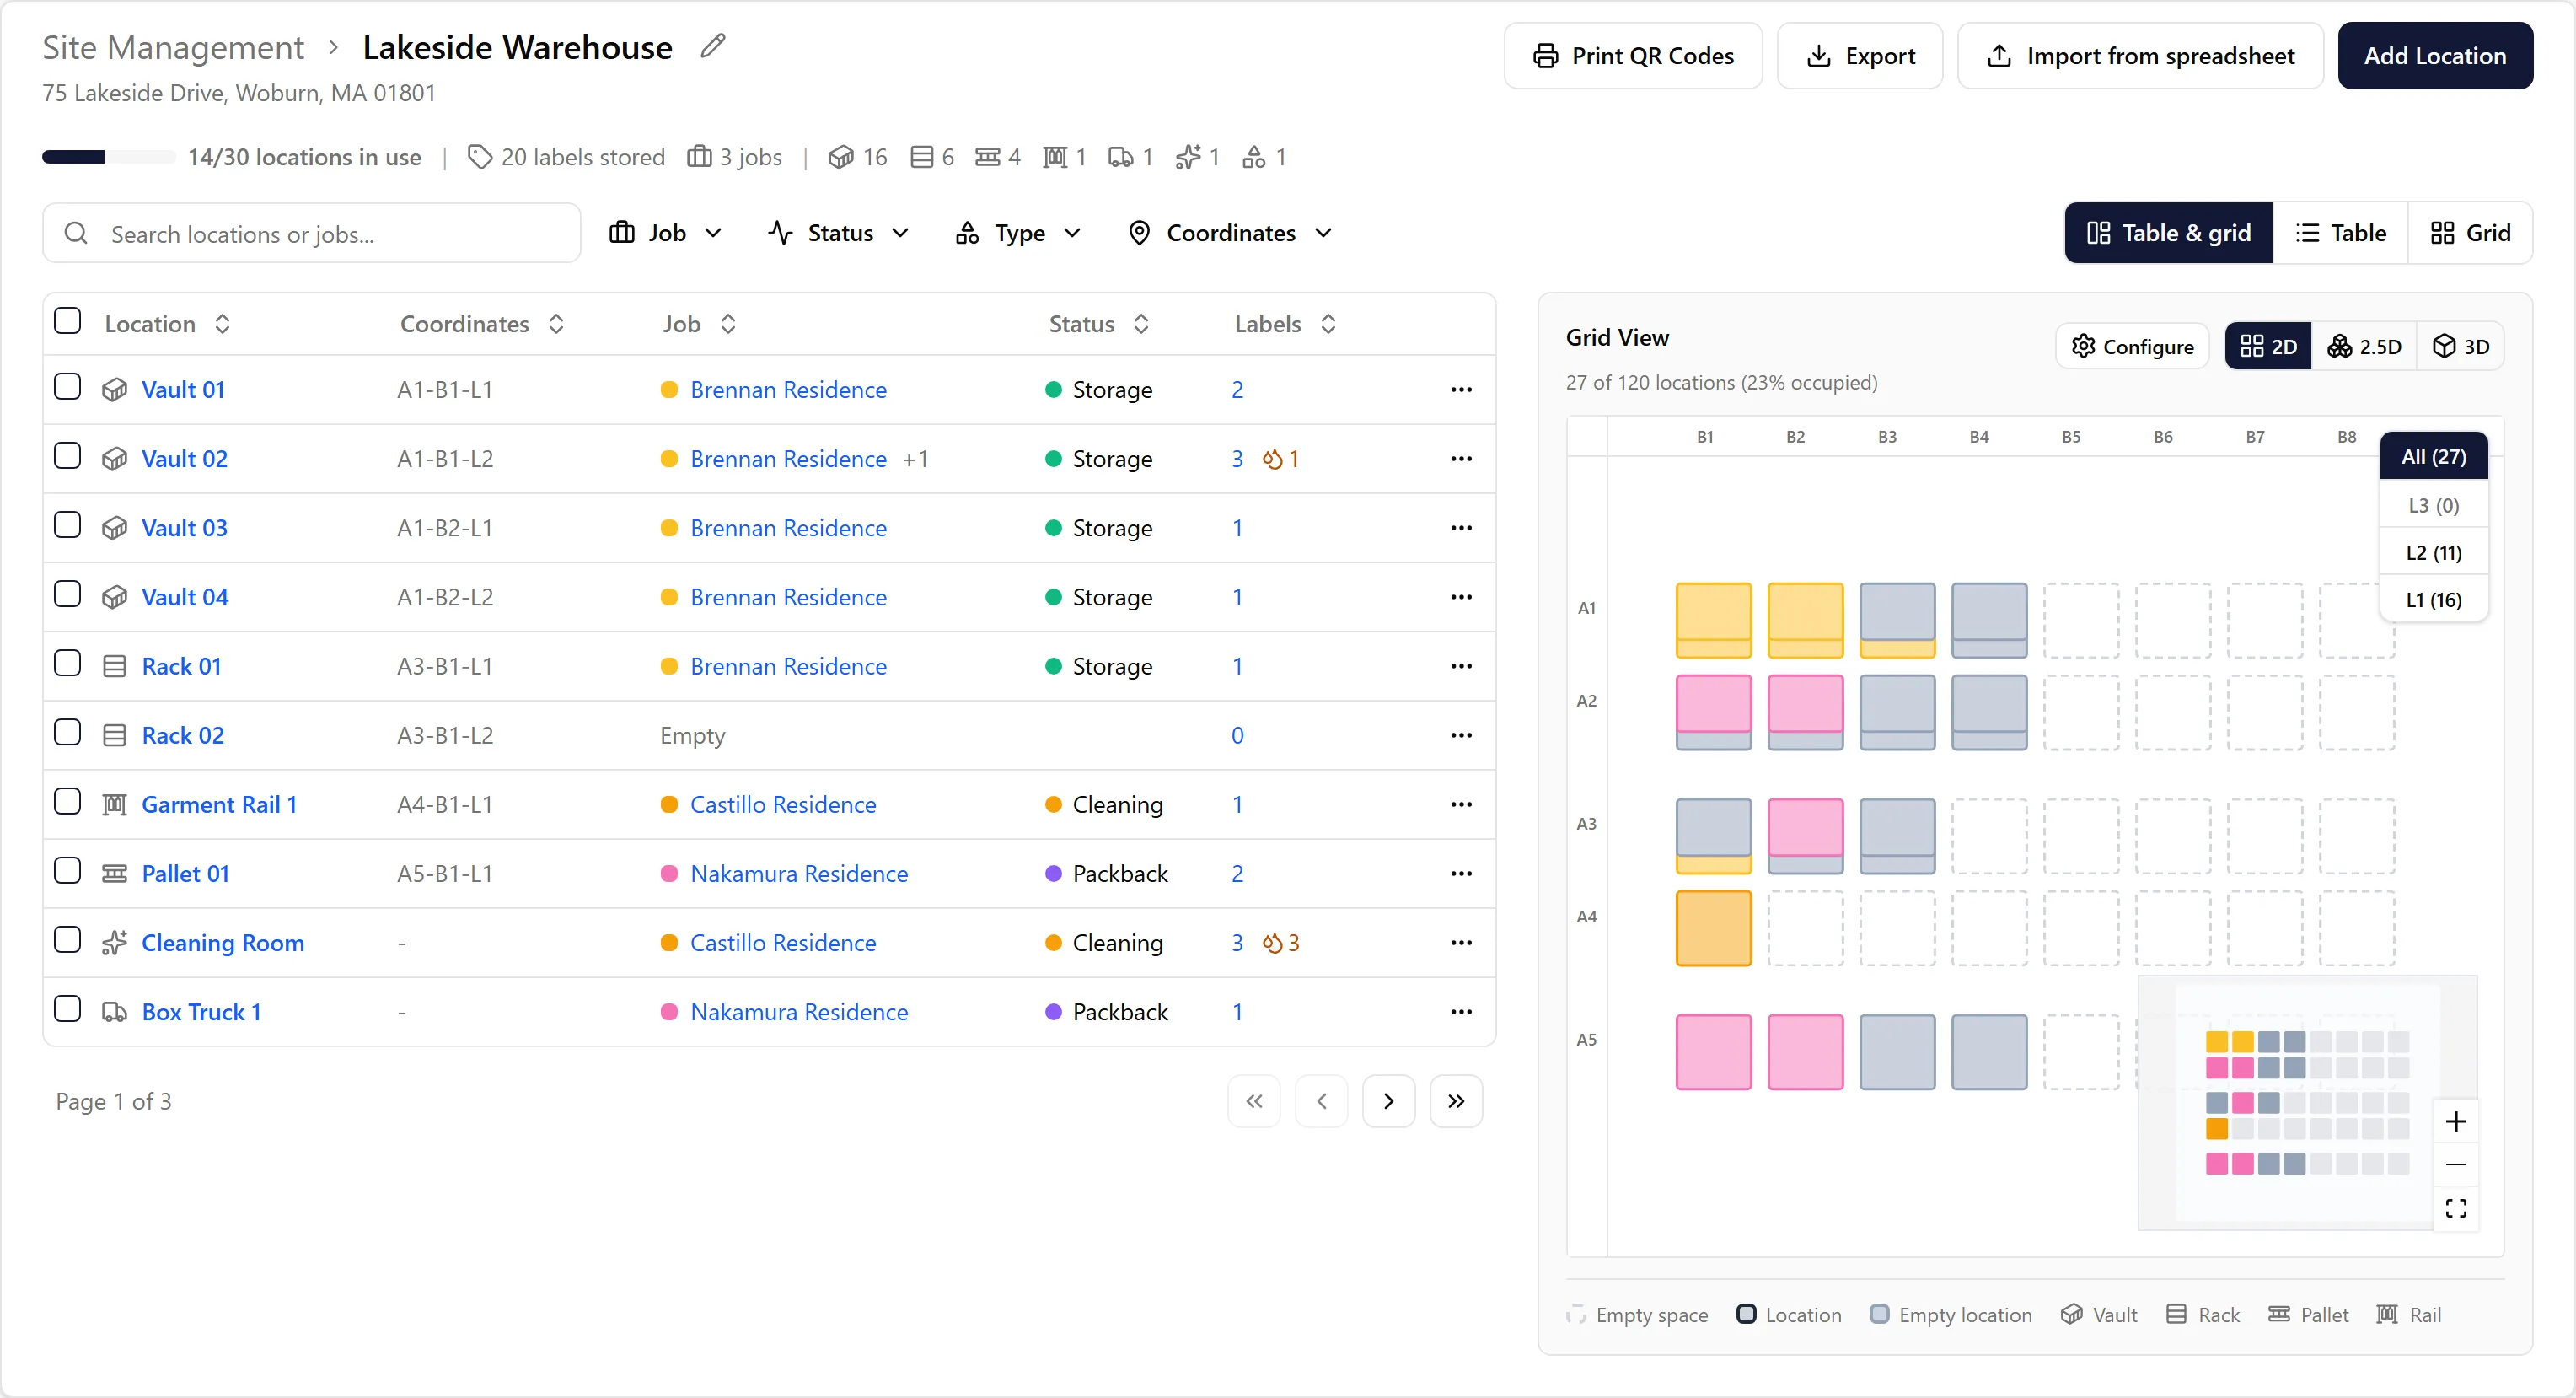
Site name and address. Click the pencil next to the name to edit the site: its name, address, image, and whether it uses a coordinate grid.
-
Print QR Codes, Export, Import from spreadsheet and Add Location sit on the right. Each is covered below; importing and exporting have their own guide, Import and Export Locations.
-
The summary bar shows how full the site is:
-
x/y locations in use: how many locations hold at least one label.
-
Labels stored: every label at the site right now.
-
Jobs: how many jobs have labels here.
-
When the site has more than one location type, a count for each type follows, with its icon (hover an icon to see the type’s name). Locations with no type set count as vaults.
-
The counts fill in once every location has loaded, and they update on their own as your crew scans labels in and out.
📋 The Locations Table
Section titled “📋 The Locations Table”Each row is one location. Ten rows show per page, newest first, and you can sort by any column.
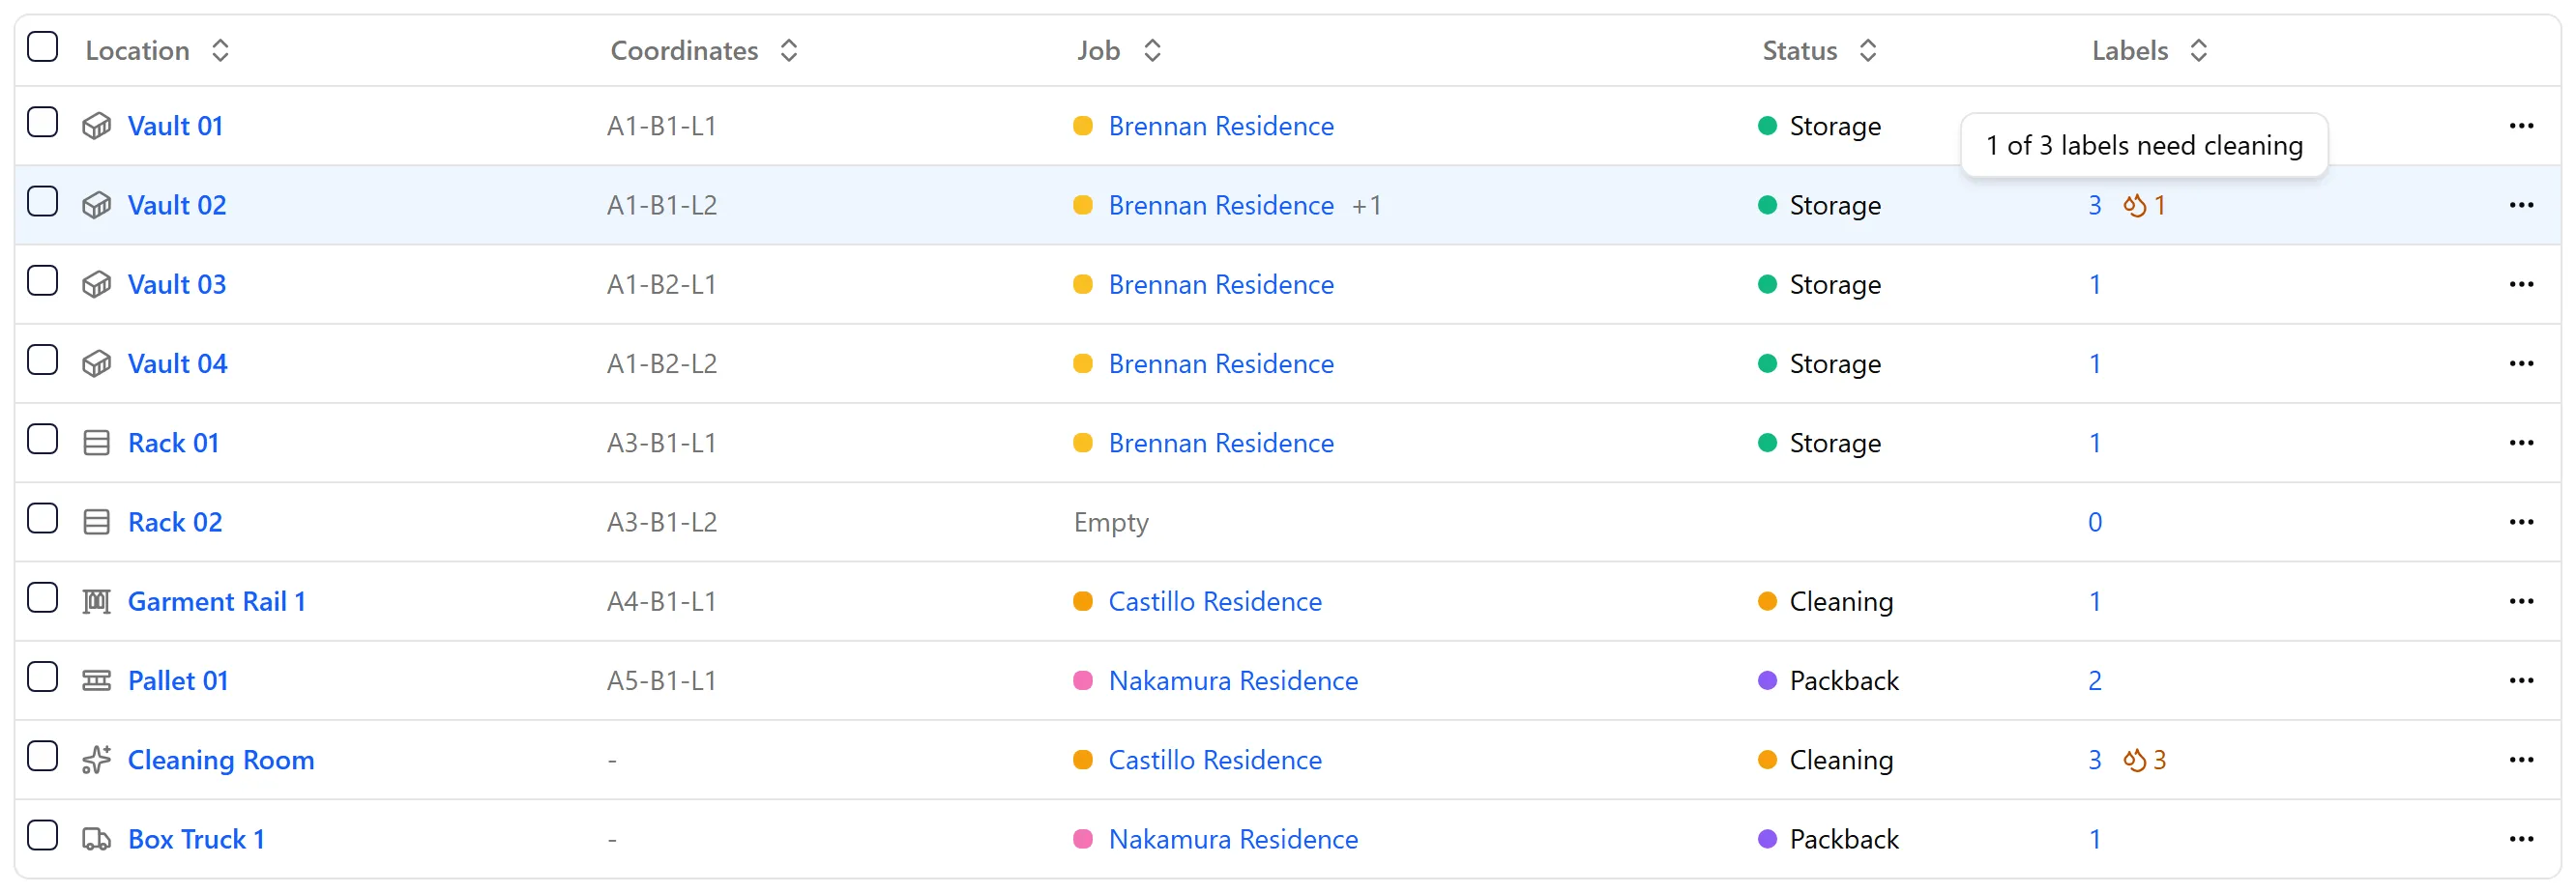
| Column | What it shows |
|---|---|
| Location | The location’s type icon and name. Locations with no type have no icon. Click the name to open the location. |
| Coordinates | Where it sits on the grid, as aisle, bay and level (for example A1-B2-L1), or a dash if it isn’t on the grid. Only shown when the site has a grid. |
| Job | The job with the most labels in this location, with its color on the grid. +1, +2 and so on means labels from other jobs are here too; hover it to see their names. Click the job to open it. Empty means nothing is stored here. |
| Job Status | The status of that job (for example Storage, Cleaning or Packback), not of its labels. Each label’s own status is on the location’s Contents tab. |
| Labels | How many labels are in the location. Click the number to open the location on its Contents tab. A water-drop icon with a number shows how many of those labels are at Needs Cleaning; hover it to read “1 of 3 labels need cleaning”. |
-
A warning icon next to the coordinates means something is wrong with them: they’re outside the site’s grid (for example after the grid was made smaller), or another location has the same coordinates. Hover the icon to see which.
-
The ⋯ menu at the end of each row has Edit Location (opens the location), Remove Coordinates (takes it off the grid straight away, keeping everything else) and Delete Location.
-
Click a row in the Table & grid view to highlight that location on the grid and jump to its level. Click the row again to clear the highlight.
To see what a location holds, who has used it and to change its settings, click its name. Everything in that window is explained in Location Details: Contents, Activity and Settings.
🔎 Search and Filters
Section titled “🔎 Search and Filters”
-
Search matches location names and job names. Press Enter to highlight the first match on the grid.
-
Job: show locations holding labels from one or more jobs. No job shows the empty ones.
-
Status: show locations by the status of their job, or pick Needs Cleaning to find every location with labels waiting to be cleaned.
-
Type: show only some location types, such as racks or pallets. It appears when the site has more than one type.
-
Coordinates: Has coordinates or No coordinates. It appears when the site has a grid.
Filters and search work together. While any of them is on, the grid fades the locations that don’t match, so the matches stand out. To turn a filter off, open it and choose Clear selection.
🖥️ Choosing a View
Section titled “🖥️ Choosing a View”Sites with a grid have three views, on the right above the table:
-
Table & grid: the table on the left and the grid beside it.
-
Table: the table across the full width.
-
Grid: the grid across the full width, with a Jobs color key and a Not on the grid list underneath.
A site without a grid shows the table only.
🗺️ The Grid
Section titled “🗺️ The Grid”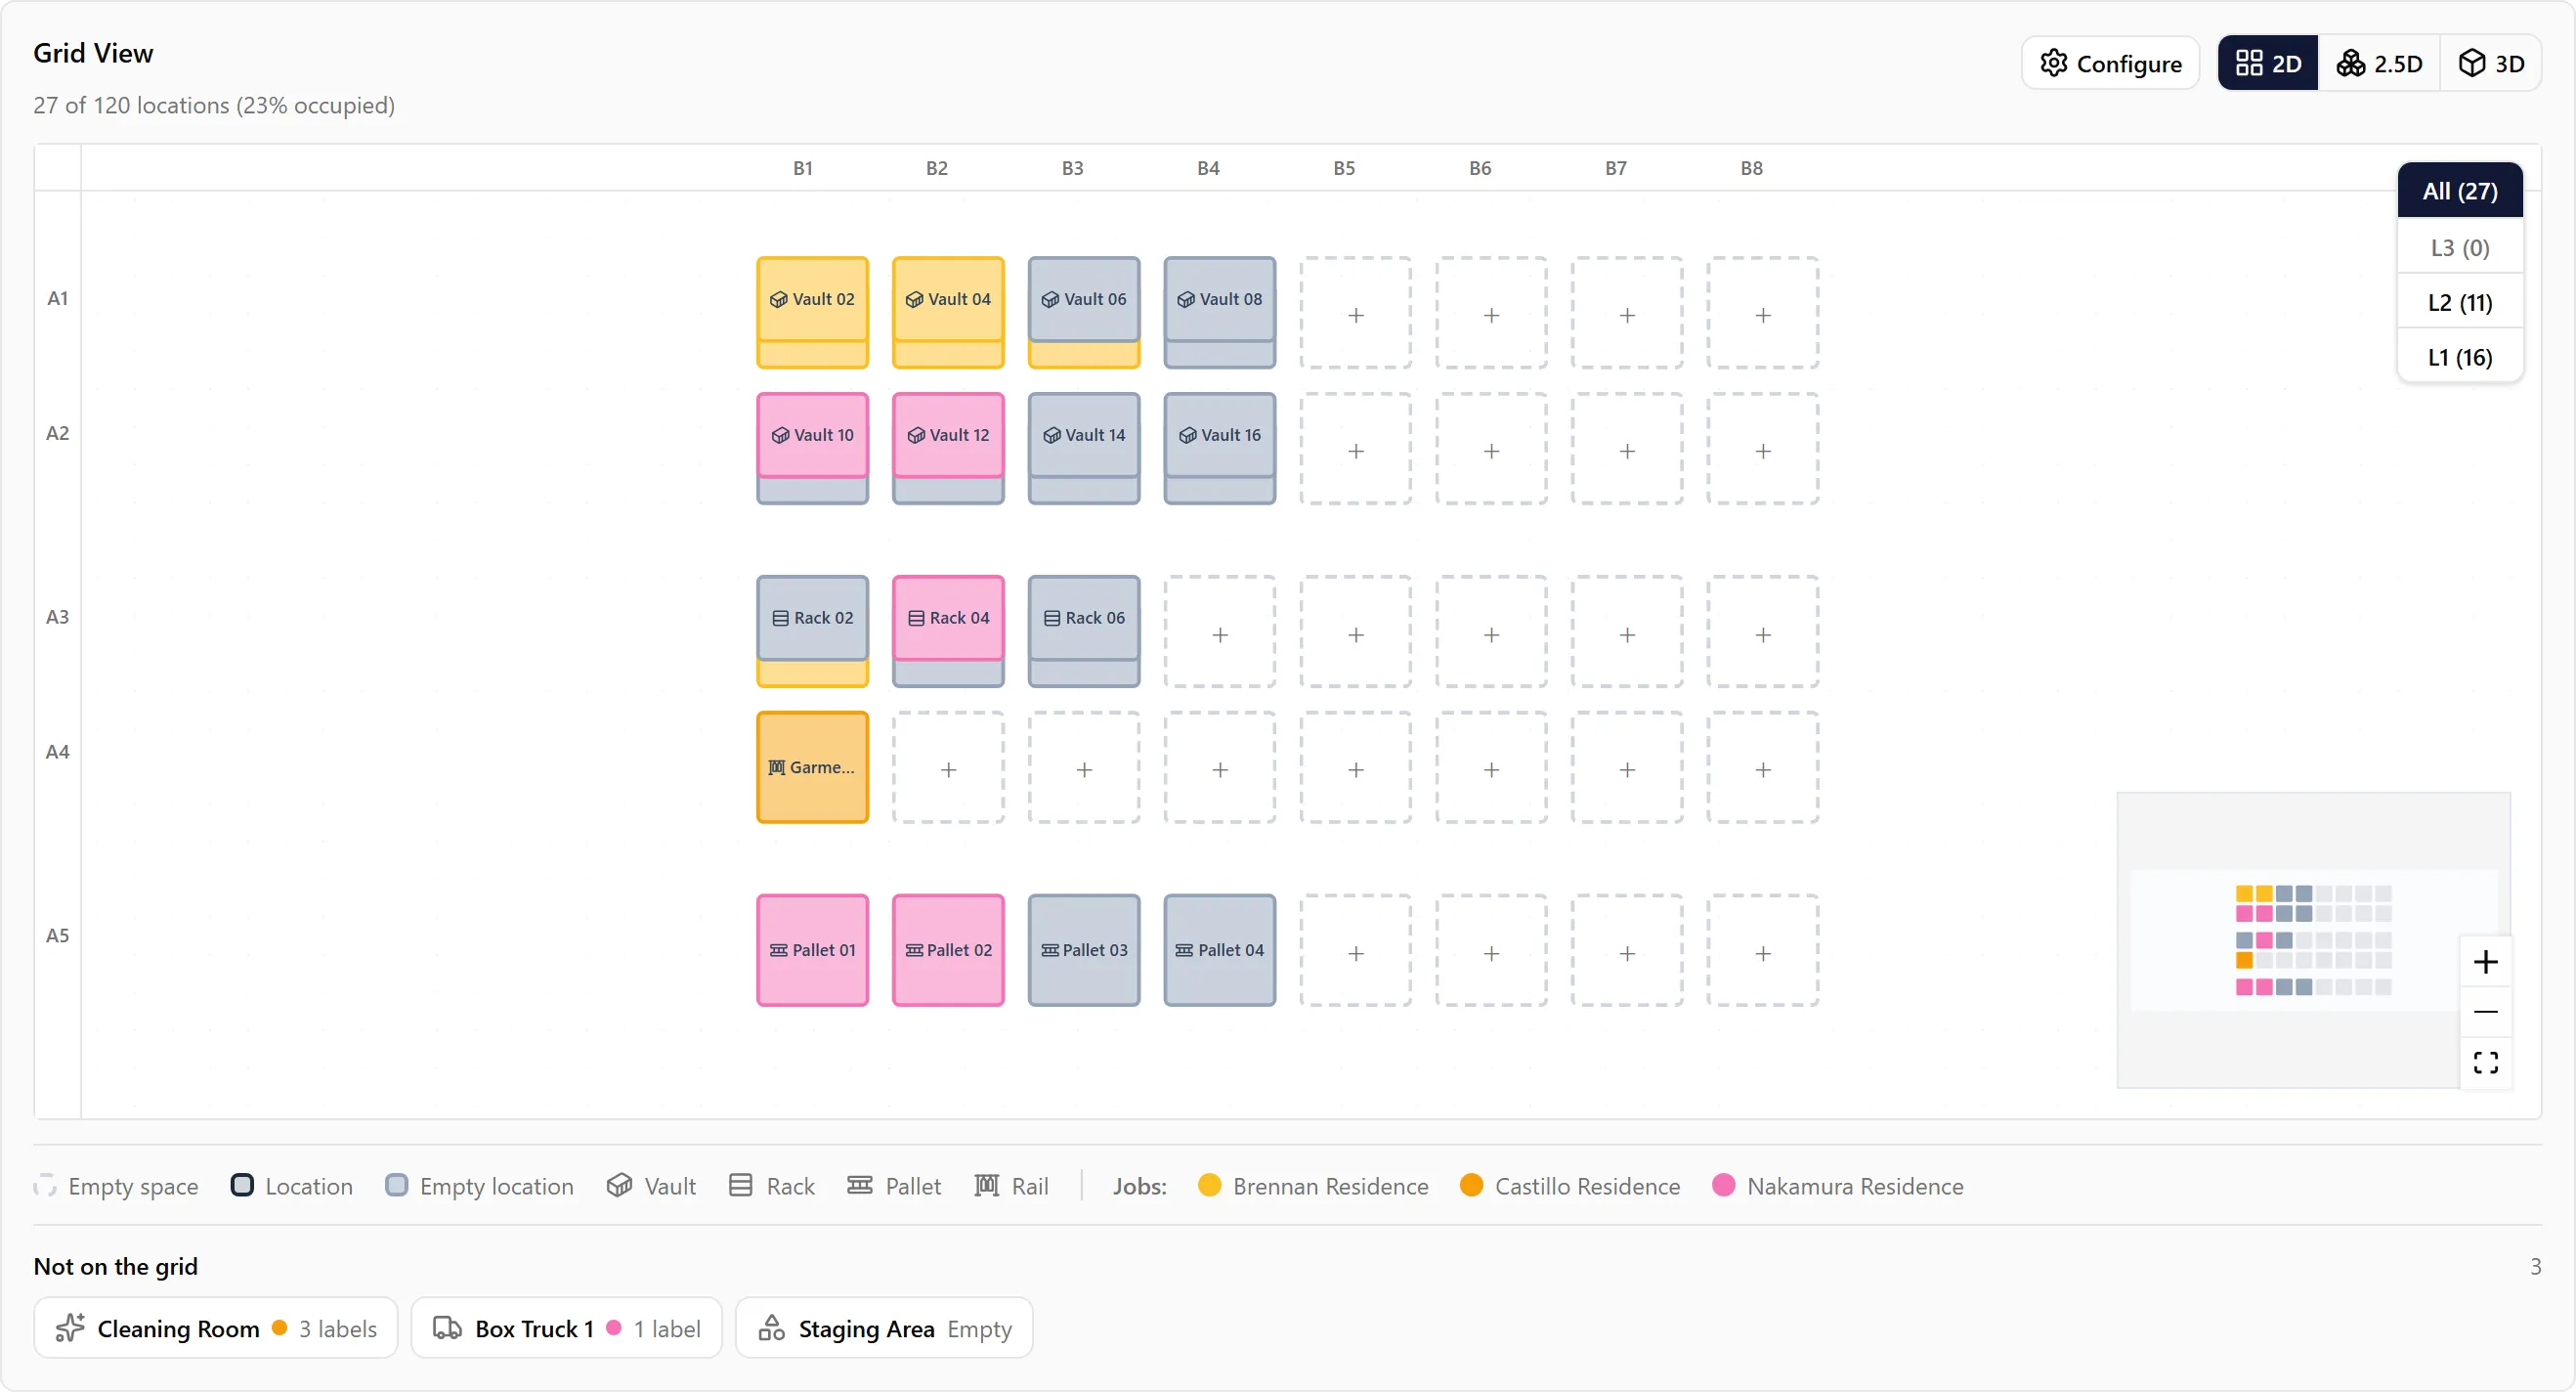
The grid draws the site from above: aisles run down the side (A1, A2…) and bays across the top (B1, B2…). The line under Grid View shows how many spots are taken, for example 27 of 120 locations (23% occupied).
-
Colors. A location is filled with the color of the job that has the most labels in it. Gray means the location is empty, and a dashed outline is an empty spot with no location.
-
Type icons. Each location shows its type’s icon, and the legend under the grid lists the types on the grid. Zoom in to see names and label counts on each location.
-
Hover a location to see its name, type, coordinates, labels and job.
-
Levels. Use the level picker in the top-right corner. All shows every level at once, with locations stacked in their aisle-and-bay spot (the stack shows the top location’s name). L1, L2 and so on show one level, and small arrows mark how many locations sit above or below each spot. The number next to each level is how many locations it has.
-
Click a location to open it. In the All view, clicking a stack with several locations lists them by level so you can pick one.
-
Configure opens the Grid Editor, where you change the number of aisles, bays and levels, add walkways and block cells. See Grid Editor.
-
In the Grid view, the Jobs key under the grid names the job for each color (up to eight), and Not on the grid lists up to twelve locations without coordinates. Click one to open it, or click +N more to see all of them in the table.
2D, 2.5D and 3D
Section titled “2D, 2.5D and 3D”Switch between three ways of drawing the grid with the buttons at the top of the grid:
-
2D: the flat plan from above described here. Drag or scroll to move around, zoom with the + and − buttons in the corner, and use the small map to jump around a large site.
-
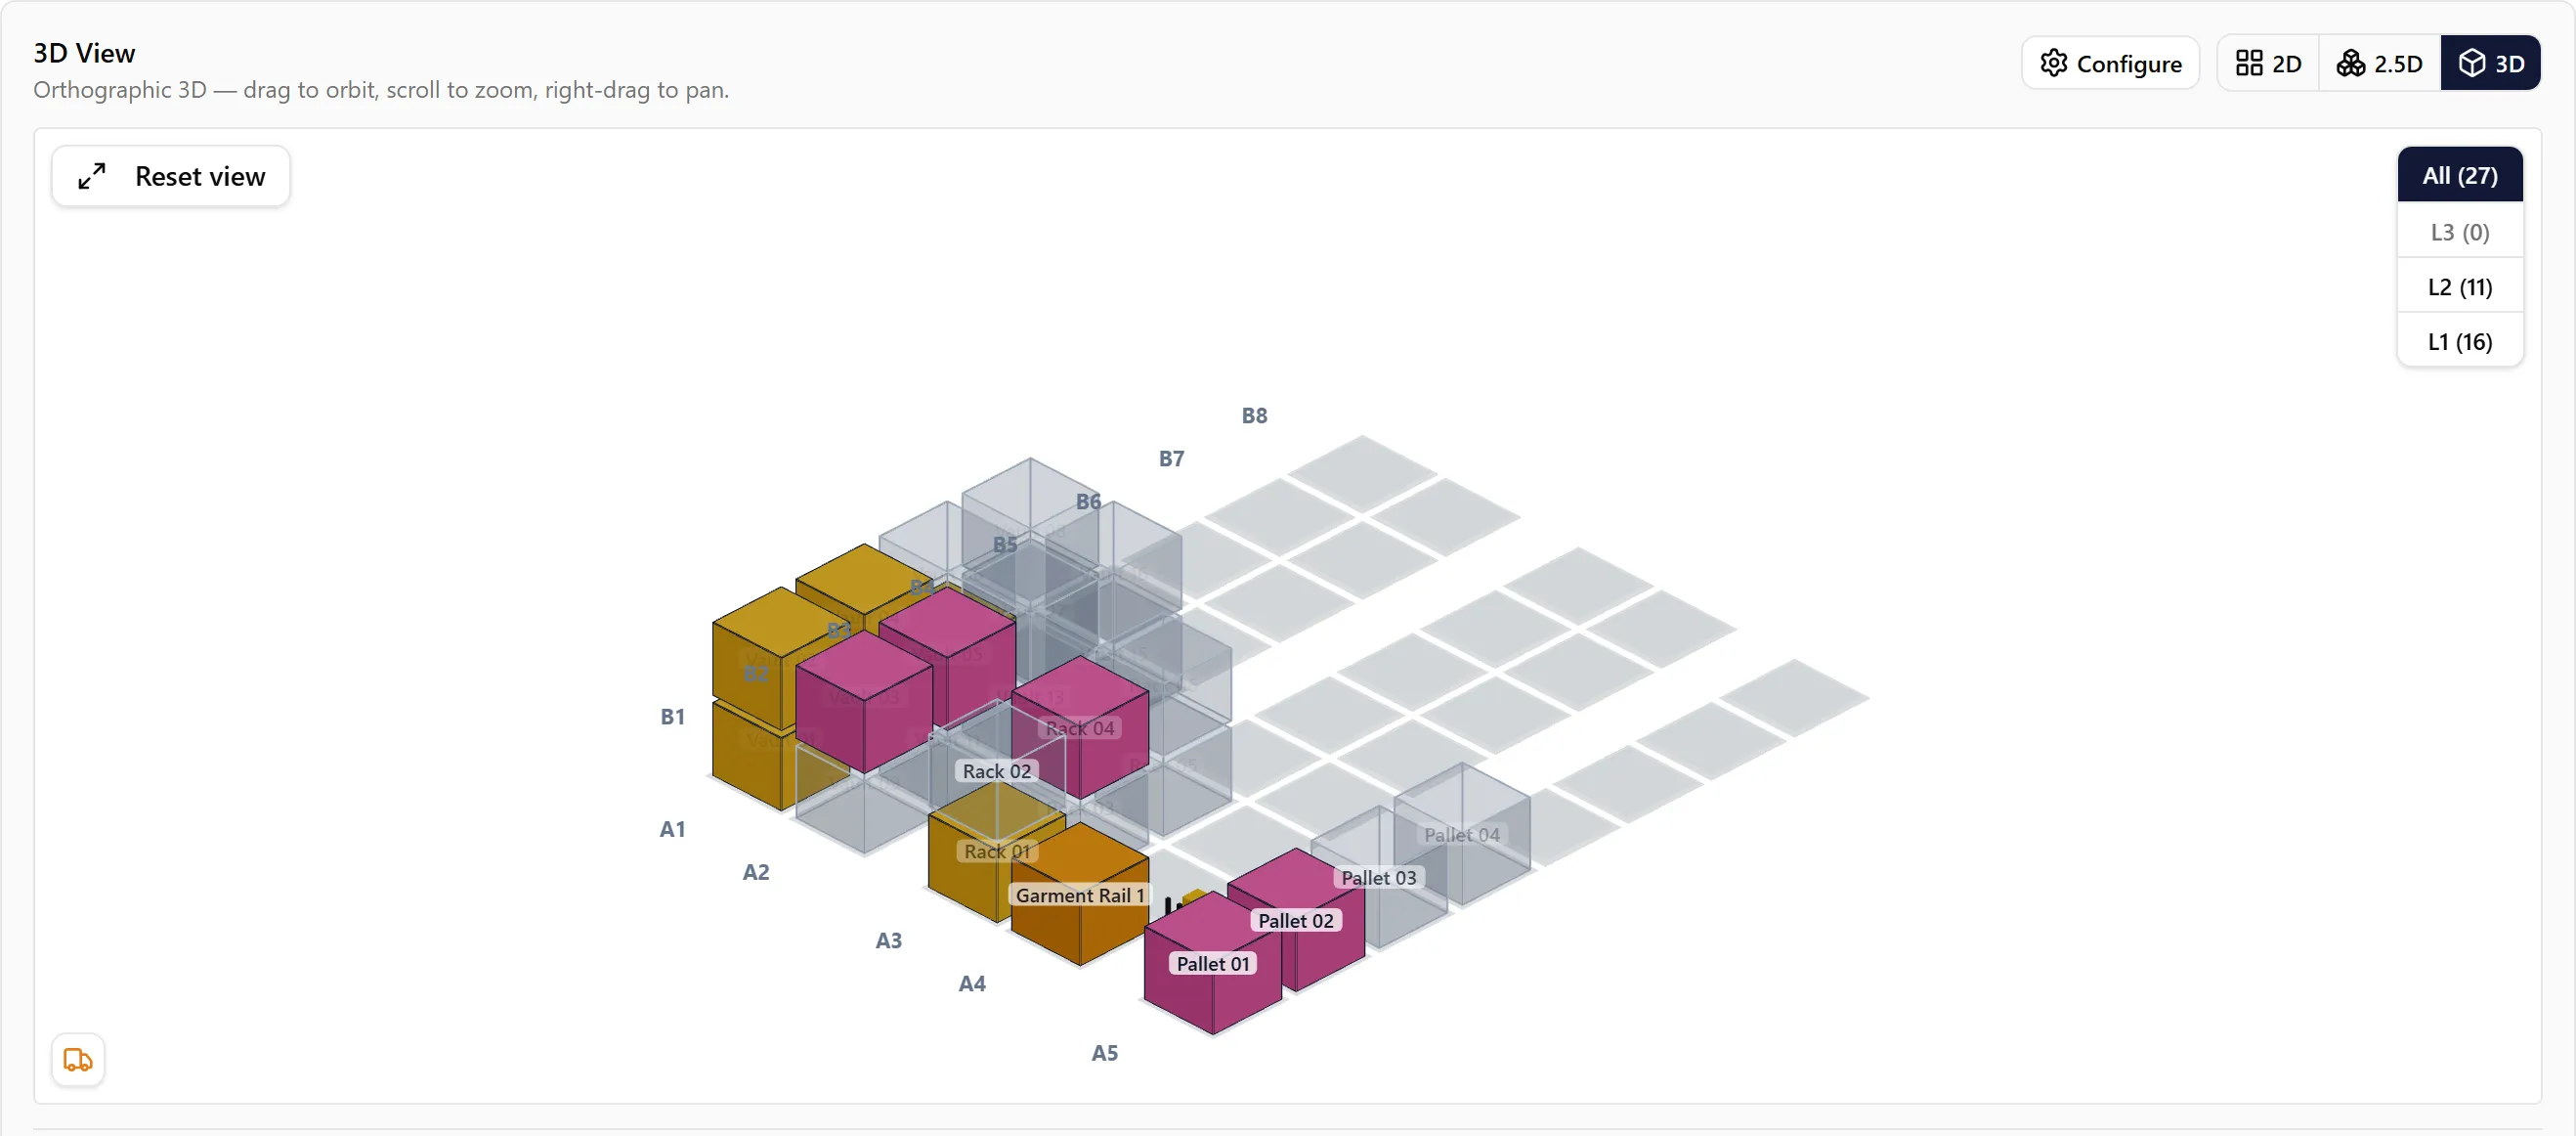
2.5D: an angled view with every level stacked, upper levels slightly see-through. Rotate turns it a quarter turn, Reset puts it back.
-
3D: a 3D model of the site. Drag to orbit, scroll to zoom, and right-drag to move it. Reset view brings it back to the start.
Adding from an Empty Spot
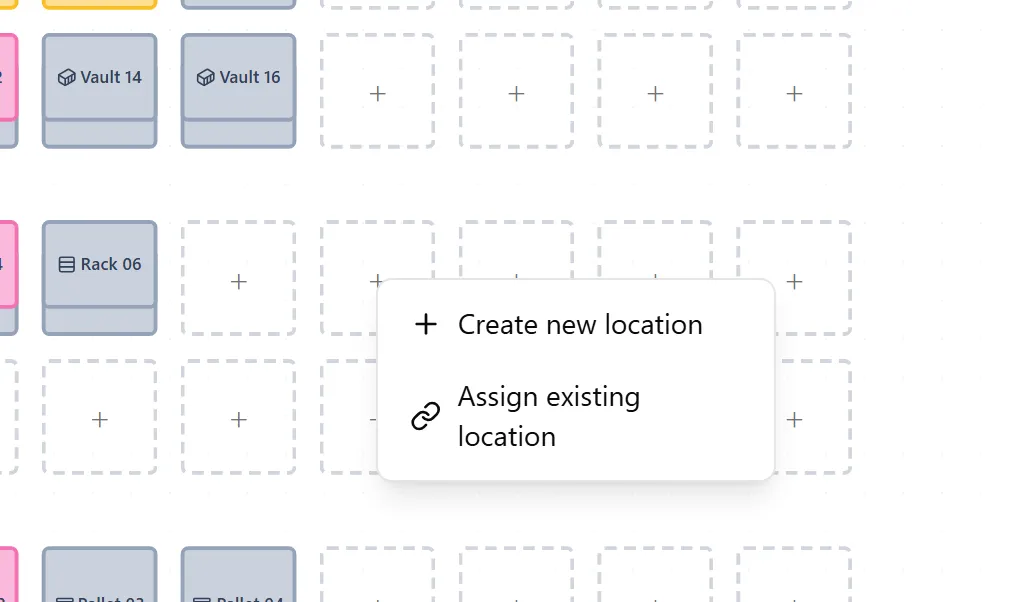
Section titled “Adding from an Empty Spot”Click an empty spot on the grid (in 2D or 3D) to fill it:
-
Create new location opens Add Location with the spot’s aisle, bay and level already filled in.
-
Assign existing location lets you search your locations by name or code and move one to this spot. A location that already has coordinates moves here from its old spot.
In the All levels view, a location placed this way goes on level 1.
➕ Adding a Location
Section titled “➕ Adding a Location”-
Click Add Location.
-
Choose Single Location or Multiple Locations.
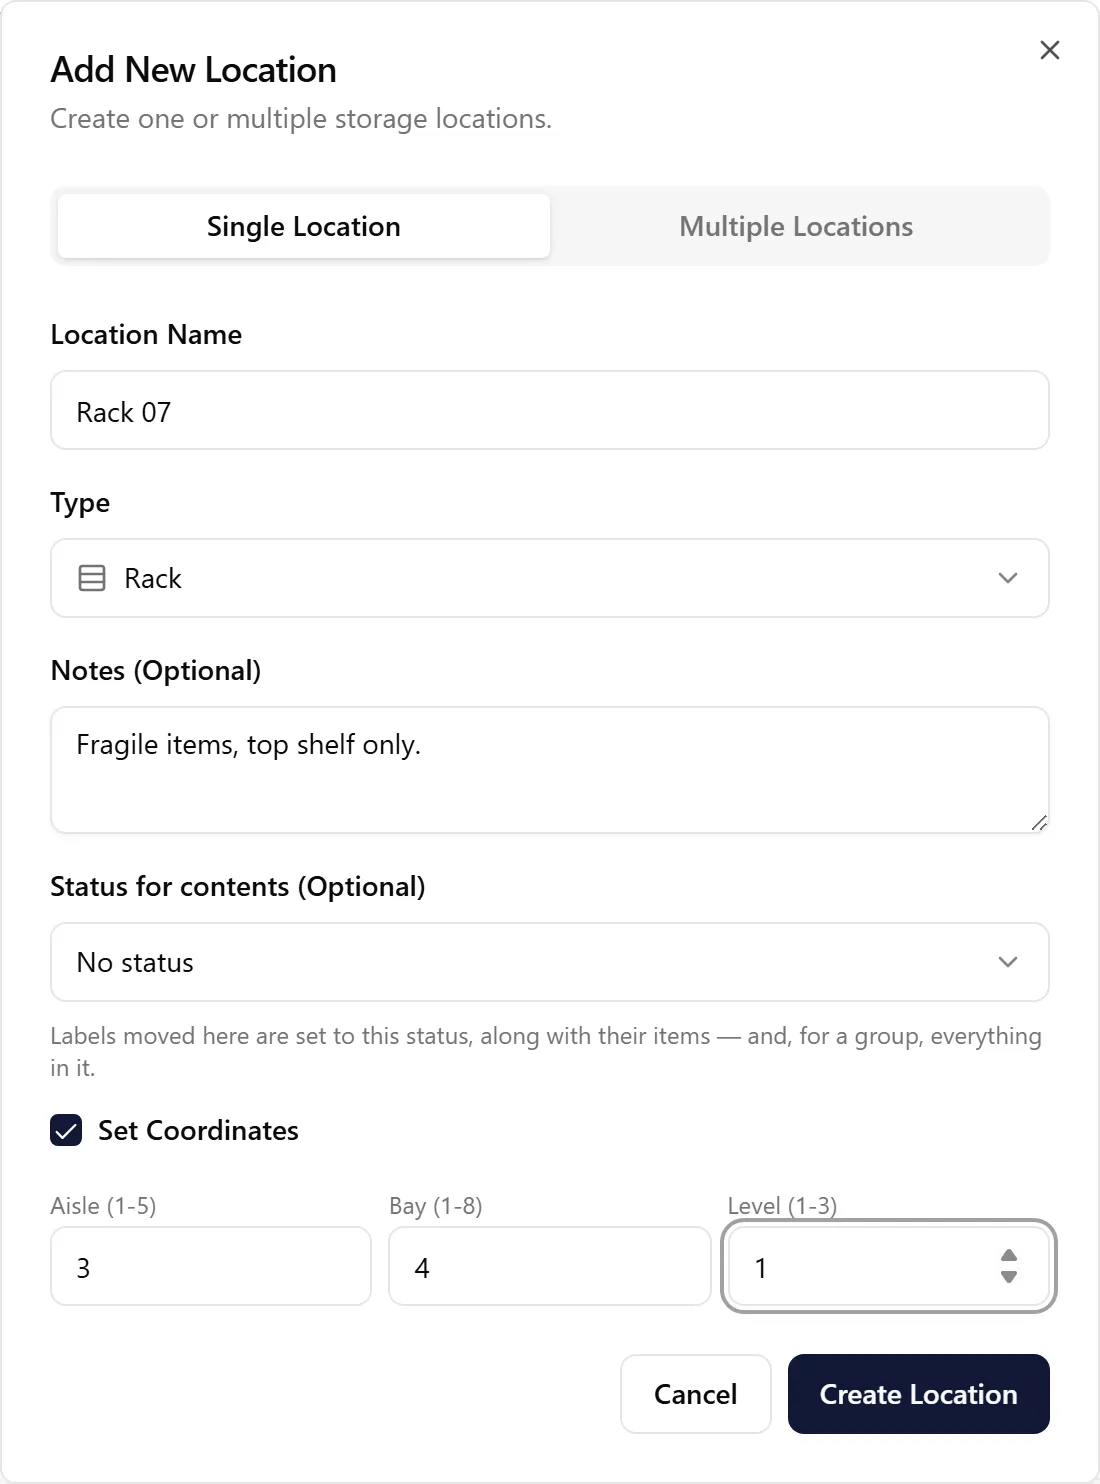
Single Location
-
Location Name, for example Rack 07.
-
Type: Vault, Rack, Pallet, Rail, Bin, Vehicle, Cleaning or Other. It labels the location in the table, on the grid and in filters.
-
Notes (Optional): access instructions, condition, anything the crew should know.
-
Status for contents (Optional): labels moved into this location are set to this status, along with their items. Leave it on No status to change nothing. Setup Locations explains how this works.
-
Set Coordinates (sites with a grid): tick it and enter the Aisle, Bay and Level. The allowed range for each is shown above the box.
Click Create Location.
Multiple Locations
Enter a Prefix (for example Pallet), the Number of Locations (up to 499), a Type and an optional Status for contents, then click Create N Locations. The new locations are numbered on from the highest number already at the site with that prefix: if Pallet-4 exists, the next ones start at Pallet-5. Numbers get a leading zero only when the run reaches two digits (Pallet-01 to Pallet-12). Locations made this way have no coordinates; place them on the grid afterwards. (The Multiple Locations tab isn’t available when you start from an empty spot on the grid.)
When the Spot Is Taken
Section titled “When the Spot Is Taken”If another location already has the coordinates you entered, a yellow warning names it, and the button changes to Create & Replace. Creating the new location takes the spot and removes the coordinates from the other location, which stays at the site without a place on the grid. Assign existing location works the same way (Assign & Replace).
A red message means you can’t use those coordinates: they’re outside the site’s grid, or the cell is blocked in the Grid Editor.
✅ Working with Several Locations at Once
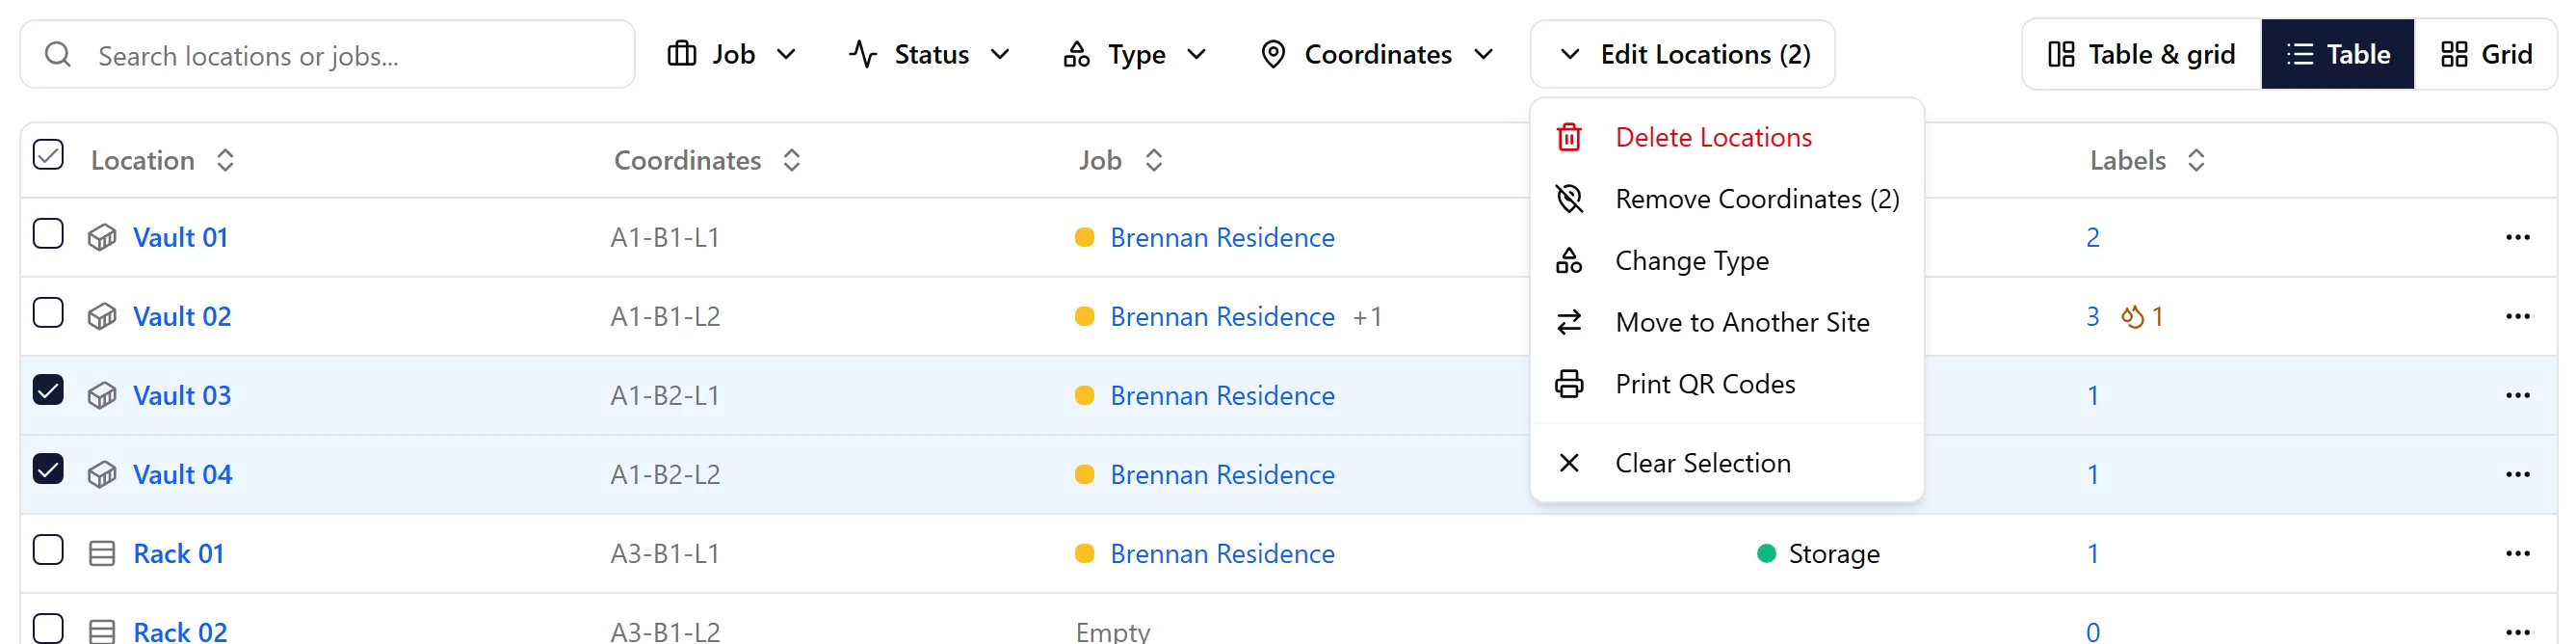
Section titled “✅ Working with Several Locations at Once”Tick the boxes next to the locations you want (the box in the header ticks the whole page). An Edit Locations (N) button appears after the filters.
-
Delete Locations: deletes the selected locations after you confirm. If they still hold labels, the confirmation says how many.
-
Remove Coordinates (N): takes the selected locations off the grid. They stay at the site and can be placed again later. It appears when some of the selected locations have coordinates.
-
Change Type: sets one type on every selected location. If they already share a type, the picker starts on it.
-
Move to Another Site: see below.
-
Print QR Codes: prints the selected locations’ QR codes.
-
Clear Selection: unticks everything.
Move to Another Site
Section titled “Move to Another Site”Use this when locations physically move to another building, or you set them up in the wrong site.
-
Tick the locations and choose Edit Locations (N) → Move to Another Site.
-
Pick the Target Site.
-
Click Move Locations.
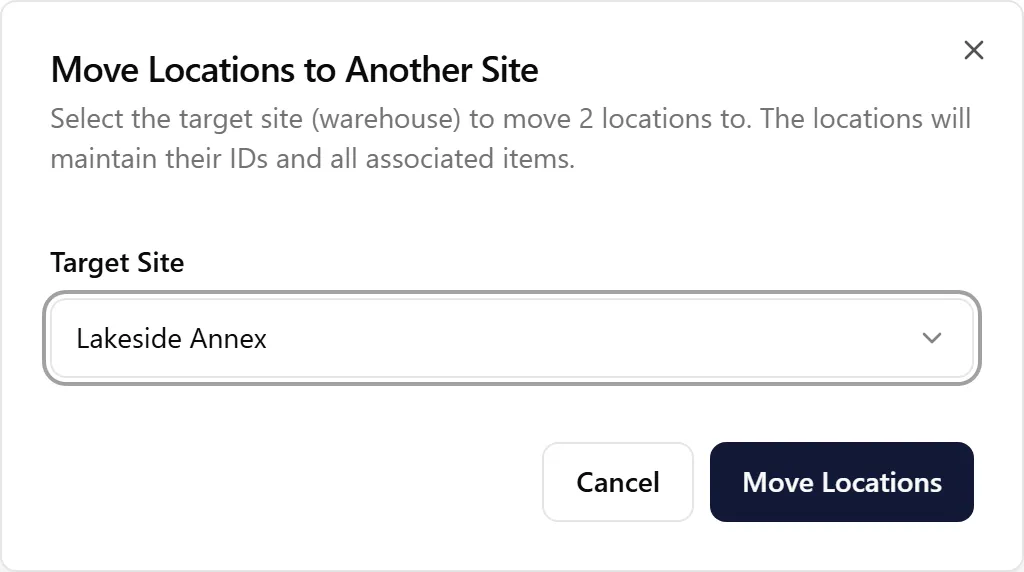
The locations keep their names, QR codes and everything stored in them, so labels inside move with them and nothing needs to be relabeled. Their coordinates are cleared, because each site has its own grid: place them on the new site’s grid afterwards. To move a single location, you can also open it and choose Move to another site.
🖨️ Printing QR Codes
Section titled “🖨️ Printing QR Codes”Click Print QR Codes at the top of the page:
-
All Locations: every location in the table, in the order the table shows them. If a filter or search is on, only the matching locations print.
-
Selected Locations (N): the locations you’ve ticked.
-
Location Range…: a run of locations by their position in the table, for example the 1st to the 20th. When several locations share a name prefix, Use prefix limits the range to that prefix.
-
Coordinate QR codes (sites with a grid): one label for each aisle-and-bay spot, to post on your racks for scanning in Warehouse Mode.
Pick a sticker layout and print. For location codes you can choose to Include site/warehouse name and Include coordinates on each label. See Setup Locations for where to post the codes and How to Print Labels for layouts.
🗑️ Deleting a Location
Section titled “🗑️ Deleting a Location”-
One location: open its ⋯ menu and choose Delete Location, then confirm.
-
Several: tick them and choose Edit Locations (N) → Delete Locations.
Deleting a location can’t be undone. If it still holds labels, the confirmation warns you: move those labels to another location first, so their tracking stays accurate.
🛠️ Troubleshooting
Section titled “🛠️ Troubleshooting”A location doesn’t show on the grid. It has no coordinates. Switch to the Grid view to see it under Not on the grid, or filter Coordinates → No coordinates. Place it by clicking an empty spot and choosing Assign existing location, or open the location and place it there.
There’s a warning icon next to a location’s coordinates. Its coordinates are outside the grid (often after the grid was made smaller) or another location has the same ones. Open the location and give it a free spot, or use Remove Coordinates.
I don’t see the grid, the view buttons or the Coordinates column. The site doesn’t use a coordinate grid. Click the pencil next to the site name and turn on Use Coordinate System.
There’s no Type filter or per-type count. They only appear when the site has more than one location type.
Export is grayed out. It’s waiting for every location’s labels to load. Give it a moment.
My moved locations lost their coordinates. That’s expected: moving to another site clears coordinates, because each site has its own grid. Place them on the new site’s grid.
The site I want isn’t in the Move list. The list shows every other site in your organization. Create the site first on the Sites page.
Who can do this? Any member of your organization can add, edit, move and delete locations, not only admins.
➡️ Related Articles
Section titled “➡️ Related Articles”-
Warehousing with ContentsPal: how sites, locations and labels fit together.
-
Setup Locations: create a site, its locations and coordinates.
-
Grid Editor: aisles, bays, levels, walkways and blocked cells.
-
Location Details: Contents, Activity and Settings: what’s inside a location, who has used it, and its settings.
-
Warehouse Mode: run the floor from the mobile app.