
📦 Packing Specialty Items
Learn how to pack processed specialty textile items into garment bags and track them through chain of custody with QR code labels.
🧭 Summary
Section titled “🧭 Summary”After you’ve inventoried and processed specialty textile items (items that needed individual attention, dry cleaning, or special handling), you need to pack them for storage or return to the customer. Pack Mode with Garment Bag option lets you document items as they’re placed into garment bags, assign QR code labels for tracking, and maintain chain of custody.
Unlike bulk items that go into boxes, specialty items typically go into garment bags. You can bundle multiple items under a single QR code label—for example, a jacket and sweater together—so you don’t need a separate label for every individual piece of clothing.
Packing items doesn’t create new inventory entries. Instead, it adds the packed items to the Custody tab where you can track their location, status, and associated images through the QR code label.
⚙️ Prerequisites
Section titled “⚙️ Prerequisites”-
Textiles Mode must be enabled in the mobile app (Settings → Mode → Textiles)
-
Specialty items have been inventoried using Single Mode (see Inventorying Specialty Items)
-
Items have been processed (cleaned, dry cleaned, or treated as needed)
-
Garment bags are ready for packing
-
QR code labels are available for tracking
🚀 Step-by-Step Instructions
Section titled “🚀 Step-by-Step Instructions”1. Enter Pack Mode and Select Garment Bag
Section titled “1. Enter Pack Mode and Select Garment Bag”-
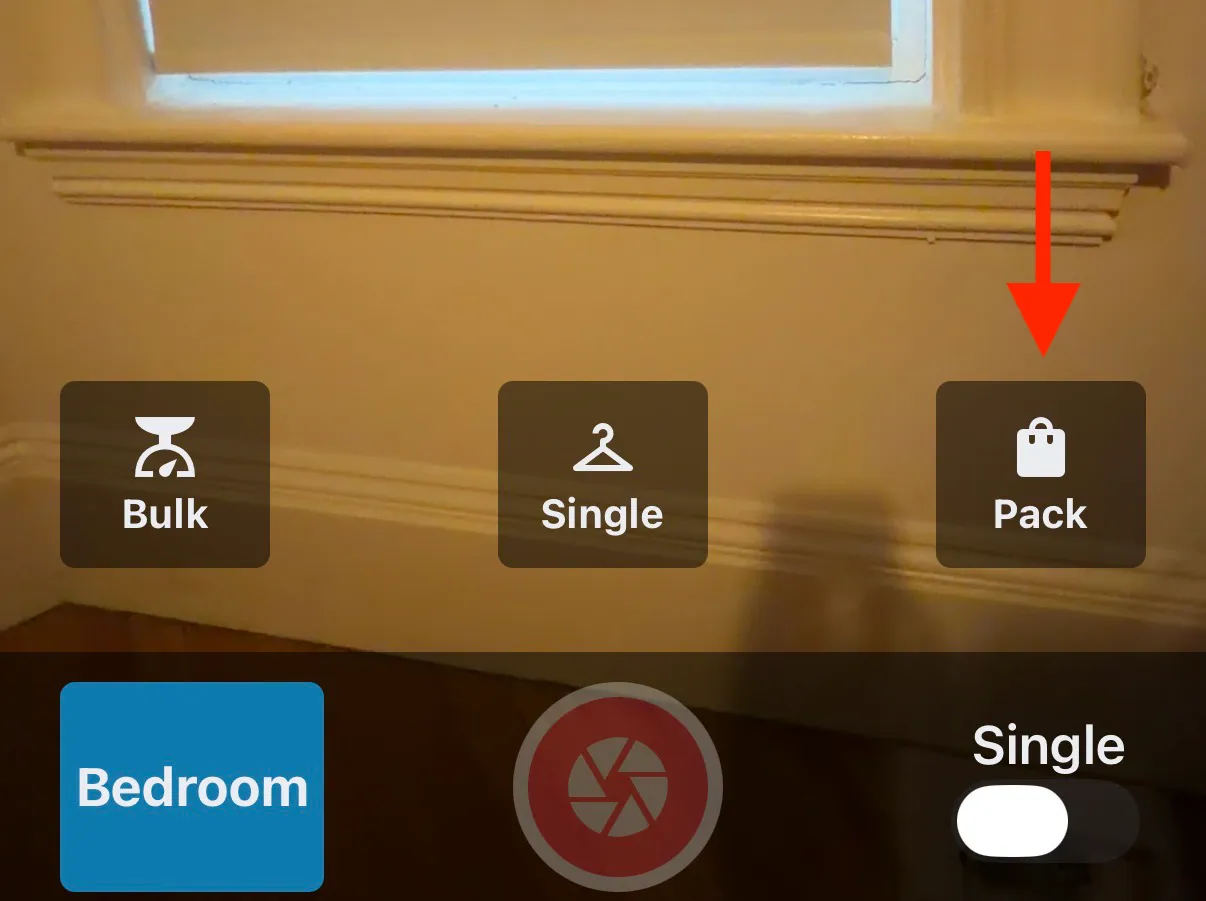
At the bottom of the capture screen, tap Pack
-
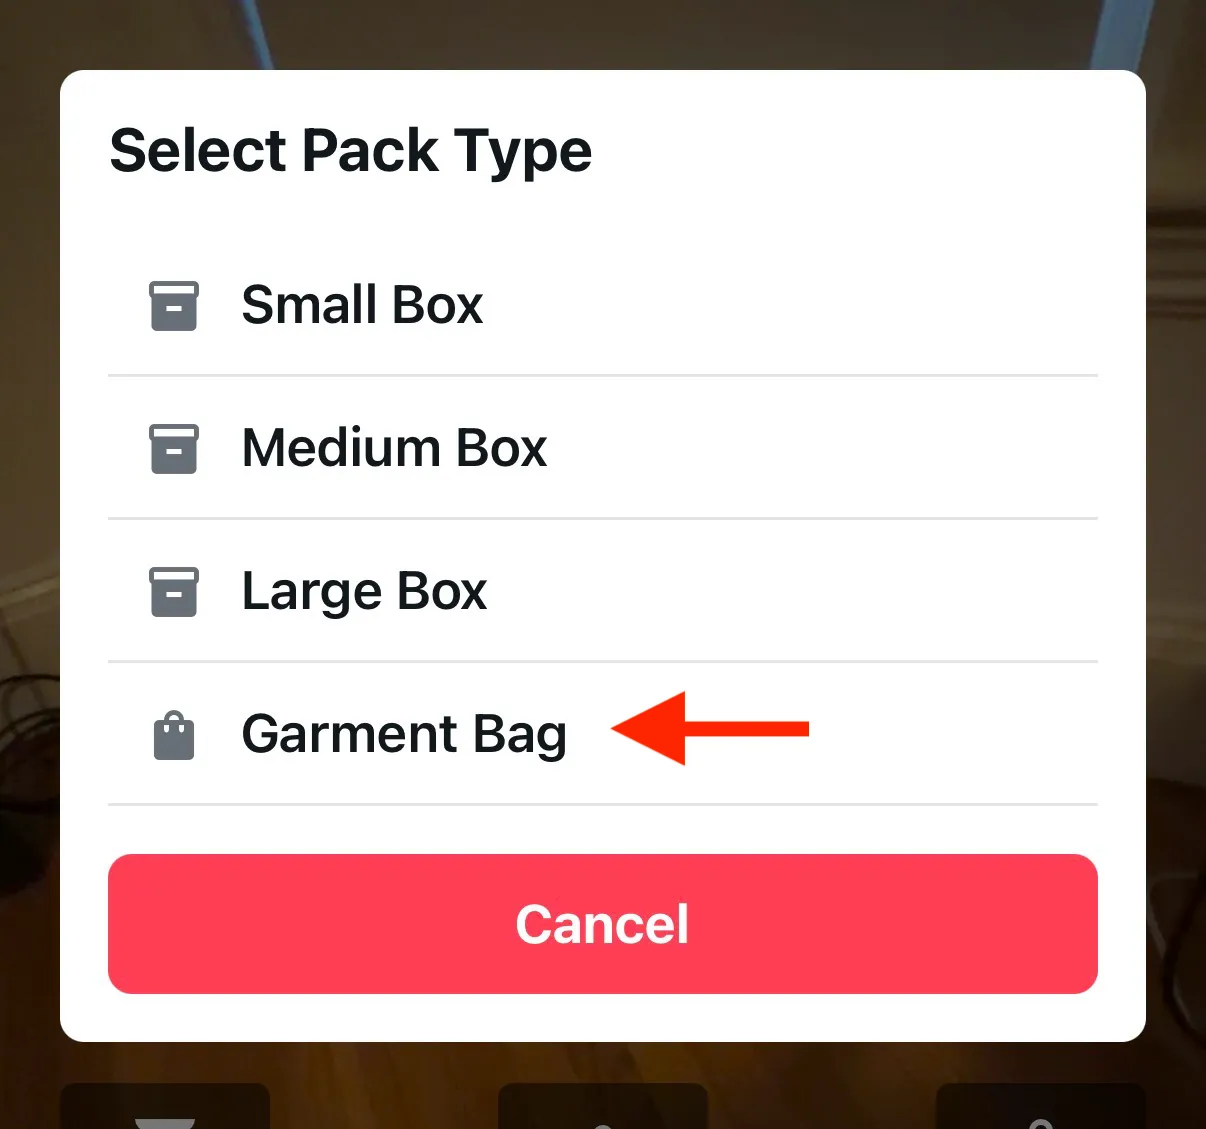
From the Select Pack Type list (Small Box, Medium Box, Large Box, Garment Bag, Tag), select Garment Bag
2. Take a Picture of Items in the Garment Bag
Section titled “2. Take a Picture of Items in the Garment Bag”-
Place your specialty items in the garment bag
-
Point your camera at the items inside the bag
-
Tap the capture button to take a photo
What this photo does:
-
Creates visual documentation of what’s inside the garment bag
-
Helps you (and the customer) see what items are packed together
-
Appears in the Custody tab when you scan the QR code later
3. Add a Label
Section titled “3. Add a Label”-
Tap the Label button
-
Scan the QR code on your label
-
The label will be associated with this garment bag
4. Add Multiple Items to the Same Label (Optional)
Section titled “4. Add Multiple Items to the Same Label (Optional)”If you want to bundle several items under one label:
-
After scanning the label, take additional pictures of other items you’re adding to the same garment bag
-
The photo count at the top of the screen goes up with each picture
-
They’ll all be associated with the same label number
Why bundle items?
-
Reduces the number of labels you need to manage
-
Groups related items together (e.g., all items from Master Bedroom)
-
Makes scanning into vault locations faster
-
Simplifies return to customer
5. Exit Pack Mode
Section titled “5. Exit Pack Mode”-
When you’re done adding items to the garment bag, tap Exit Pack
-
Review the confirmation message (photo count, pack type, and room) and tap Close Pack
-
The garment bag is saved with all the photos you took
-
Everything is tied to the QR code label you scanned
📋 What You’ll See in the Custody Tab
Section titled “📋 What You’ll See in the Custody Tab”After packing specialty items, check the Custody tab to see your garment bags:
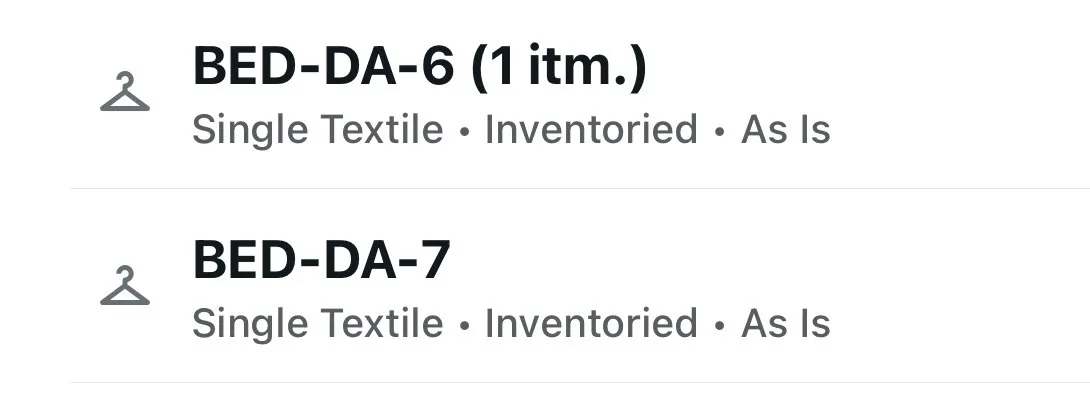
How to View Garment Bag Details
Section titled “How to View Garment Bag Details”-
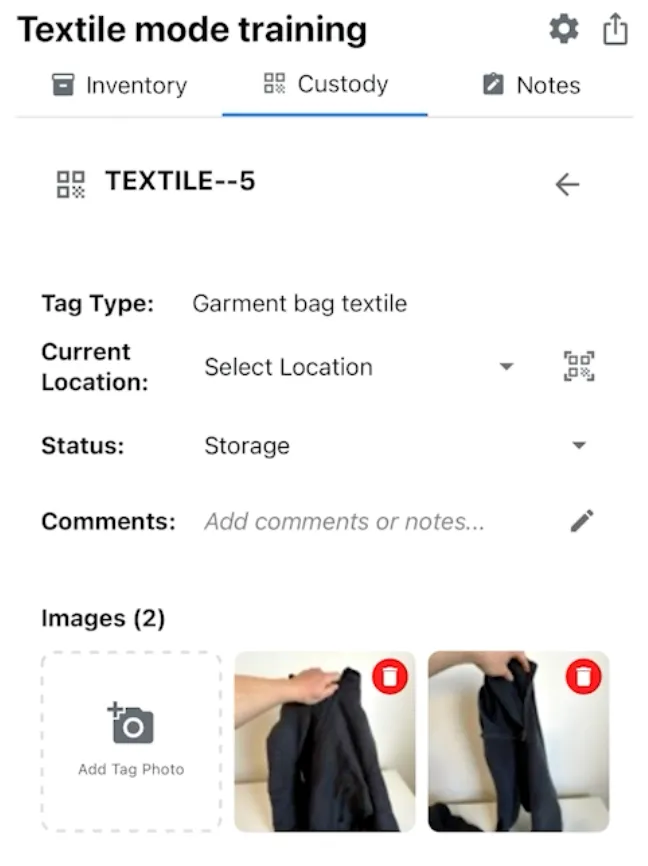
In the Custody tab, find your textile label (e.g., “Textile #5”)
-
Tap to open it
-
You’ll see all the images you took
-
You can also see which room it’s associated with
6. Scan Label into Storage Location (Optional)
Section titled “6. Scan Label into Storage Location (Optional)”After packing, you can assign the garment bag to a vault or storage location:
-
Open the Custody tab
-
Find your garment bag label
-
Scan the label into a vault or storage area using QR codes
-
The label will be assigned to that location for easy tracking
7. Change Status if Needed (Optional)
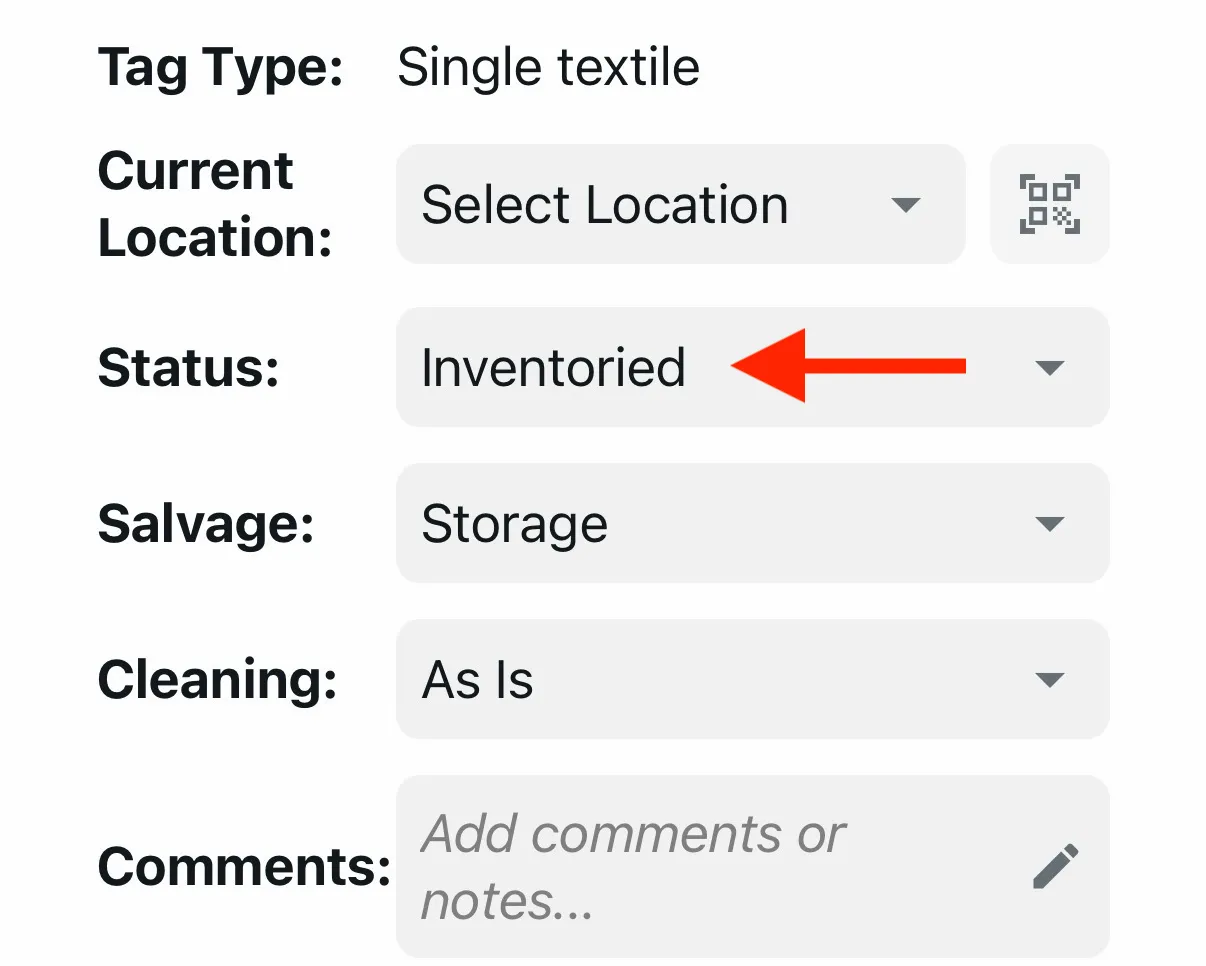
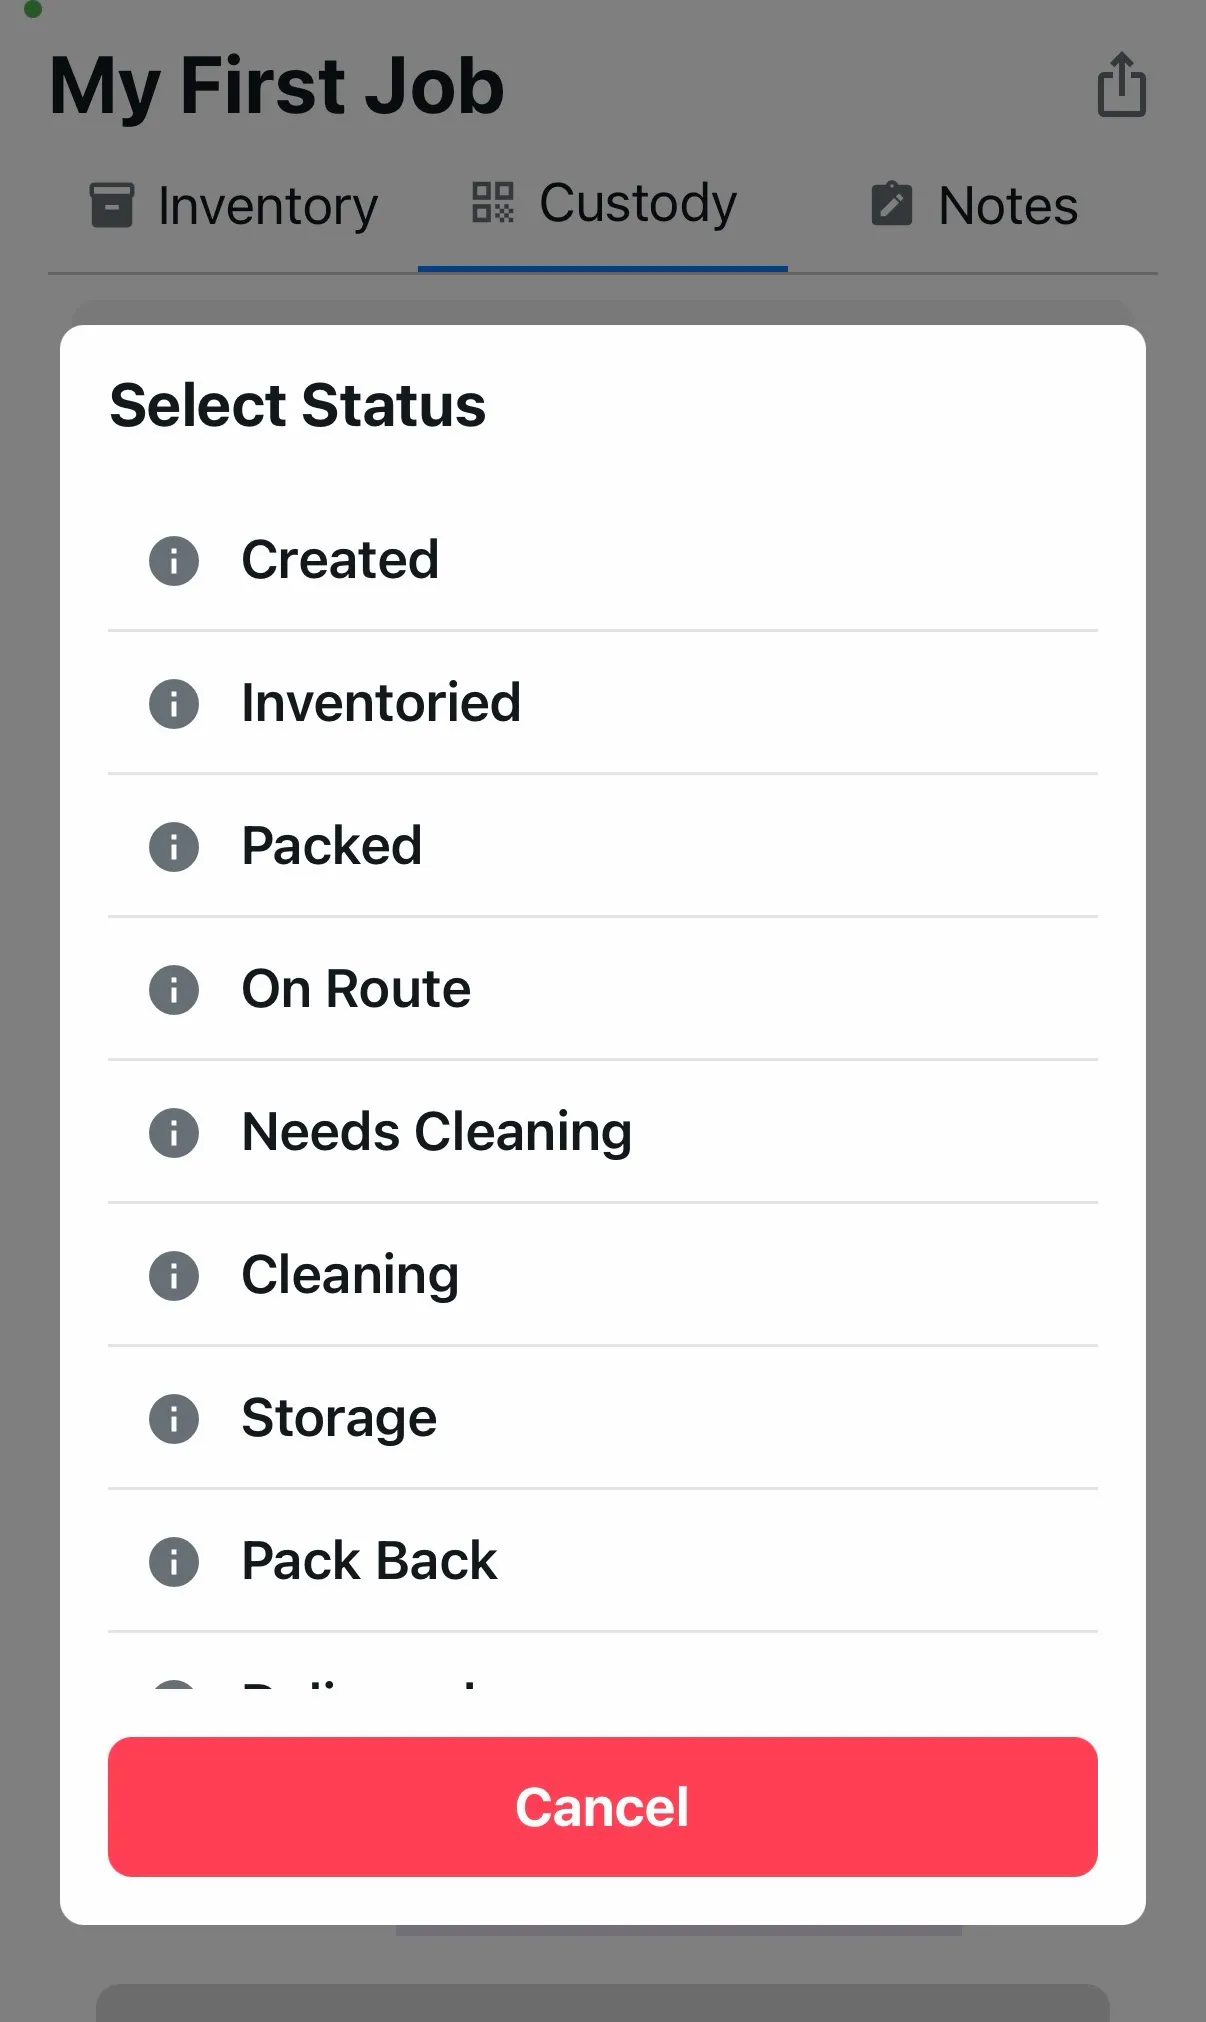
Section titled “7. Change Status if Needed (Optional)”By default, the status is set to Storage because the system assumes processed items are going into storage. If that’s not the case:
-
Open the garment bag in the Custody tab
-
Find the Status field
-
Change it to the appropriate option:
-
Delivered: If returning to customer
-
Pack Back: If items are packed and ready for pickup
-
Or other options that fit your workflow
-
✅ Best Practices
Section titled “✅ Best Practices”-
Bundle related items: Put multiple items under one label instead of creating a label for every piece of clothing
-
Take photos: Document what’s inside each garment bag so you don’t have to open it to see what’s there
-
Associate with room: Pack items by room (e.g., all Master Bedroom items together) to make returns easier
-
Use vault locations: Scan labels into storage locations so you can find them quickly later
-
Update status: Change the status from Storage to Delivered or Pack Back when items are ready to return
-
Keep labels visible: Place QR code labels on the outside of garment bags in a consistent spot for easy scanning
🧩 Troubleshooting
Section titled “🧩 Troubleshooting”I don’t see the Garment Bag option: Make sure you’re in Pack Mode (tap Pack at the bottom of the capture screen). Garment Bag should appear in the list of packing options. If you don’t see it, verify that Textiles Mode is enabled.
Can I add items to a label after I’ve exited Pack Mode? No, once you exit Pack Mode, the label is finalized. If you need to add more items, you’ll need to create a new label. Plan ahead and add all items you want to bundle before exiting.
The garment bag went to the wrong room: You can update the room association in the Custody tab by opening the garment bag details and changing the room assignment.
I forgot to take a picture: A garment bag needs at least one photo—if you exit Pack Mode without taking any, nothing is saved. Tap Pack → Garment Bag again, take a photo, scan the label, and exit.
Where do I find my packed items? Packed specialty items don’t appear in the Inventory tab—they go to the Custody tab. Look for your textile label there (e.g., “Textile #5”).
The status is wrong (shows Storage but items are delivered): Open the garment bag in the Custody tab and change the status manually. The system defaults to Storage, but you can update it to match your actual workflow.
🔑 Key Takeaways
Section titled “🔑 Key Takeaways”-
Use Pack Mode → Garment Bag to pack specialty items after processing
-
Bundle multiple items under one QR code label to simplify tracking
-
Take photos to document what’s inside each garment bag
-
Items appear in the Custody tab, not Inventory
-
Packing doesn’t create new inventory entries—it just adds items to Custody for tracking
-
Default status is Storage, but you can change it to Delivered, Pack Back, or other options
-
Scan labels into vault locations to track where garment bags are stored
-
Associate garment bags with the correct room to make returns easier