
Grid Editor
Customize your warehouse grid layout — adjust aisles, bays, and levels, add walkways, and block cells that aren’t usable for storage.
Overview
Section titled “Overview”The Grid Editor lets you visually customize the coordinate grid for a site. Instead of a basic aisle × bay × level number, you can tailor the grid to match your real-world layout:
-
Add or remove aisles, bays, and levels using the toolbar controls
-
Add walkways between rows or columns to reflect physical aisles in your facility
-
Block cells that aren’t available for storage (pillars, doors, unusable spots)
All changes are previewed live and only saved when you click Save.
Opening the Grid Editor
Section titled “Opening the Grid Editor”-
Navigate to Sites and select the site you want to edit.
-
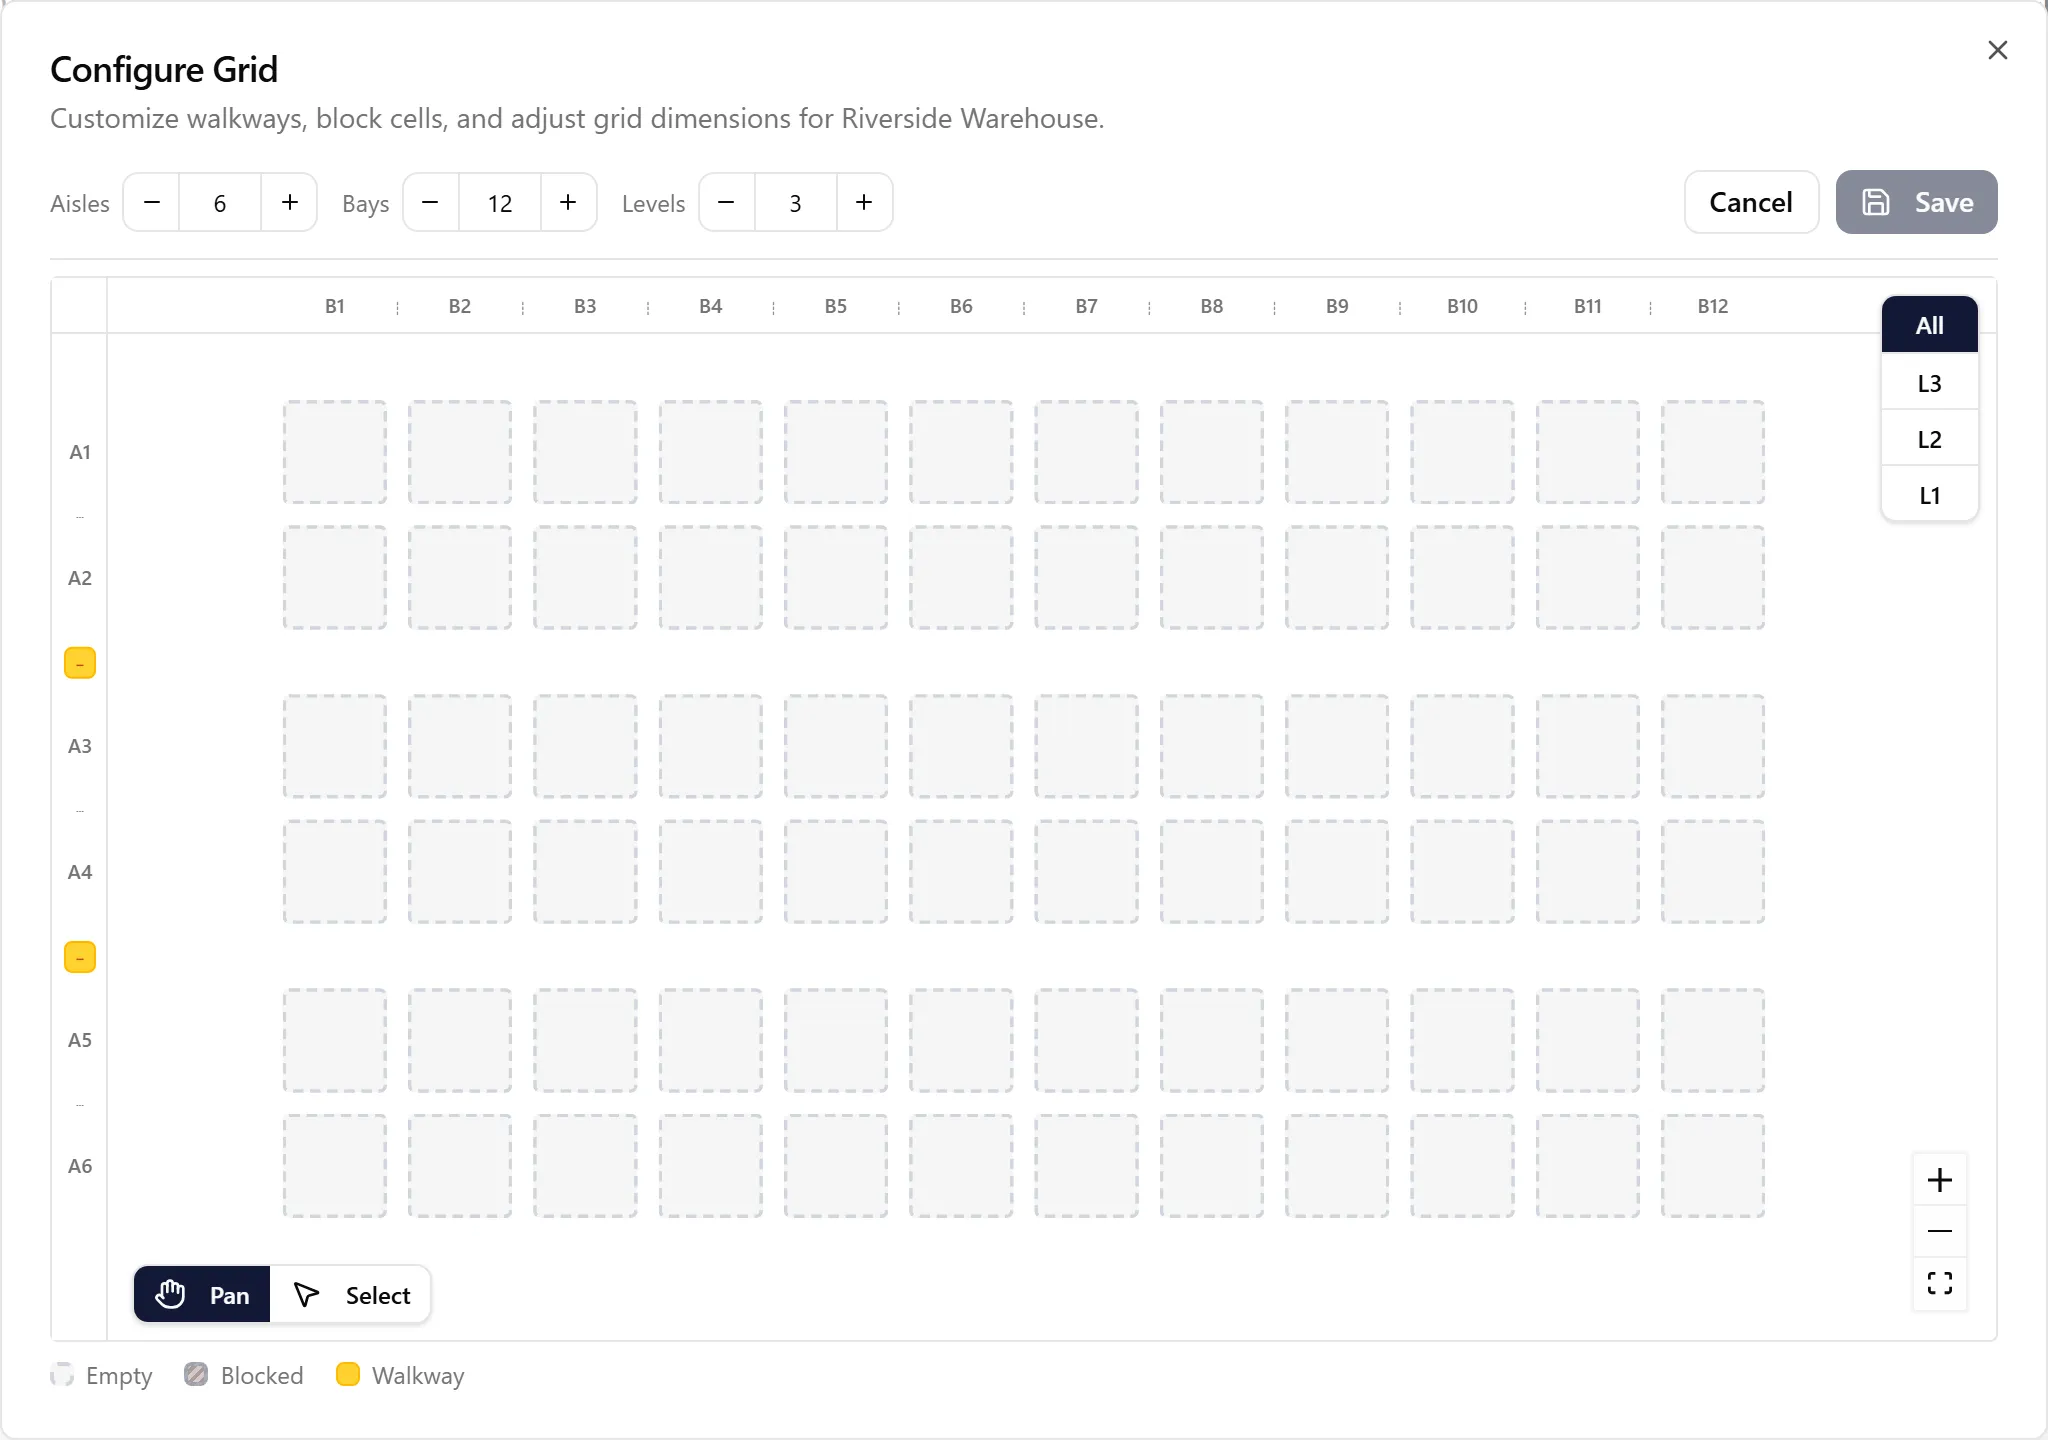
Click Configure (gear icon) at the top of the grid, next to the 2D / 2.5D / 3D switch. The grid shows in the Table & grid and Grid views.

You’ll see a full view of your grid with controls for editing.
(Note: When you create a new site with Add Site, the same editor appears as the Layout step of the setup, so you can lay out the grid before the site is finished.)
Adjusting Grid Dimensions
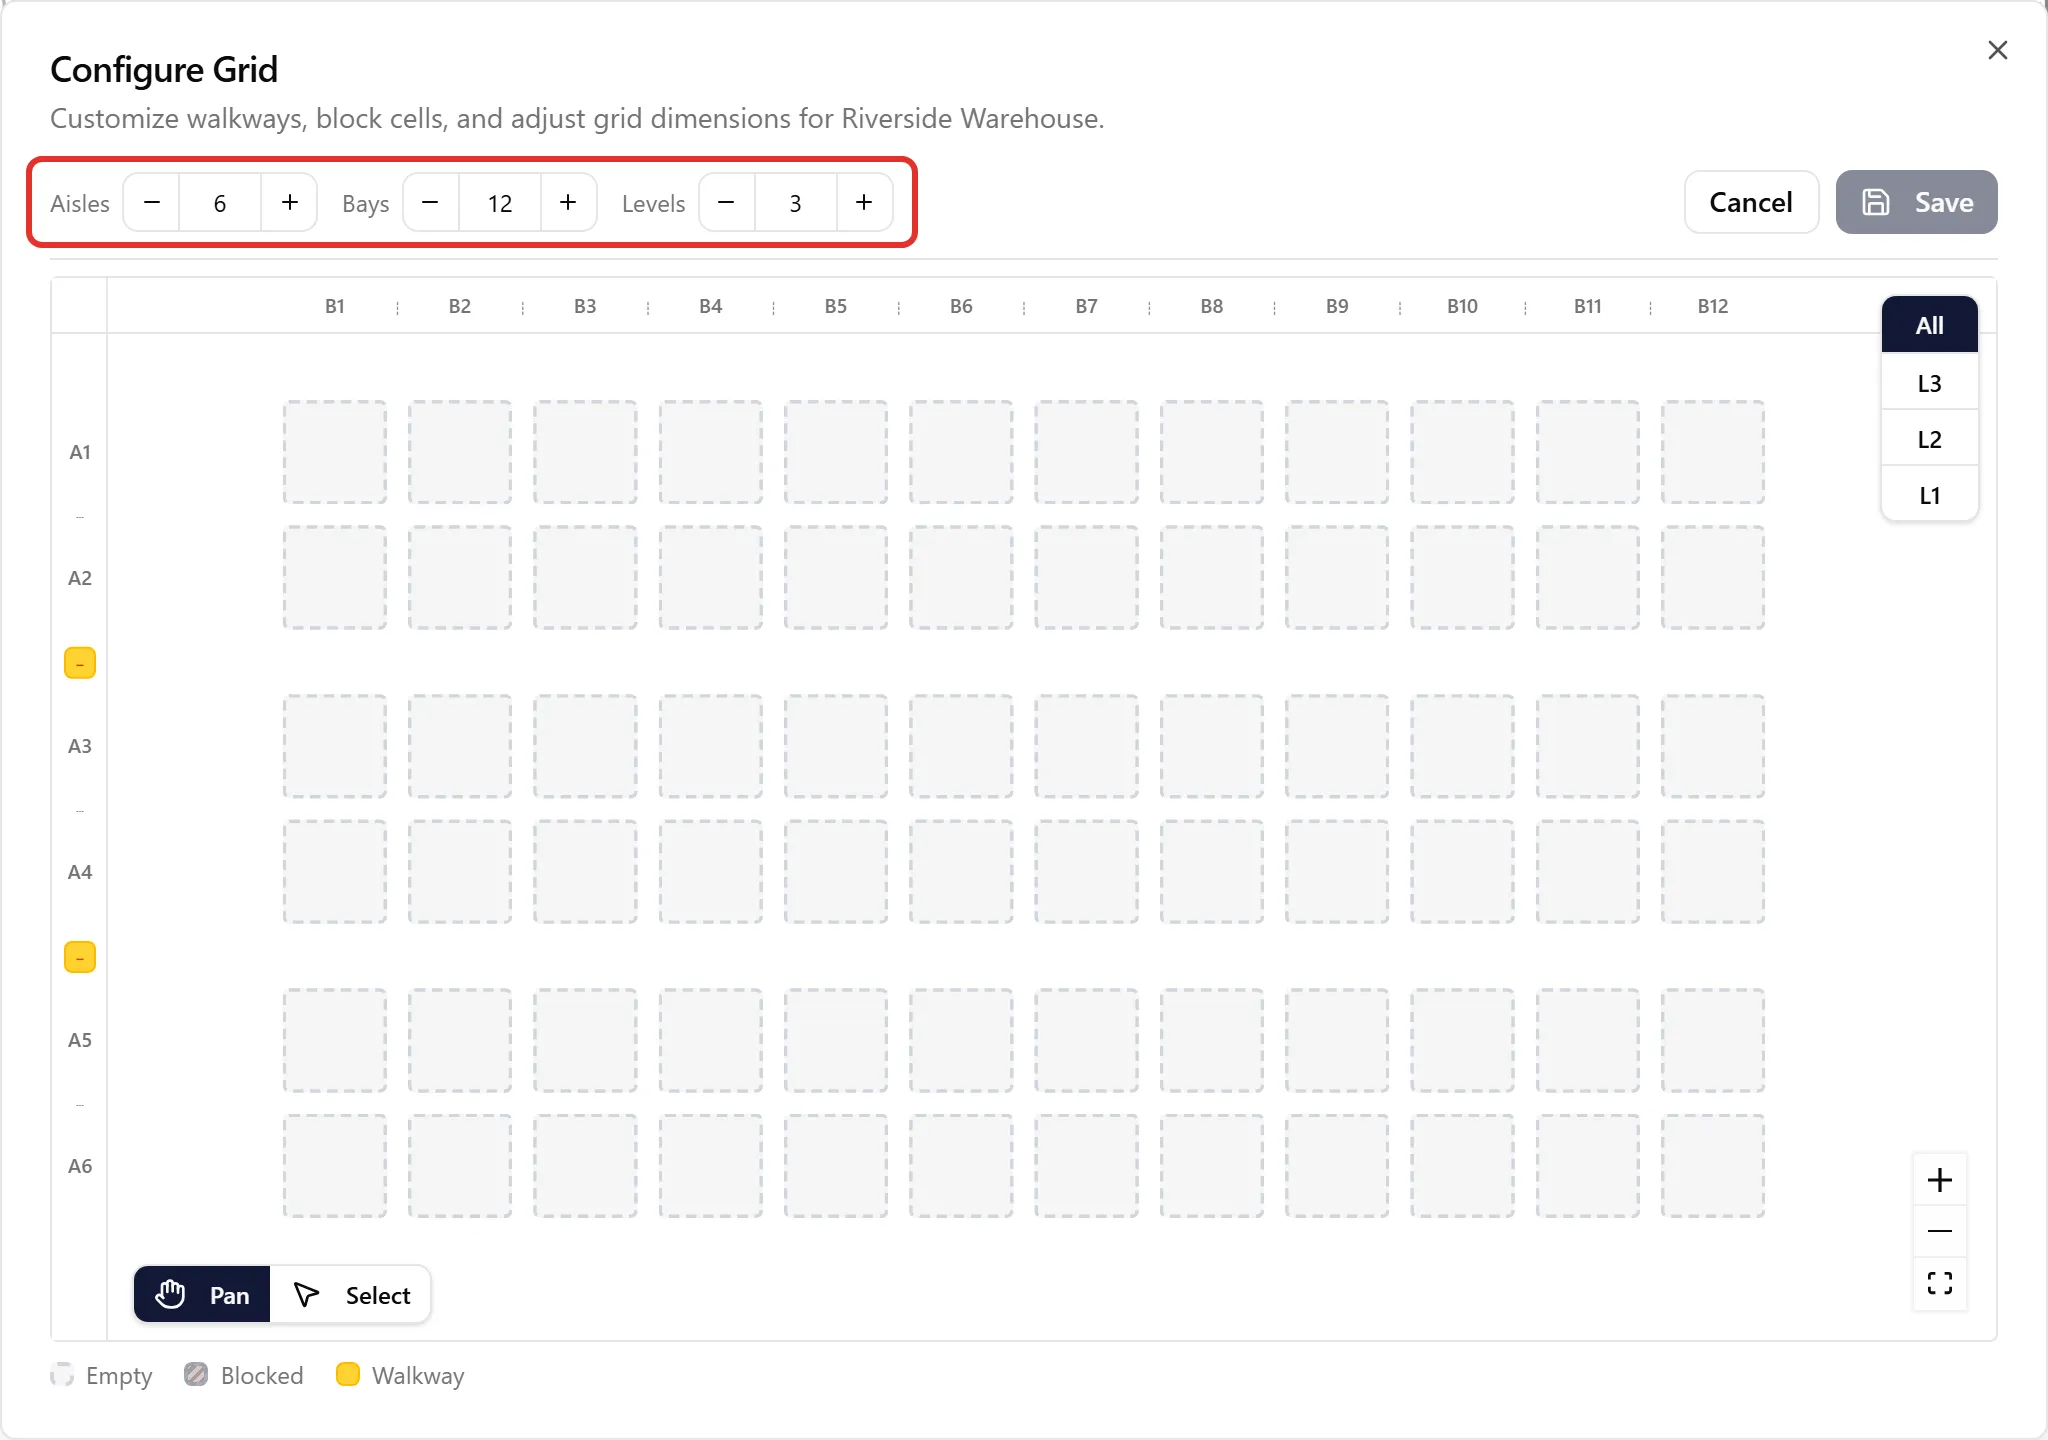
Section titled “Adjusting Grid Dimensions”At the top of the editor you’ll find controls for Aisles, Bays, and Levels:
-
Use the +/− buttons to add or remove aisles, bays, or levels one at a time.
-
Or type a number directly into the field to jump to a specific size.
The maximum size is 64 aisles, 64 bays, and 15 levels.
Adding Walkways
Section titled “Adding Walkways”Walkways are the gaps between rows or columns that represent the physical aisles in your facility.
To add or remove a walkway:
-
Look at the axis labels on the left side (aisles: A1, A2, …) or across the top (bays: B1, B2, …).
-
Between each pair of labels, you’ll see a small clickable indicator.
-
Click it to add a walkway (it turns amber) or click again to remove it.
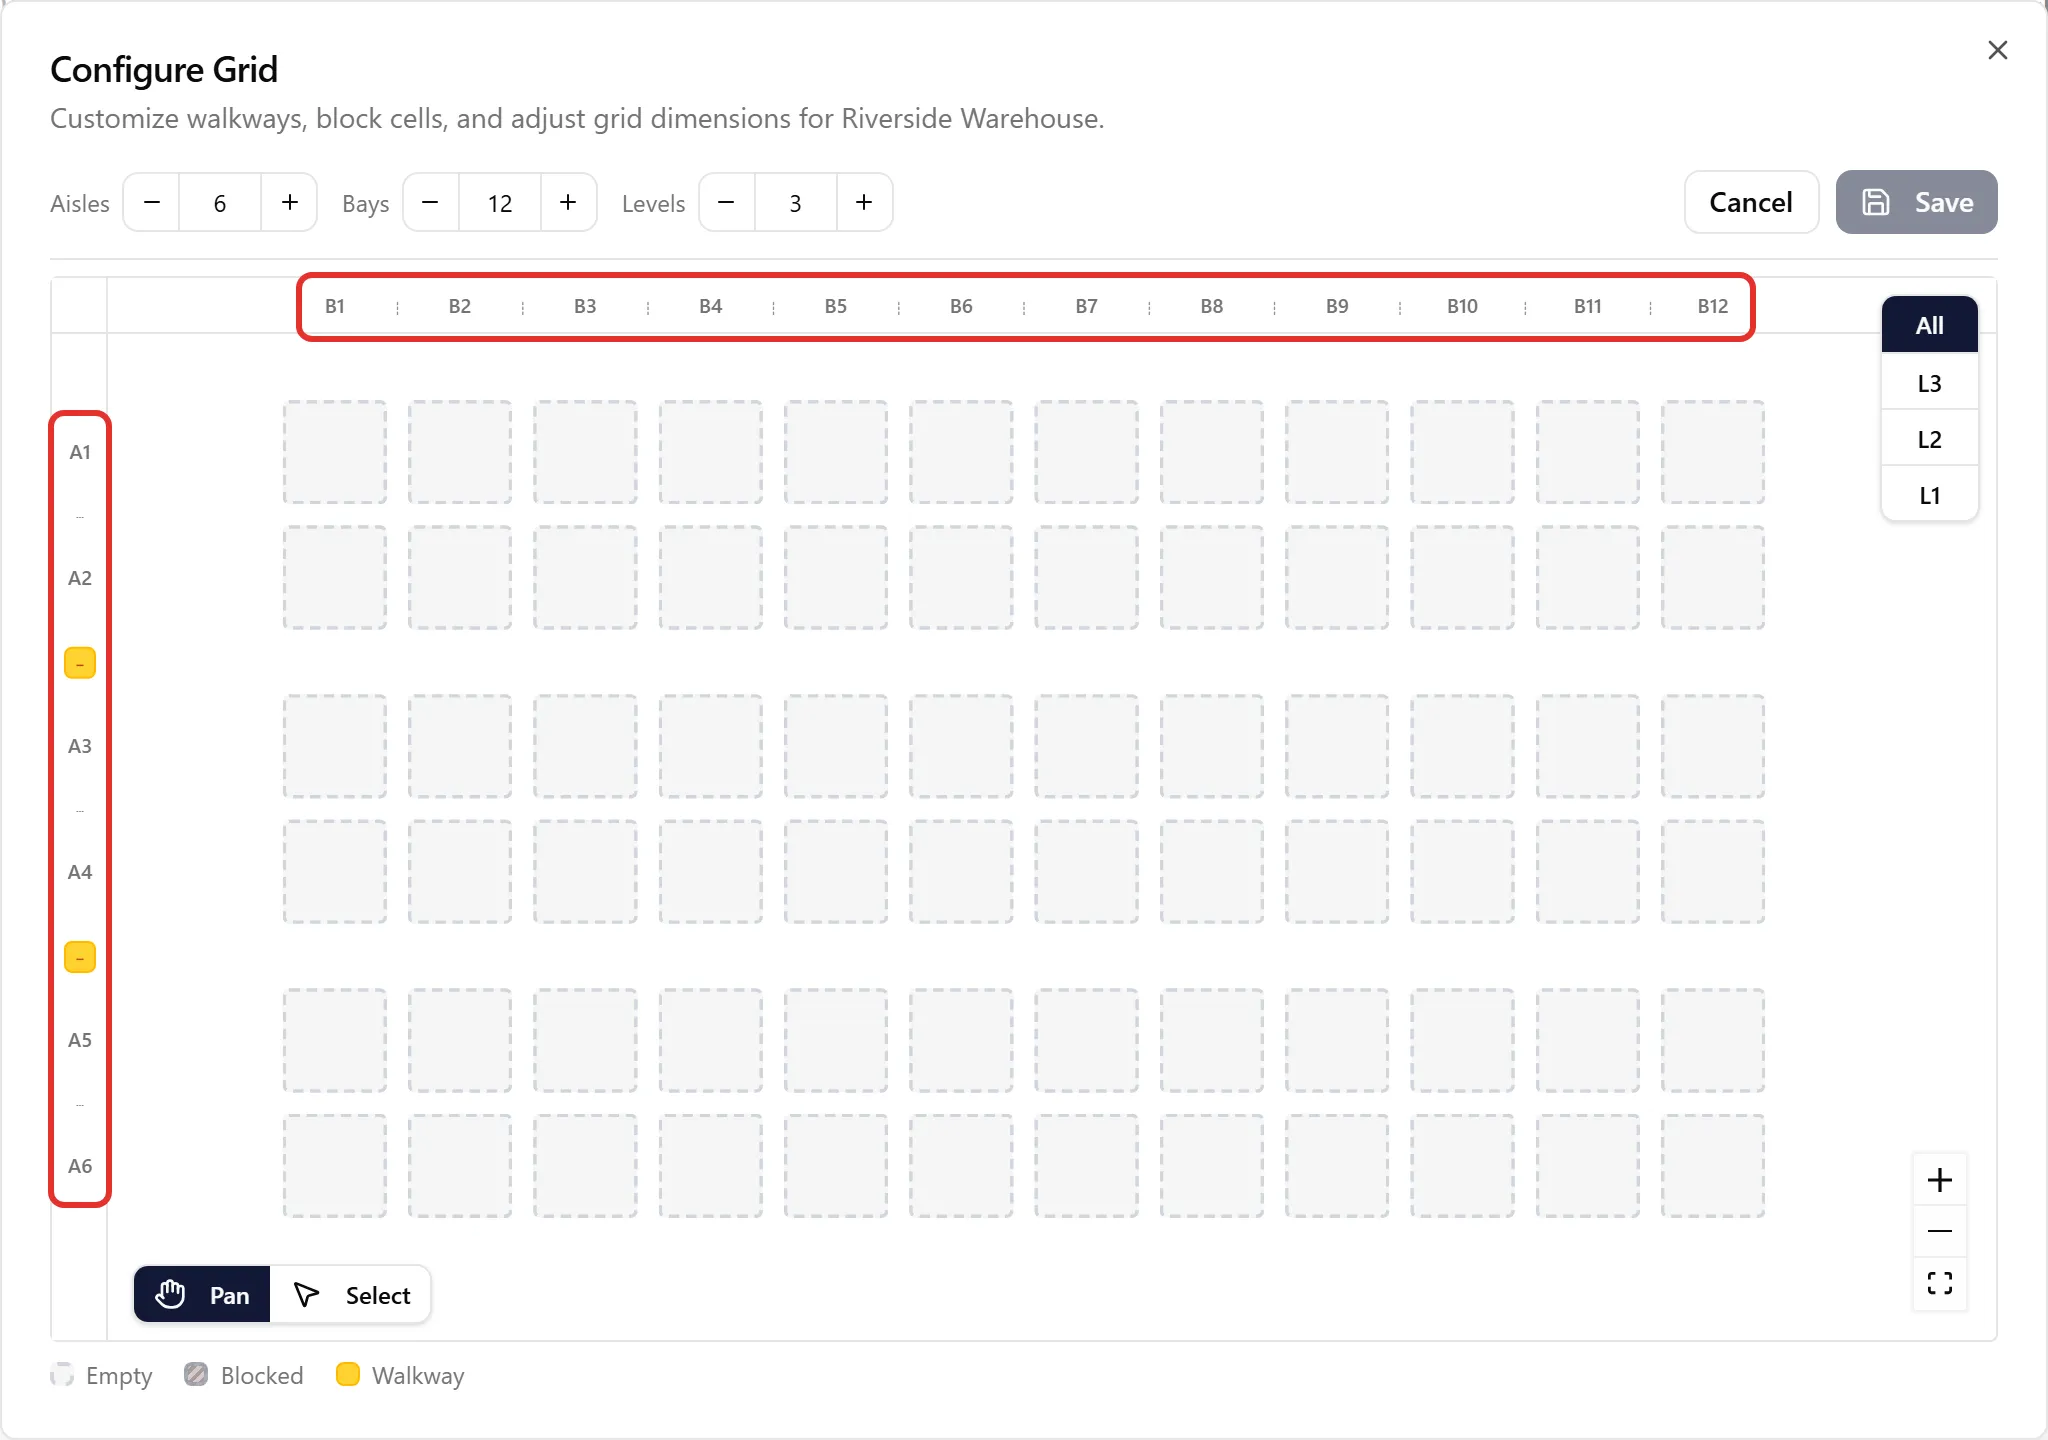
(Note: Walkways apply to all levels — they represent the physical floor plan of your facility.)
Blocking Cells
Section titled “Blocking Cells”Some grid positions may not be usable for storage — pillars, doorways, equipment areas, etc. You can block these cells so they can’t be assigned to locations.
Selecting Cells
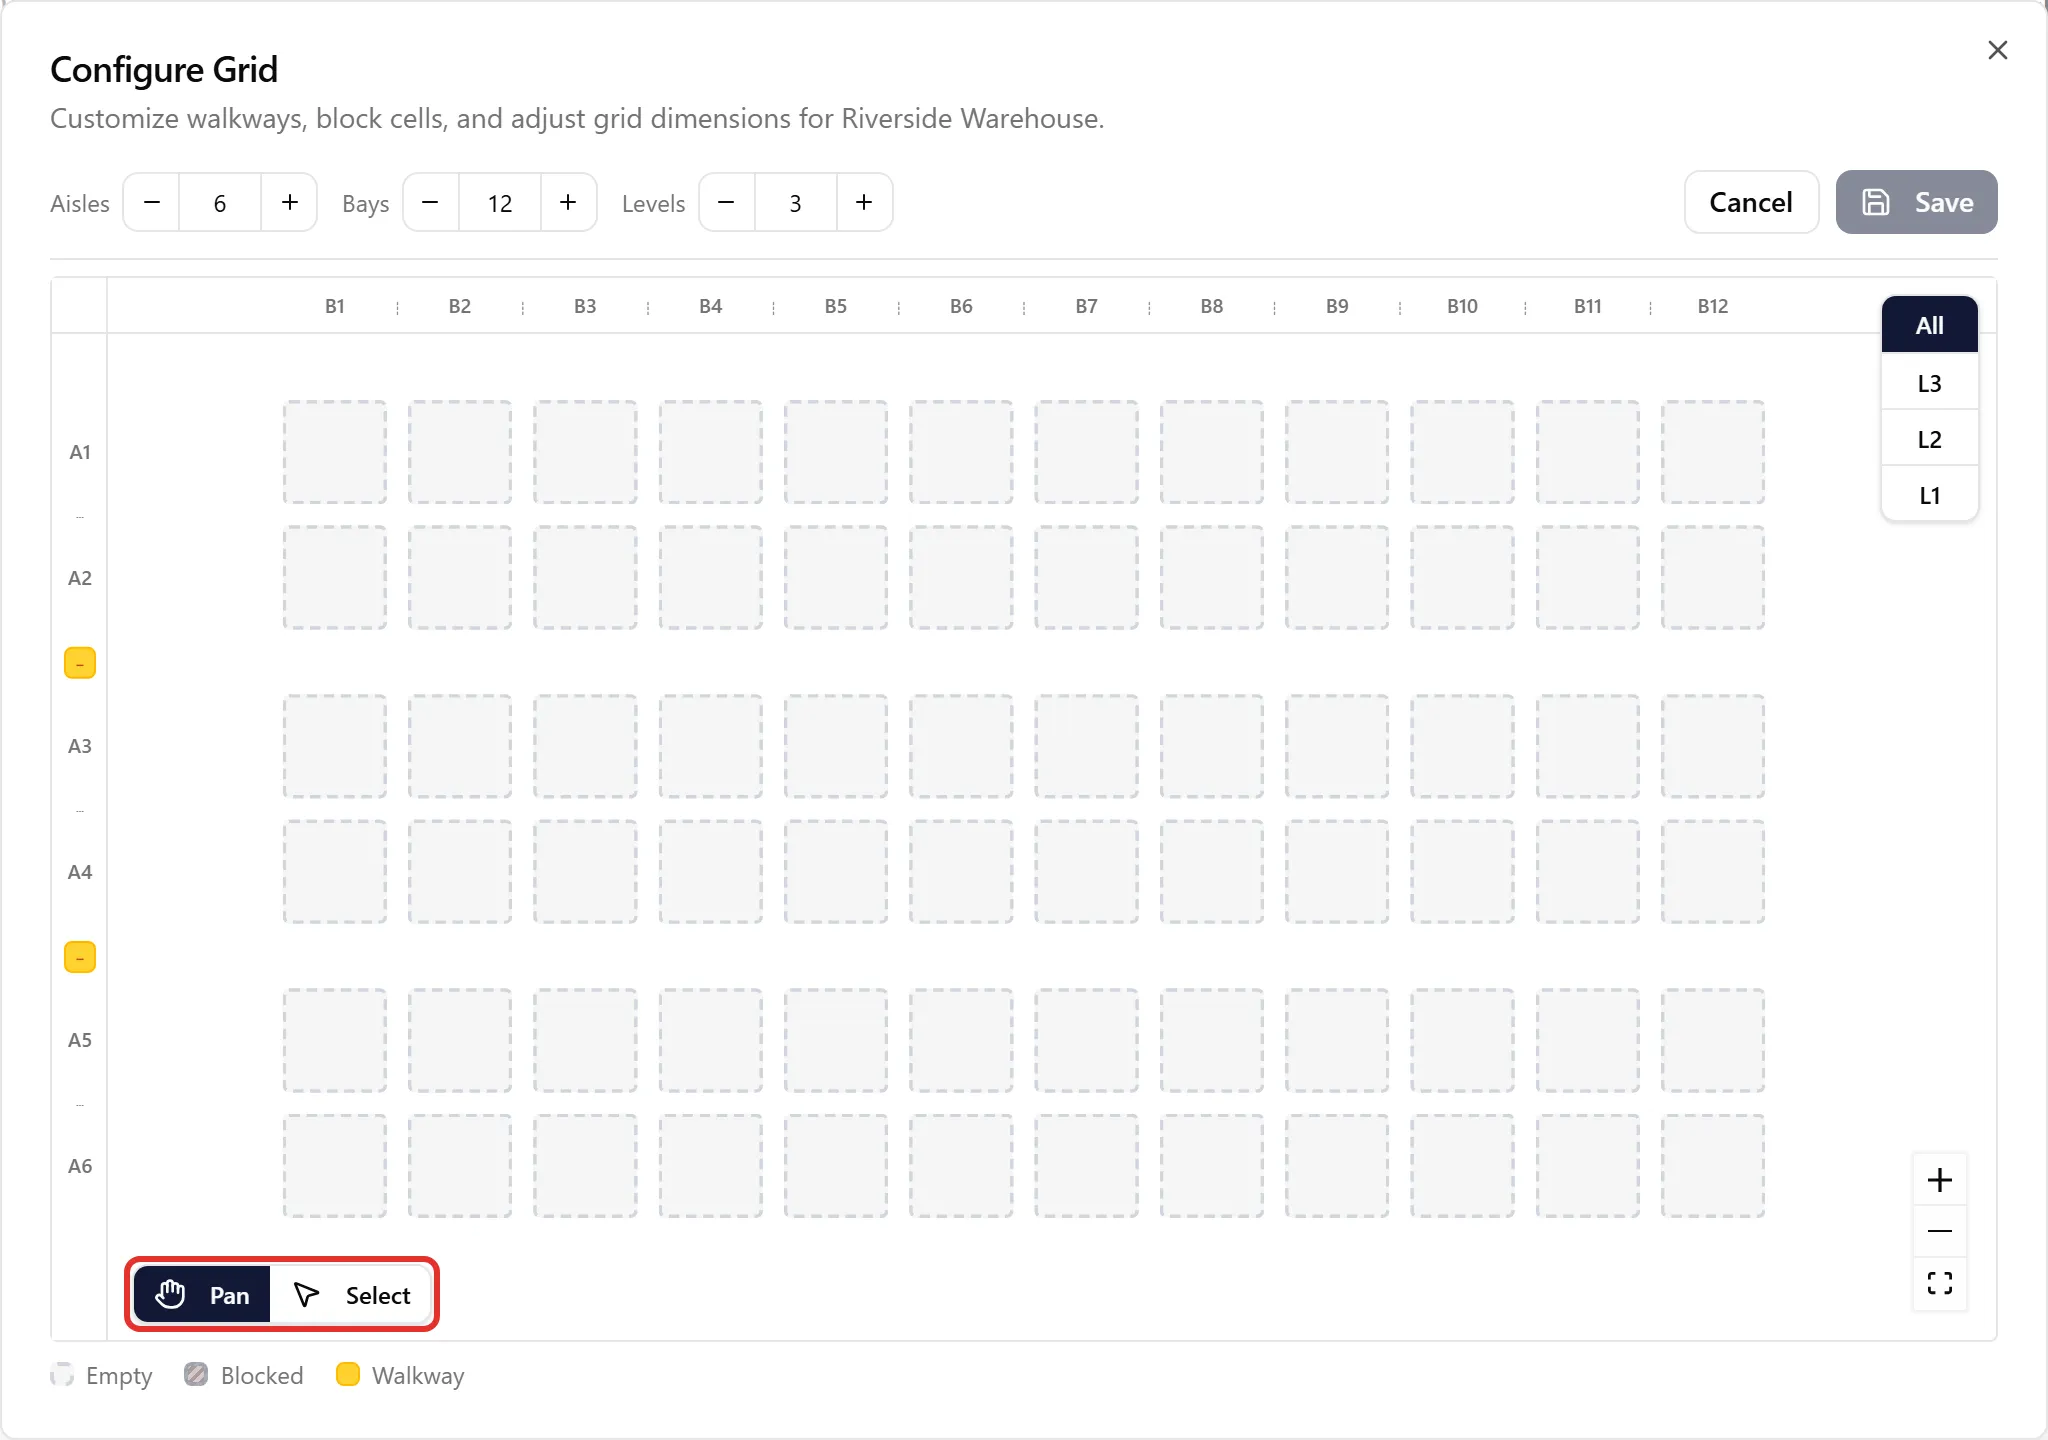
Section titled “Selecting Cells”Use the Pan / Select toggle at the bottom-left of the grid to switch between modes:
-
Pan mode (default) — drag to move around the grid.
-
Select mode — drag to draw a selection rectangle over multiple cells, or click individual cells to select them.
(Tip: In Pan mode, you can hold Shift while dragging as a shortcut to select cells without switching modes.)
Blocking and Unblocking
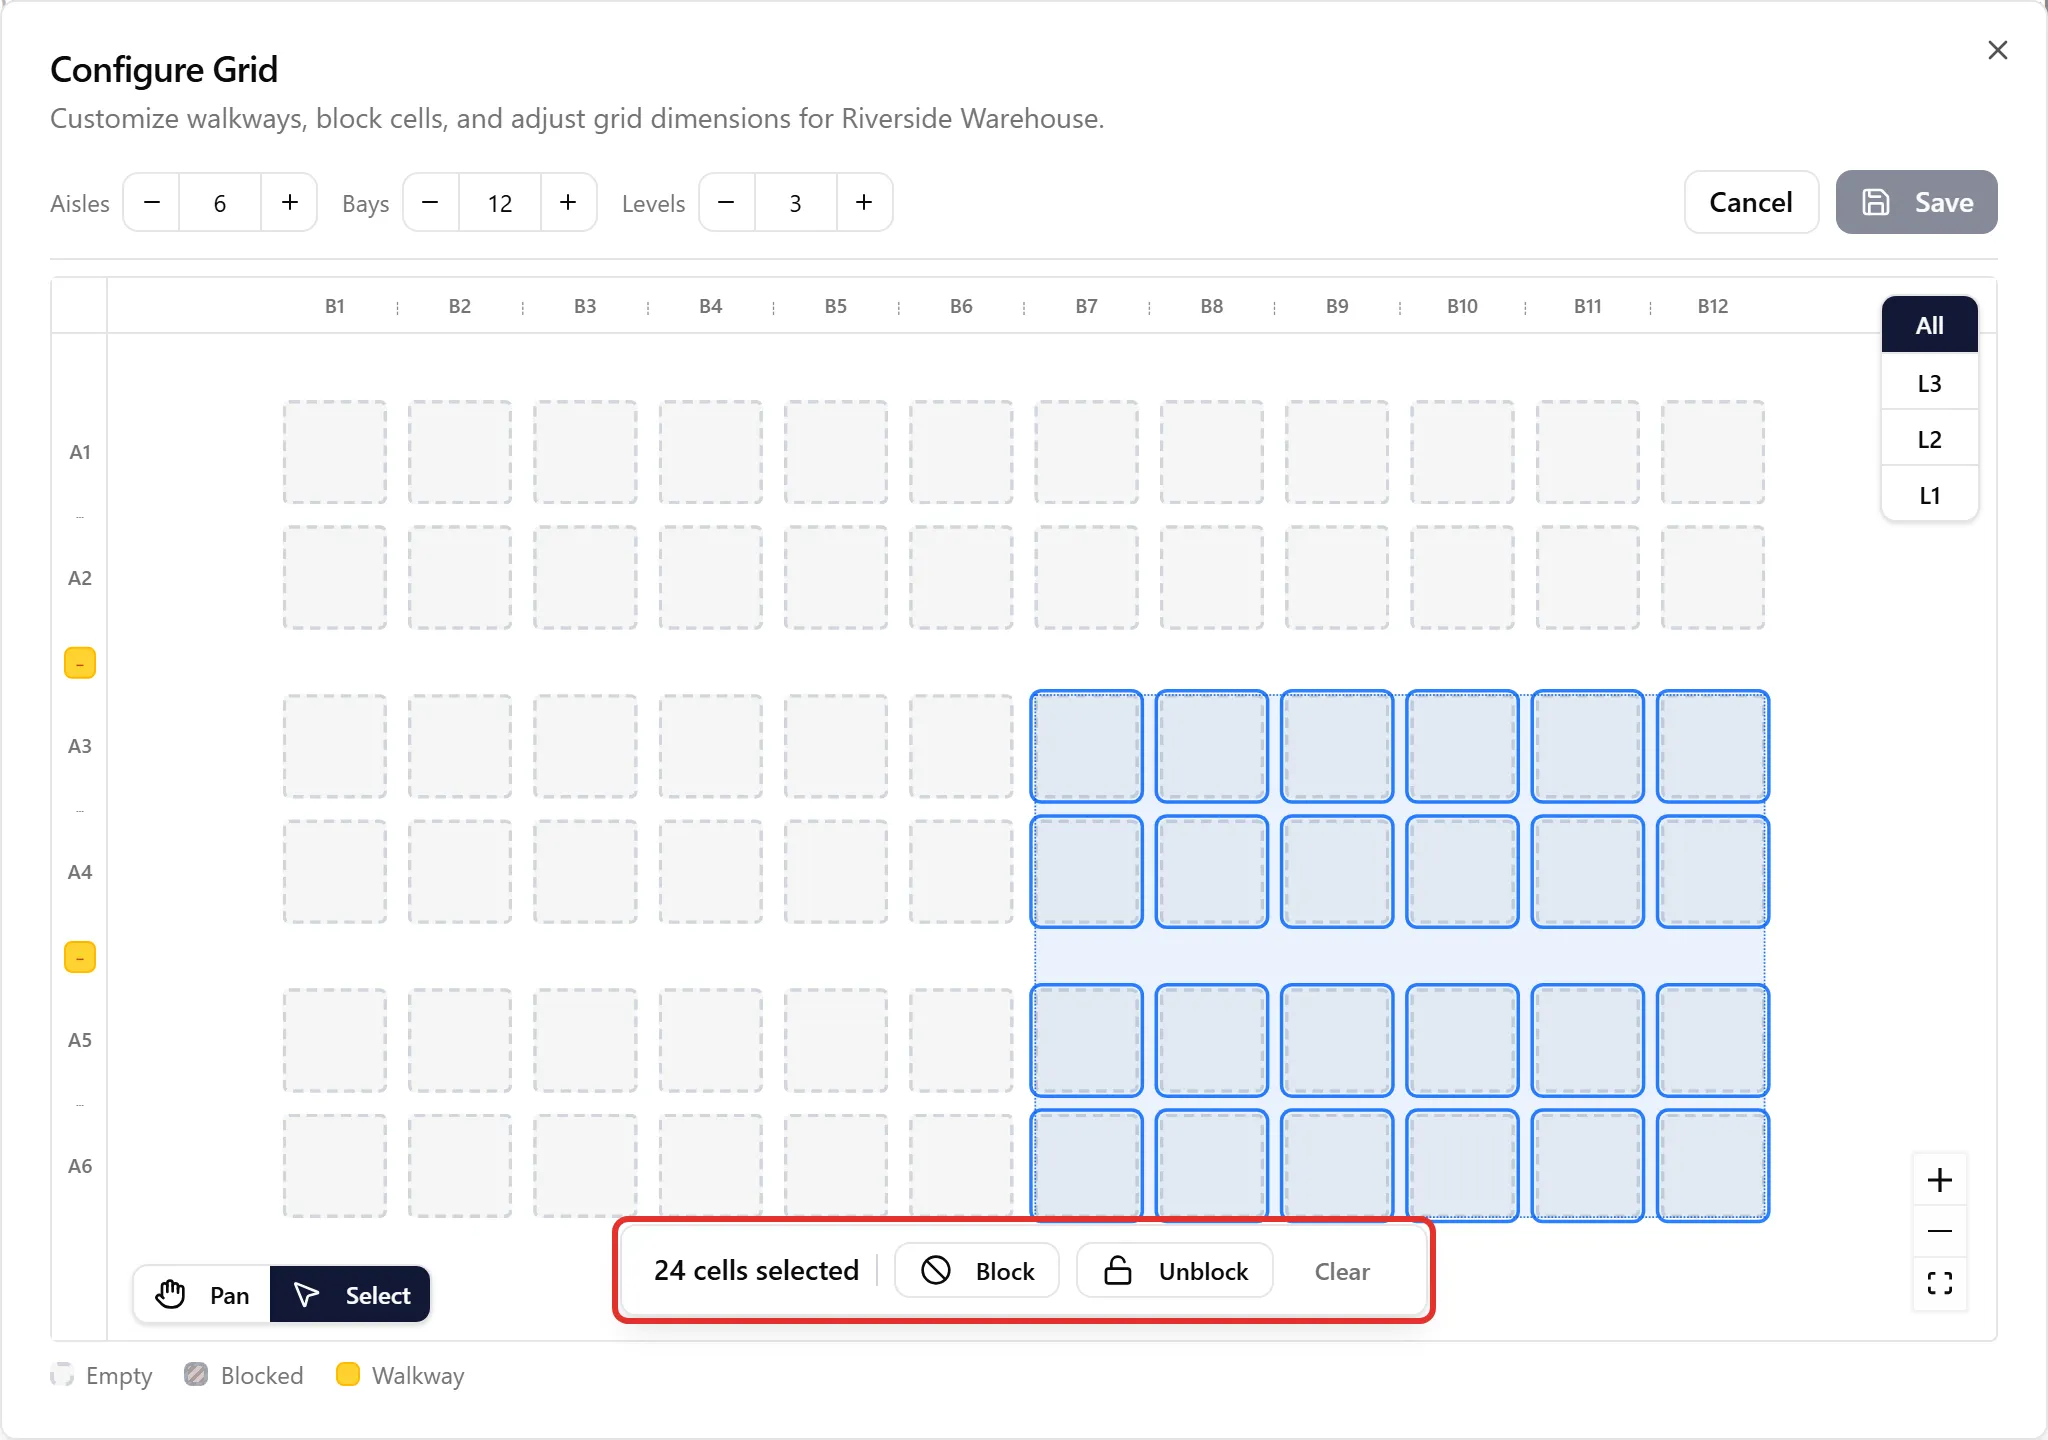
Section titled “Blocking and Unblocking”Once cells are selected, an action bar appears at the bottom of the grid:
-
Click Block to mark selected cells as blocked (shown with a striped pattern).
-
Click Unblock to make blocked cells available again.
-
Click Clear to deselect all cells.
Blocked cells are per-level — you can block different cells on each level of the grid. To block (or unblock) the same spot on every level at once, choose All in the level selector before you click Block or Unblock.
Working with Multiple Levels
Section titled “Working with Multiple Levels”If your site has more than one level, a level selector appears in the top-right corner of the grid, with an All option above the individual levels:
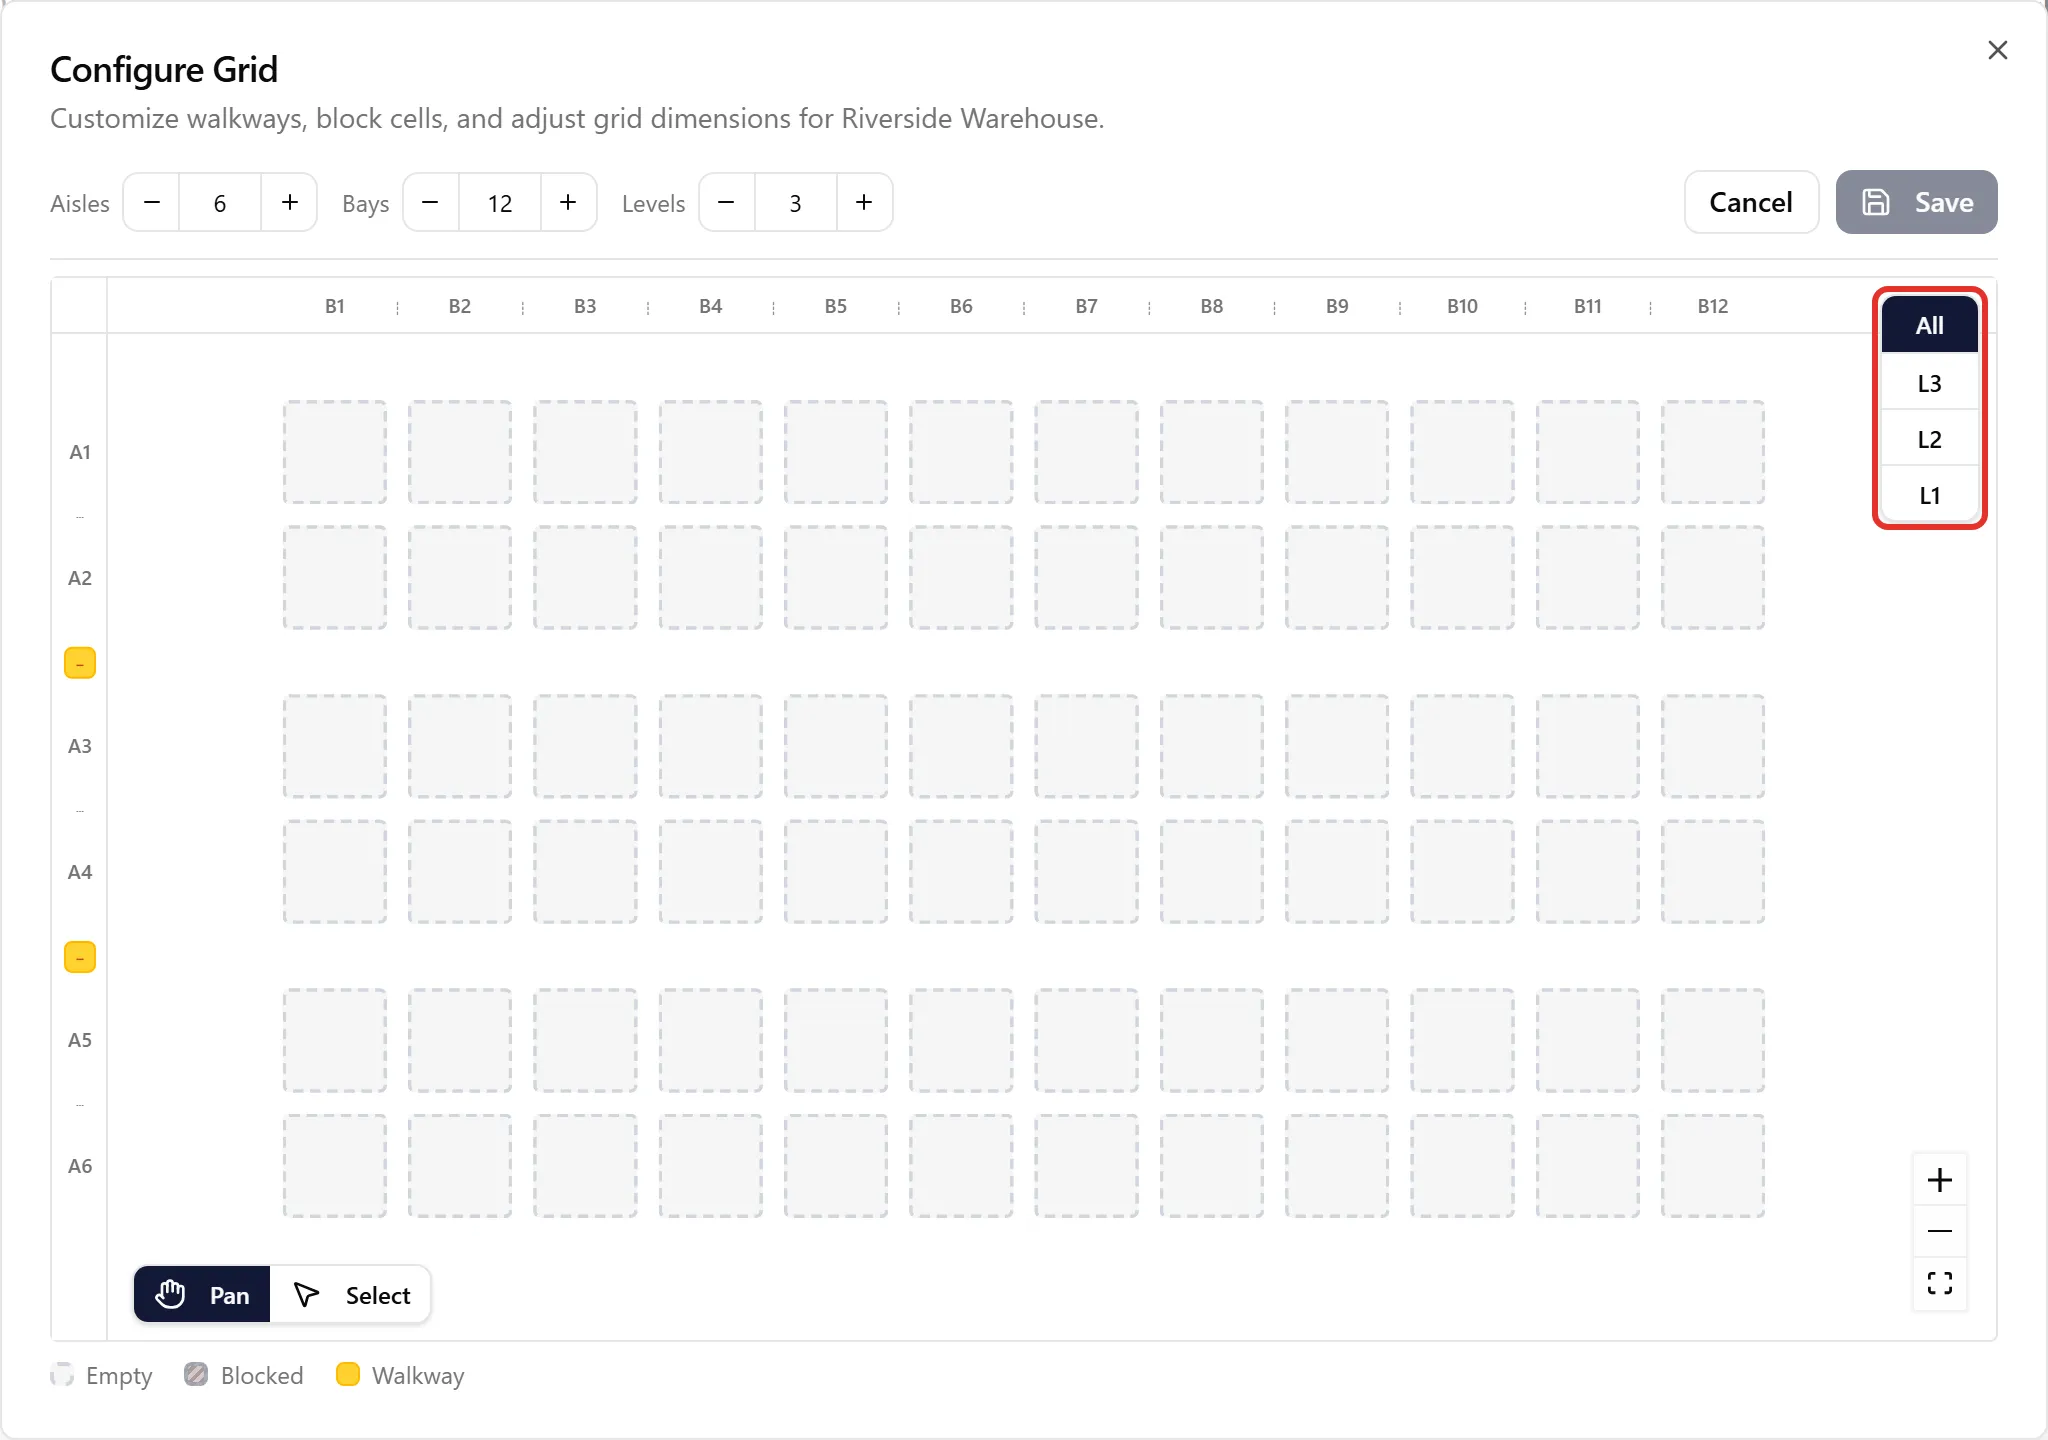
Click a level to switch views, or All to work on every level at once. Blocked cells are specific to each level, while walkways and grid dimensions apply across all levels.
Saving Changes
Section titled “Saving Changes”When you’re done editing:
-
Click Save in the toolbar.
-
If any existing locations would be affected — for example, because they now fall outside the grid or sit on a blocked cell — you’ll see a confirmation listing the affected locations.
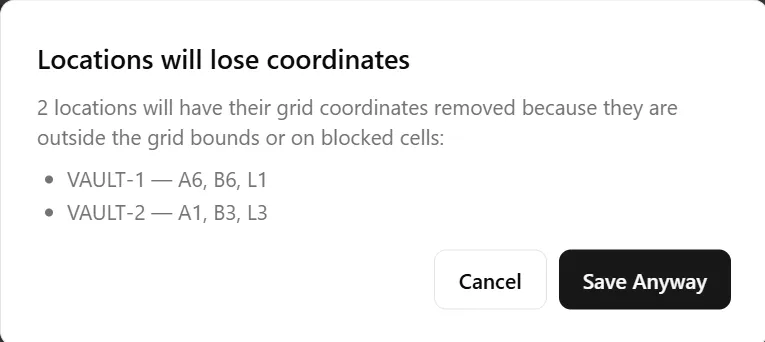
- Click Save Anyway to proceed, or Cancel to go back and adjust.
All changes — dimensions, walkways, and blocked cells — are saved together.
-
Walkways are visual — they create gaps in the grid to match your physical layout but don’t change the coordinate numbering (A1 is still A1 even with walkways between rows).
-
Blocked cells can’t have locations — if you block a cell that already has a location, that location’s coordinates will be cleared when you save.
-
Nothing saves until you click Save — click Cancel at any time to discard all changes.
-
A walkway runs the full length of the grid. If you only need a gap along part of a row, block those cells instead.
Troubleshooting
Section titled “Troubleshooting”A cell I unblocked still shows as blocked. Blocked cells are set per level, so the cell may still be blocked on another level. Check each level in the level selector, or choose All and click Unblock to clear that spot on every level.