
🗂️ Grouping Custody Labels
Group the labels that travel together — boxes on a pallet, in a crate, or on a rack — under one grouping label, so one change to the group updates every label in it and their items.
🧭 Summary
Section titled “🧭 Summary”A grouping label is a custody label with its own QR code that holds other labels instead of items. Its room, status, salvage and cleaning categories, hashtags, and storage location apply to every label in the group, and through them to their items. Set a pallet’s status or move it into a vault once, and every box on it follows.
You can group labels on the web portal and in the mobile app, and in Warehouse mode a scan of the grouping label moves the whole group at once.
🧩 When to Use It
Section titled “🧩 When to Use It”-
Pallets — several boxes shrink-wrapped onto one pallet and stored as one unit
-
Crates — boxes or tagged items packed into a vault crate together
-
Racks — garment bags or textiles hung on one rack
Keep a grouping label on the outside of the pallet, crate, or rack and scan it whenever the whole unit moves.
📏 How Groups Work
Section titled “📏 How Groups Work”-
The group decides. Changing the grouping label’s room, status, salvage category, cleaning category, hashtags, or storage location applies the change to every label in the group. Room, status, and the categories also reach those labels’ items; hashtags stop at the labels.
-
Grouped labels are locked for those fields. A label inside a group can’t change them on its own — not on its own screen, not in batch edit, and not in Warehouse mode. Everything else about it (name, type, box size, comments, photos, consumables, and its items) stays editable.
-
One level deep. A label inside a group can’t group other labels, and a grouping label can’t join another group.
-
Grouping labels never hold items. They aren’t offered when you pick a label for an item. Labels that already hold items can join a group, but a label that holds items can’t become a grouping label.
-
Joining copies the group’s values. A label that joins a group takes on the group’s room, status, categories, hashtags, and storage location, and its items take on the room, status, and categories. A group with no room set leaves its labels’ rooms alone.
-
Leaving keeps them. A label that leaves a group keeps every value it got from the group and becomes editable on its own again.
-
Groups don’t count as containers. Grouping labels are left out of the box and tag counts in the Custody summary and out of reports, so a pallet never counts twice.
🖥️ On the Web Portal
Section titled “🖥️ On the Web Portal”1. Group Labels You Already Have
Section titled “1. Group Labels You Already Have”-
Open the job and click the Custody tab.
-
Tick the labels that belong together.
-
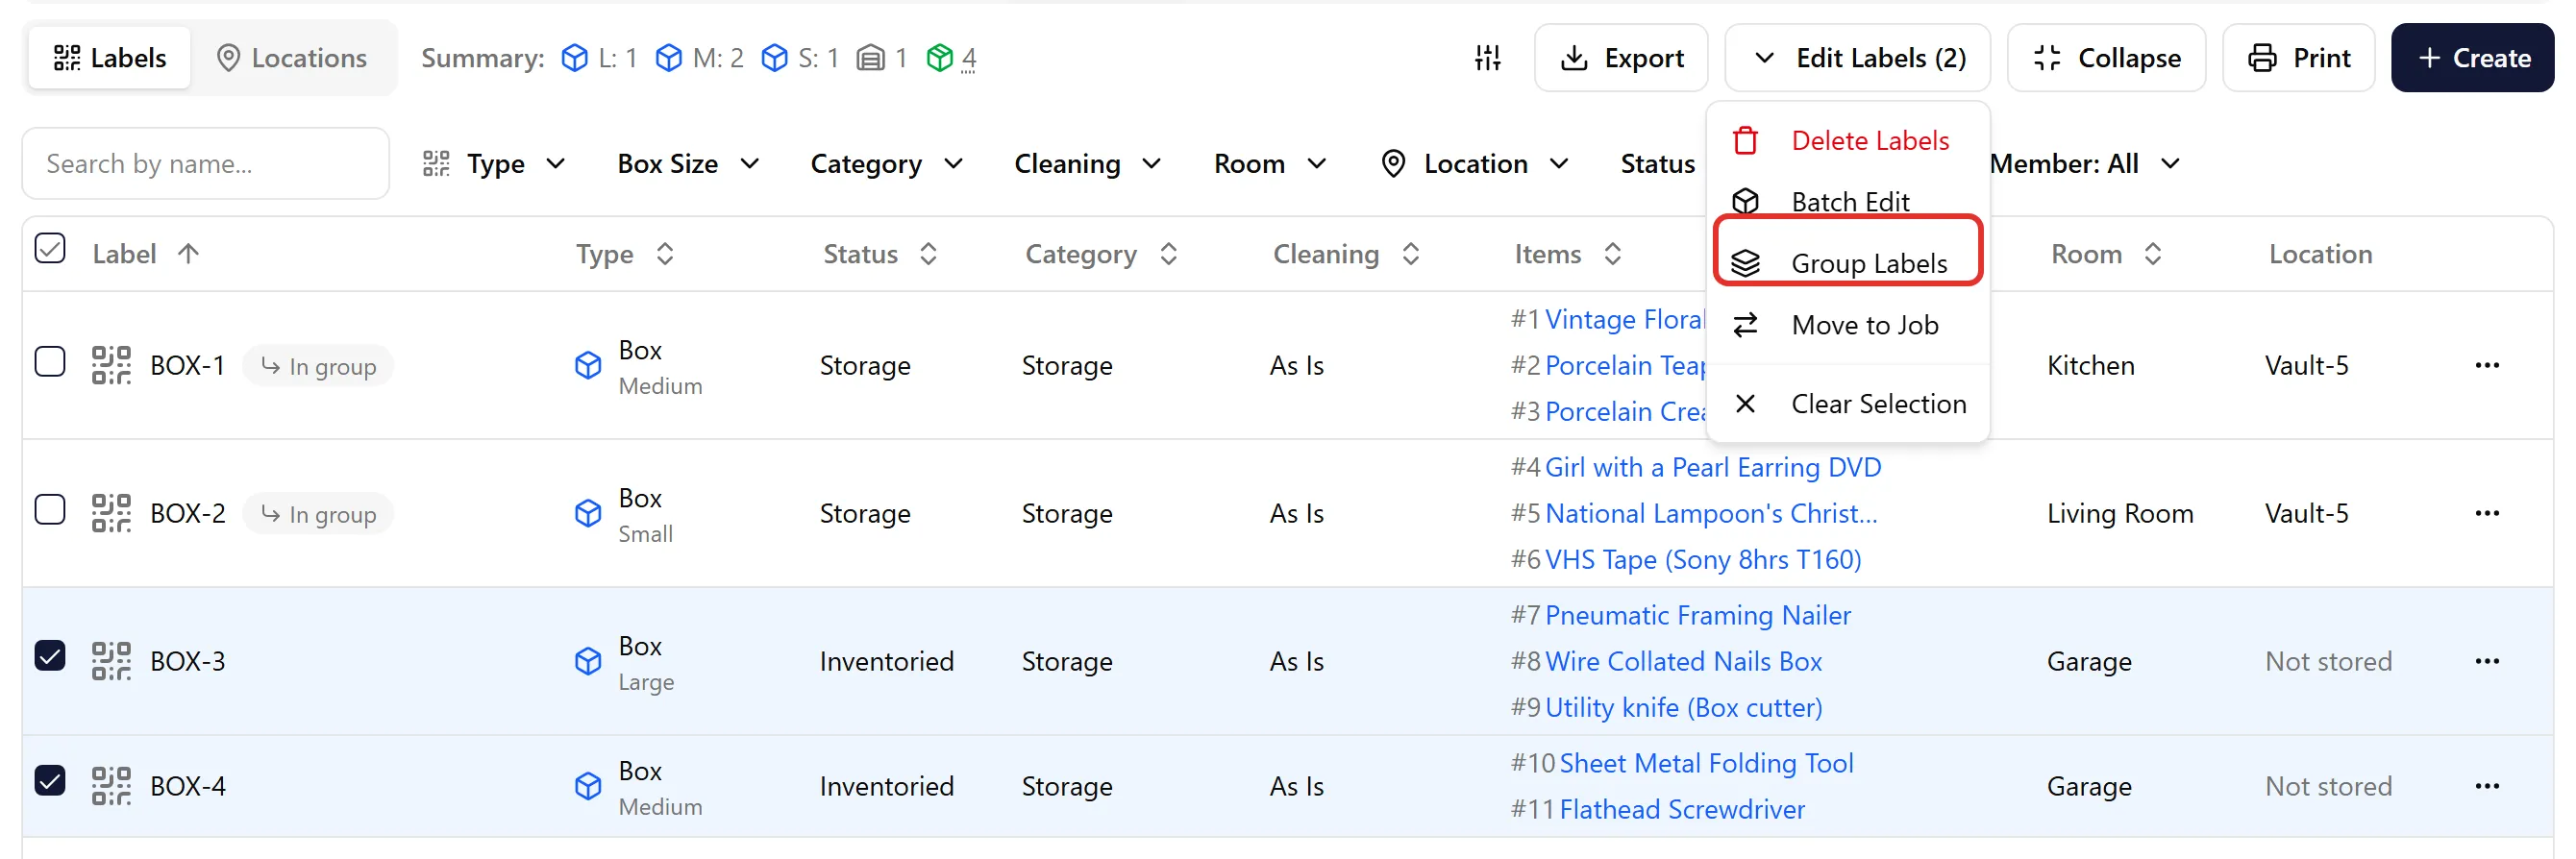
Click Edit Labels (N) and choose Group Labels.
-
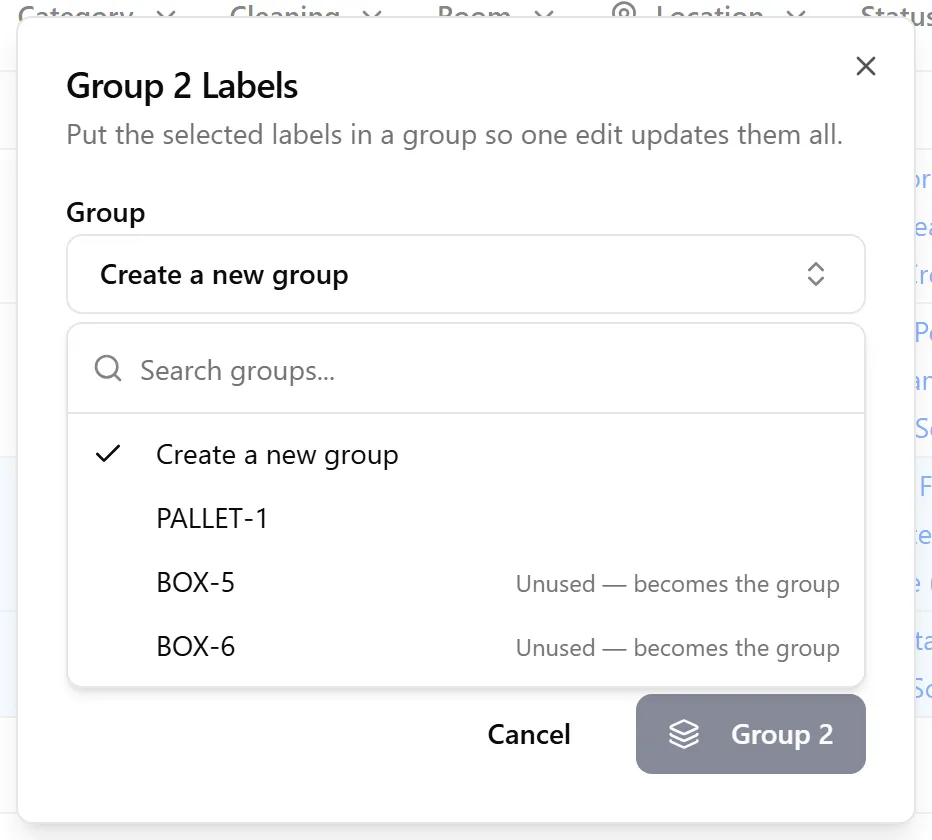
Under Group, choose where the labels go:
-
Create a new group — type a name for it in New group name, e.g.
PALLET-1. A new grouping label with that name is added to the job. -
An existing group — adds the labels to a group already on the job.
-
An unused label — a printed label that’s still Created and holds no items is listed as Unused — becomes the group. Pick it and it becomes the grouping label, so a pallet placard you printed in advance becomes the group the first time you use it.
-
- Click Group N.
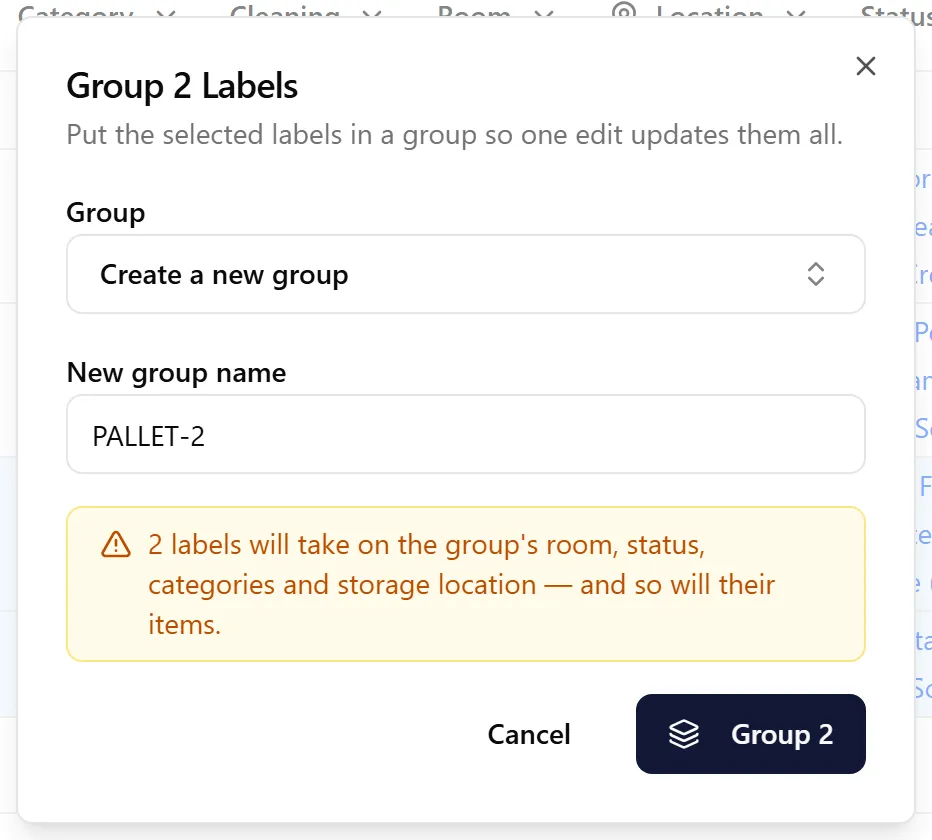
The dialog warns you that the labels will take on the group’s room, status, categories, and storage location, and so will their items. Labels that can’t be grouped — grouping labels, or labels already in another group — are skipped, and the dialog says how many.
2. Create a Grouping Label From Scratch
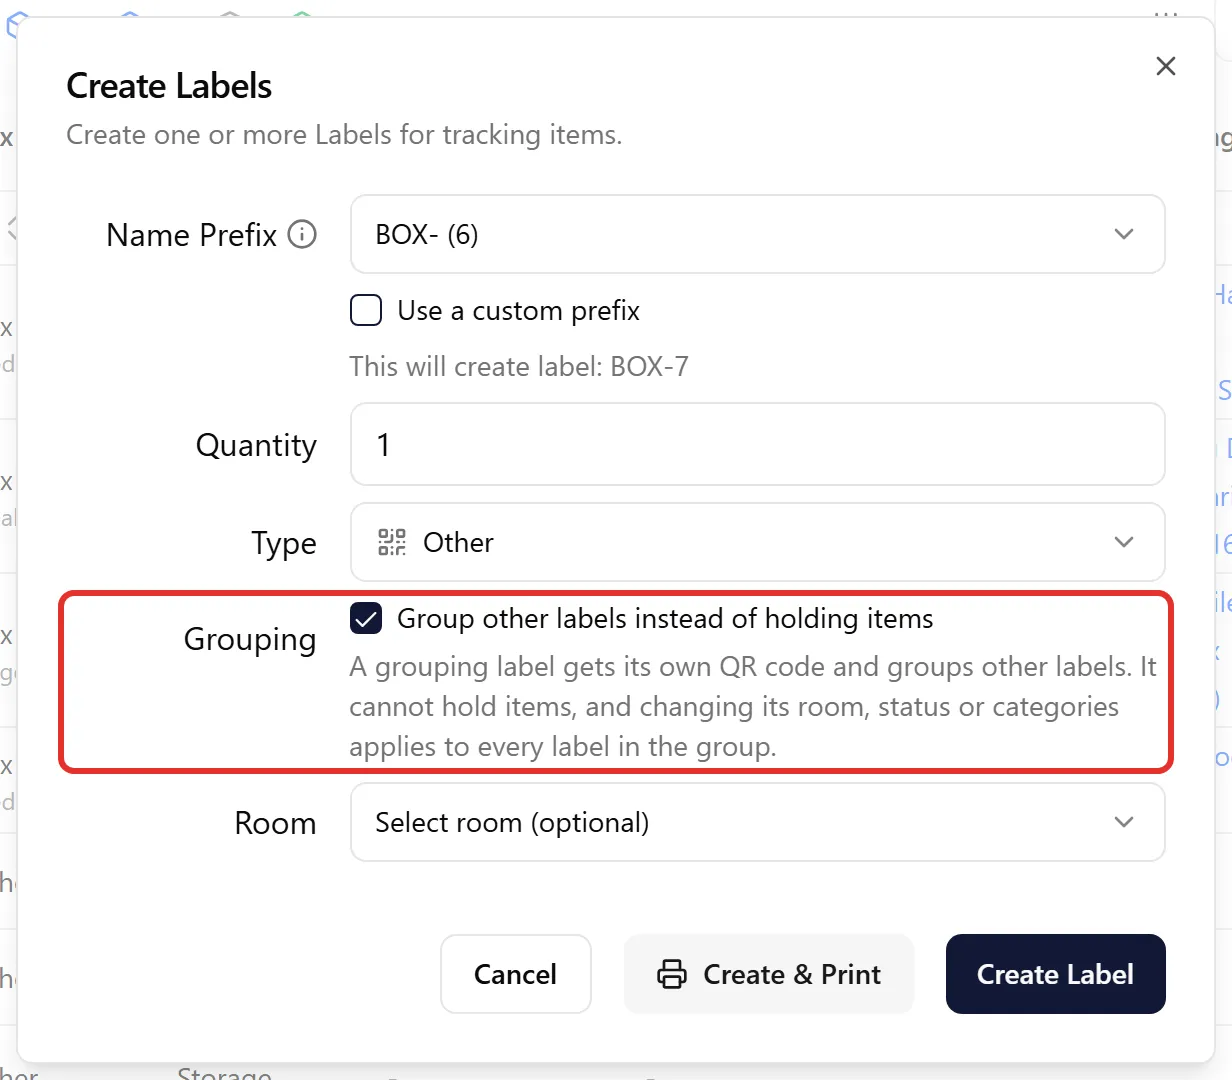
Section titled “2. Create a Grouping Label From Scratch”Click Create on the Custody tab and tick Group other labels instead of holding items next to Grouping. The new labels are grouping labels with their own QR codes, ready to print. They’re always created with the type Other, whatever type is picked.
3. See Groups in the Label Table
Section titled “3. See Groups in the Label Table”-
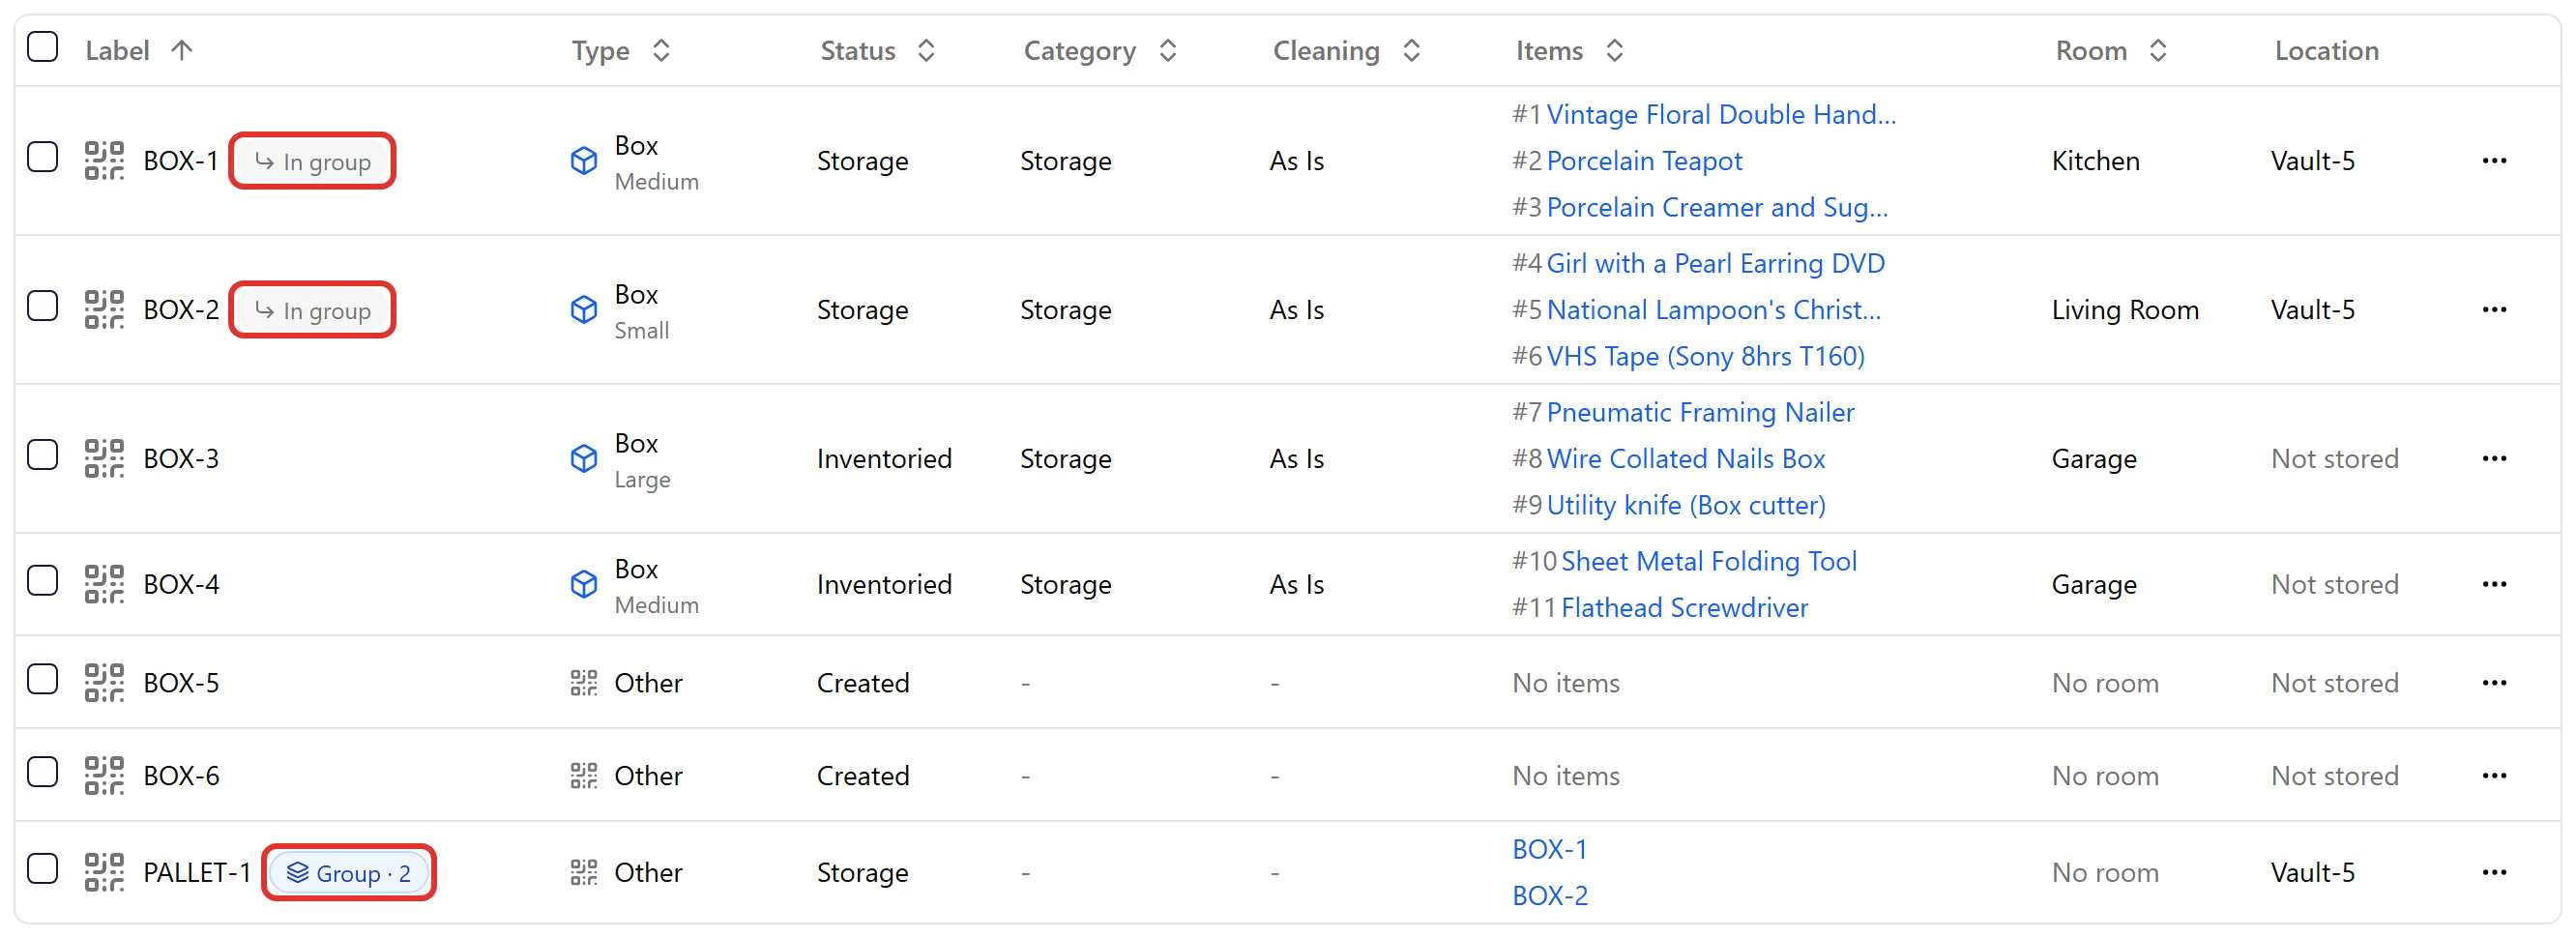
A grouping label is marked Group · N, where N is how many labels it holds, and its Items column lists those labels — click one to open it.
-
Each label inside a group is marked In group.
4. Edit the Whole Group
Section titled “4. Edit the Whole Group”Click the grouping label’s name to open it. A banner at the top reminds you that changes apply to every label in the group, and to their items.
-
Change Status or Room on the Label tab. Before you save, a warning shows how many labels the change will write.
-
Pick a vault on the Location tab to move the whole group.
-
Click Save Changes.
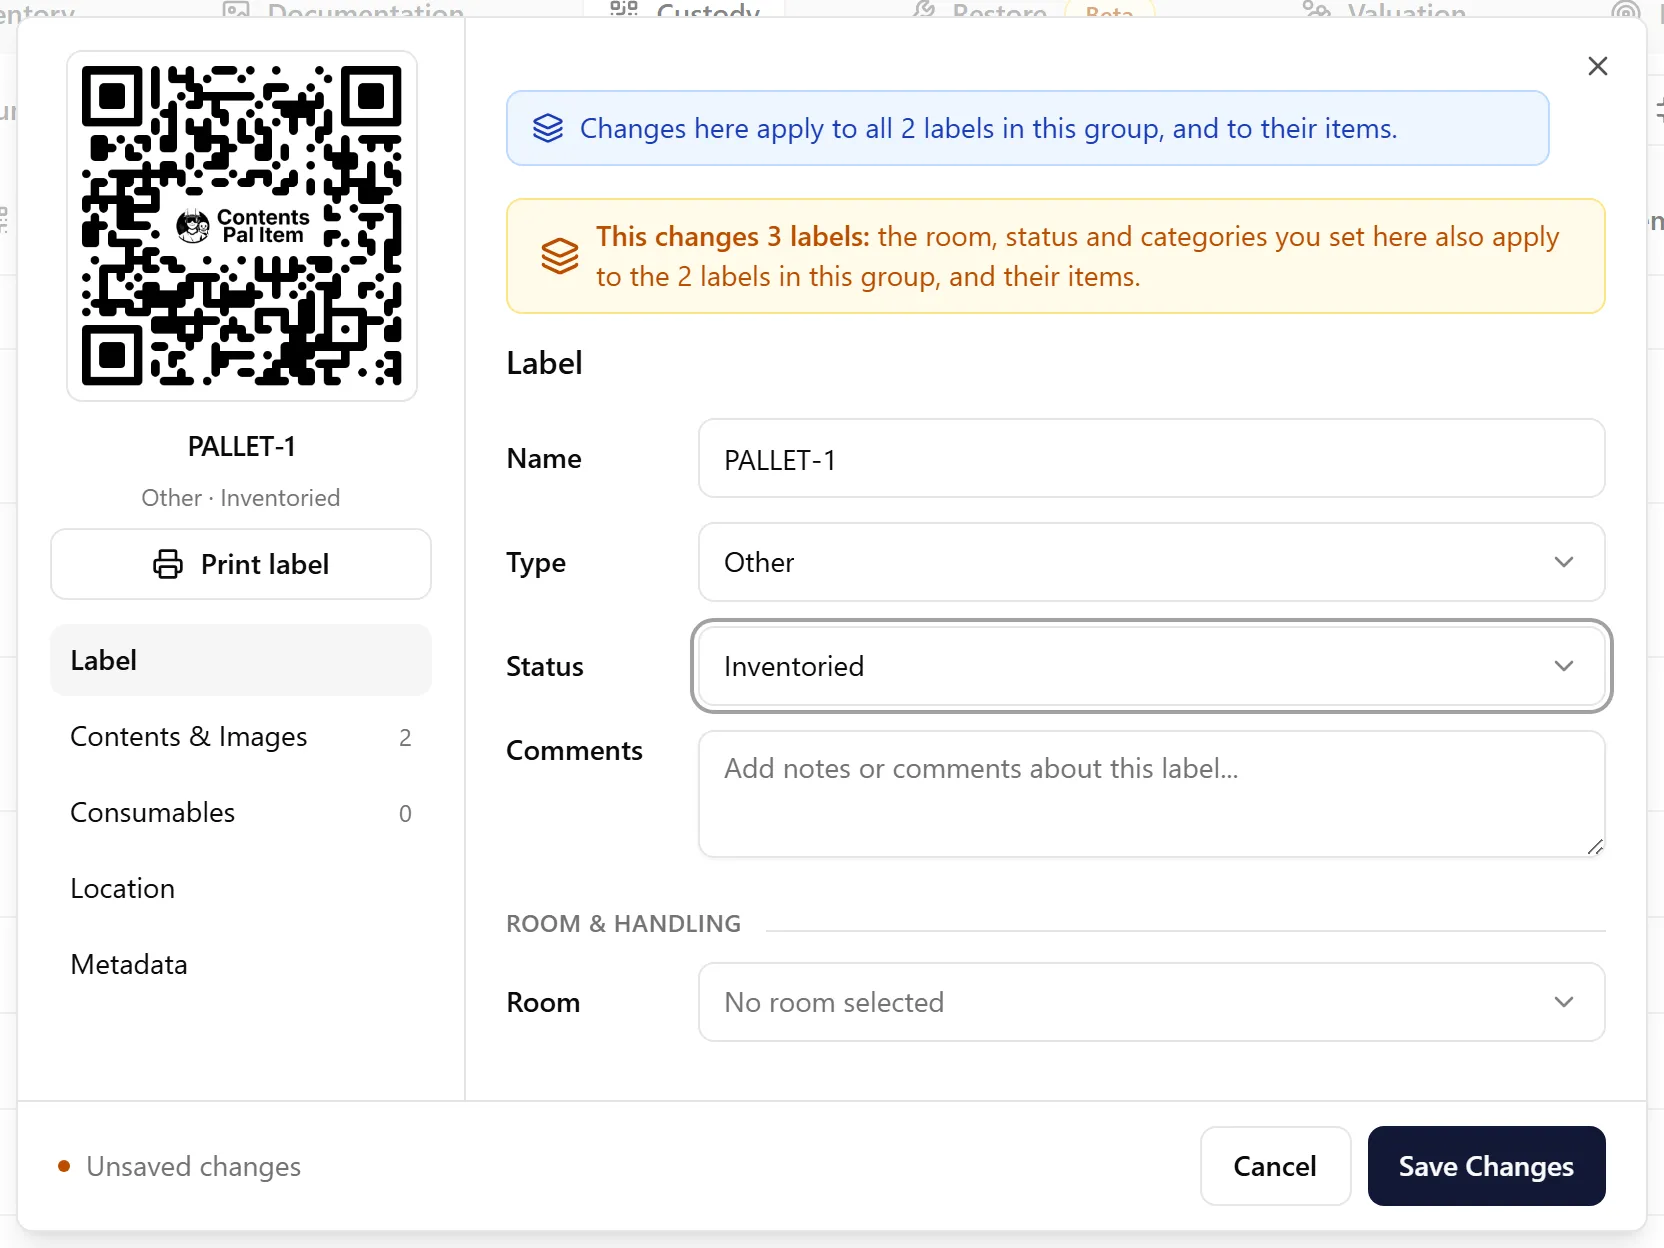
A grouping label’s type is Other, so its dialog doesn’t show the Storage and Cleaning categories. To set the categories for a whole group, tick the grouping label in the table and use Edit Labels → Batch Edit — the confirmation tells you how many more labels in the group will be updated. You can also set them from the group’s screen in the mobile app.
5. Add or Remove Labels
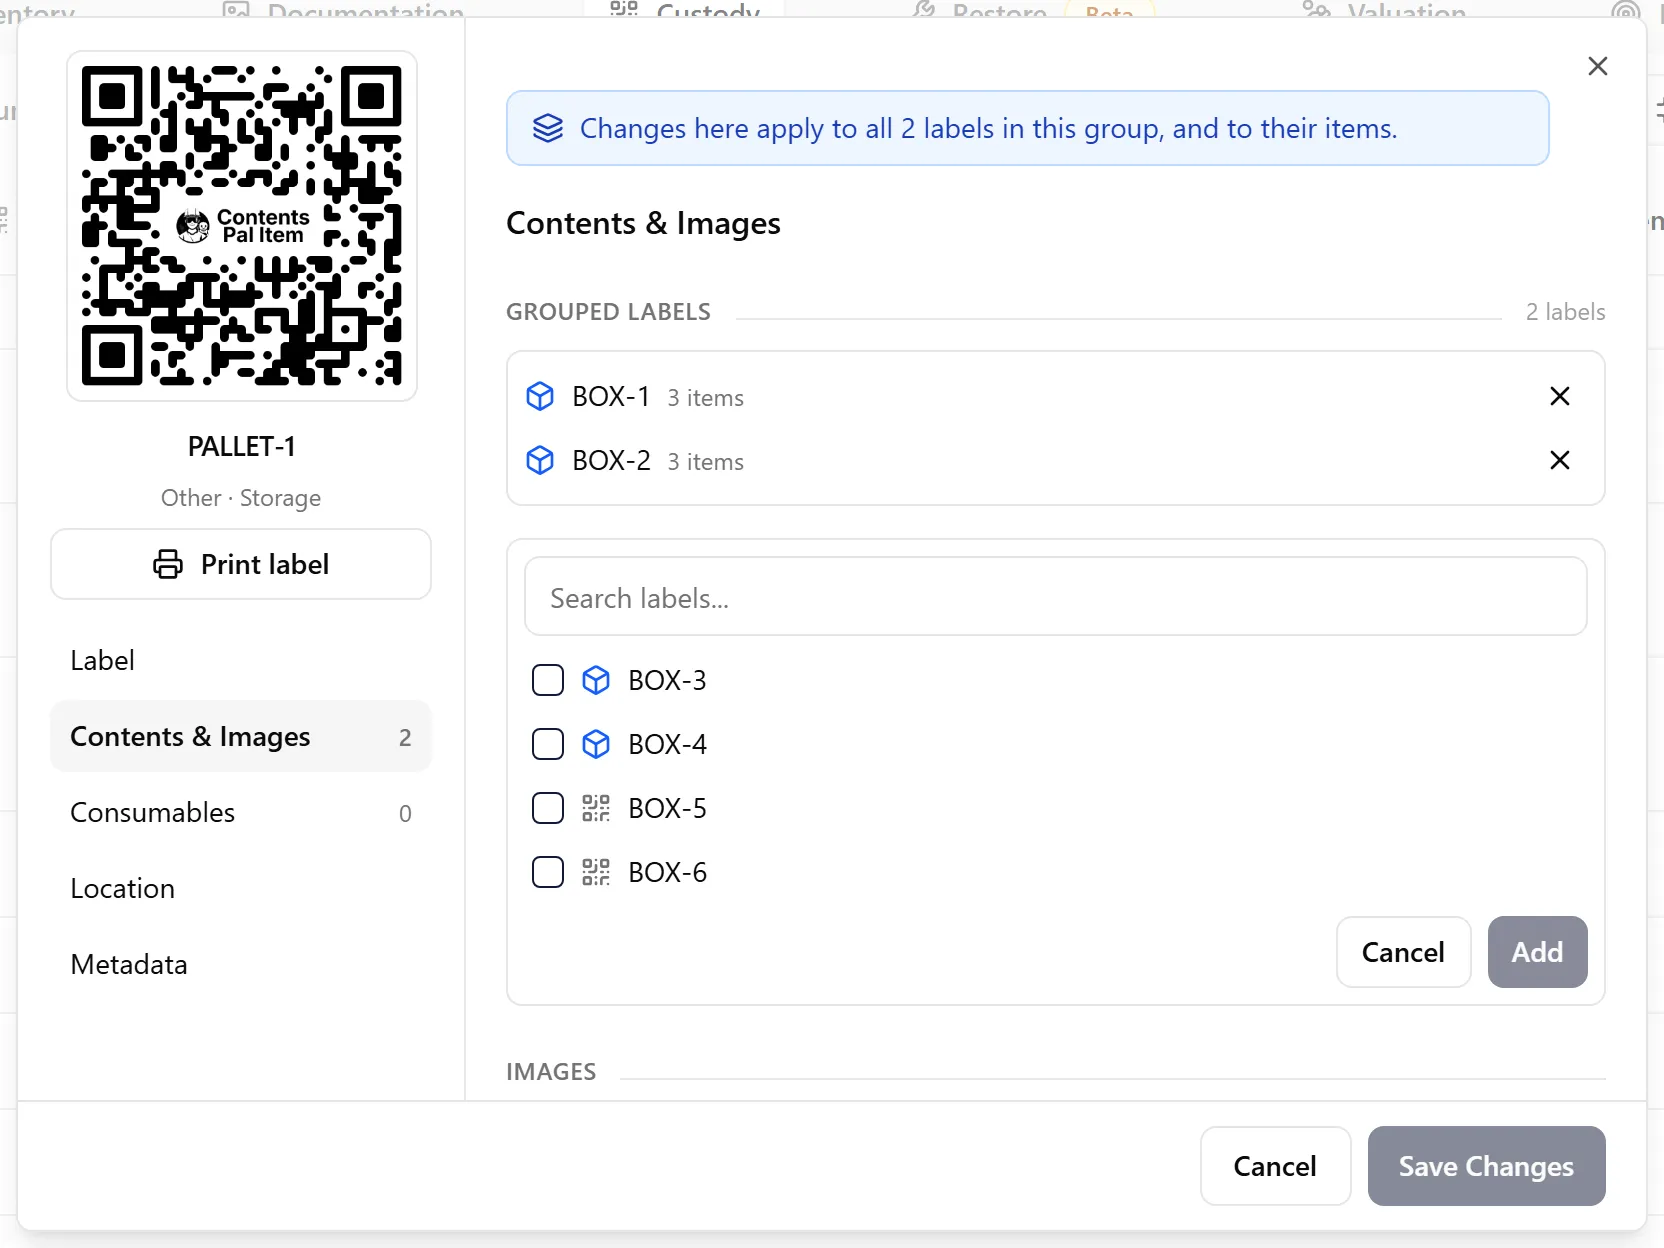
Section titled “5. Add or Remove Labels”Open the grouping label and go to the Contents & Images tab. It lists the Grouped labels instead of items.
-
Click Add labels, tick the labels to add (use the search box to find them), and click Add N. Only labels that can join are listed.
-
Click the ✕ next to a label to take it out of the group. It keeps the values it got from the group.
6. Take One Label Out (Leave Group)
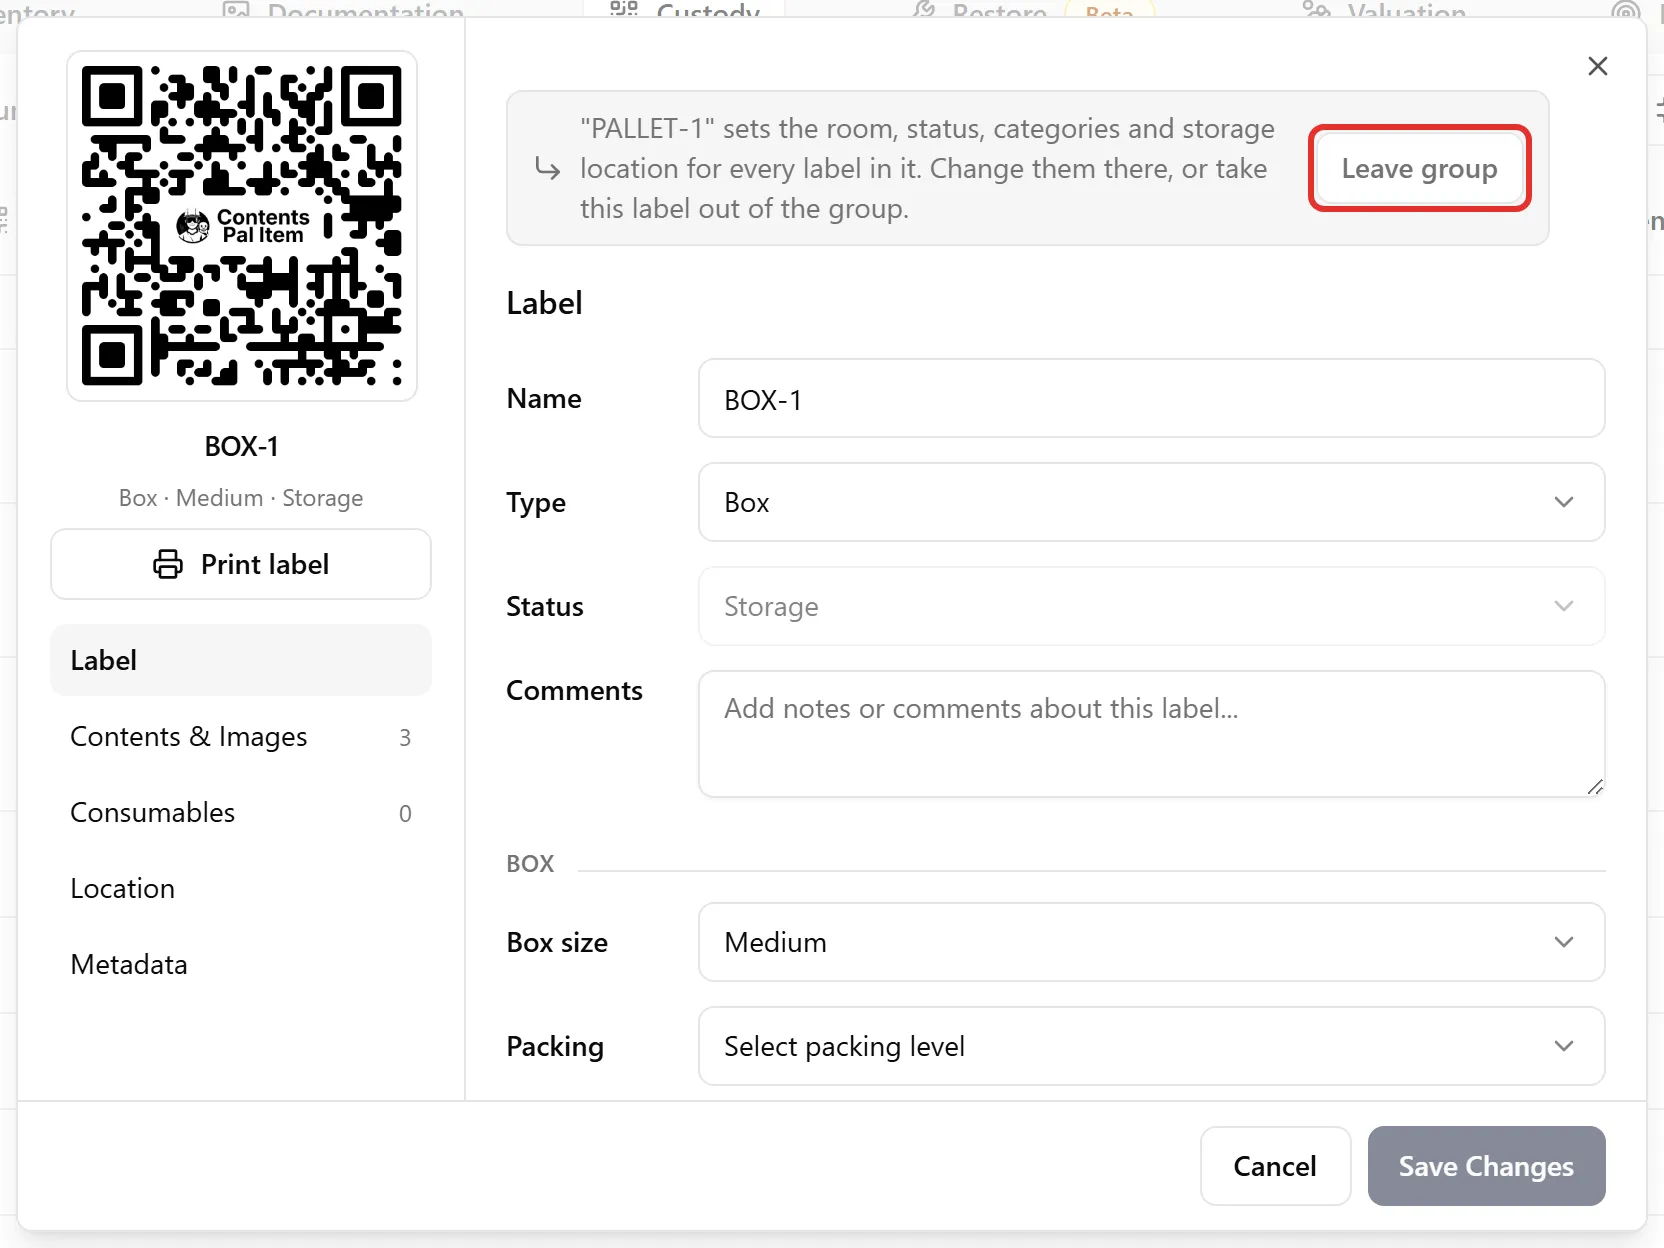
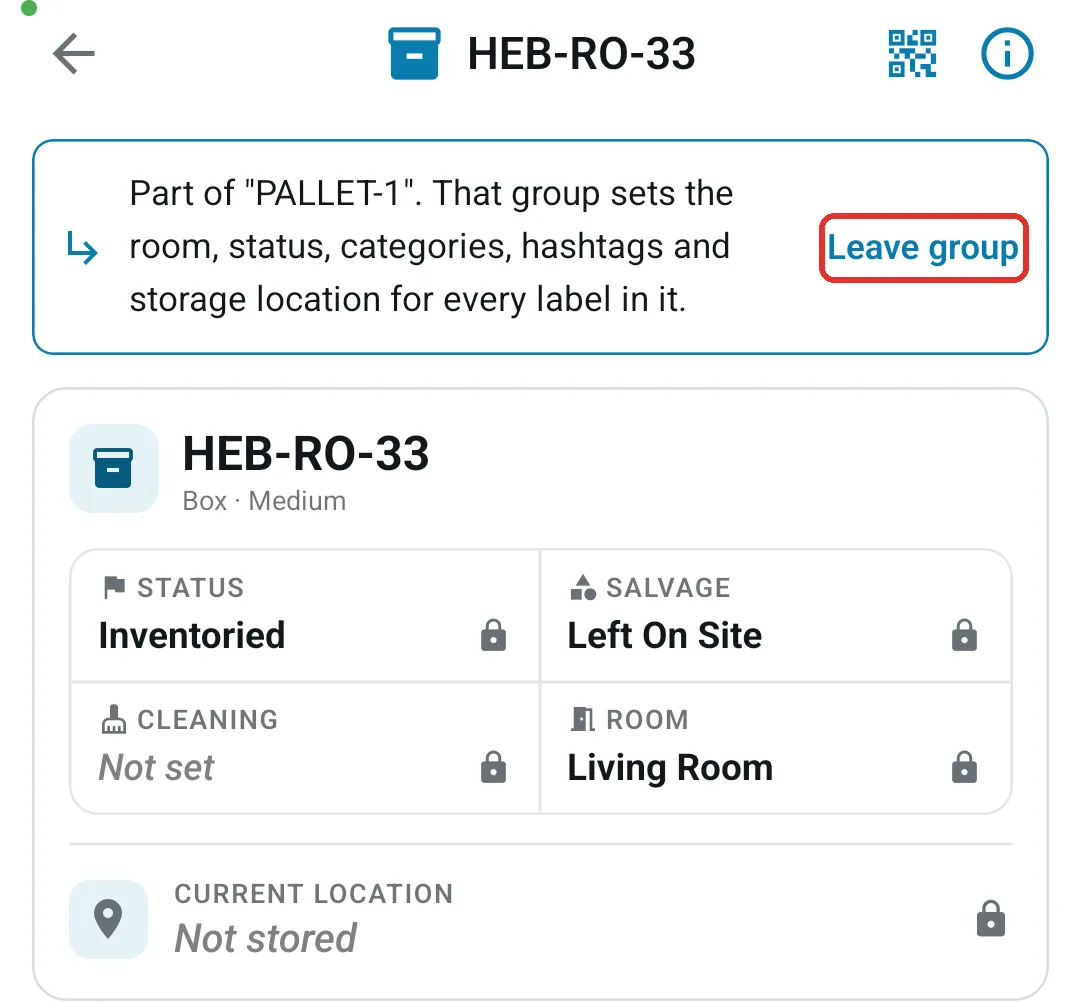
Section titled “6. Take One Label Out (Leave Group)”Open a label that’s in a group. A banner names its group and explains that the group sets its room, status, categories, and storage location. Those fields are greyed out.
Click Leave group on the banner. The label keeps every value it inherited and can be edited on its own again. The rest of the group stays together.
📱 In the Mobile App
Section titled “📱 In the Mobile App”Open the job’s Job Report and tap Custody to see its labels.
Spot Groups in the List
Section titled “Spot Groups in the List”-
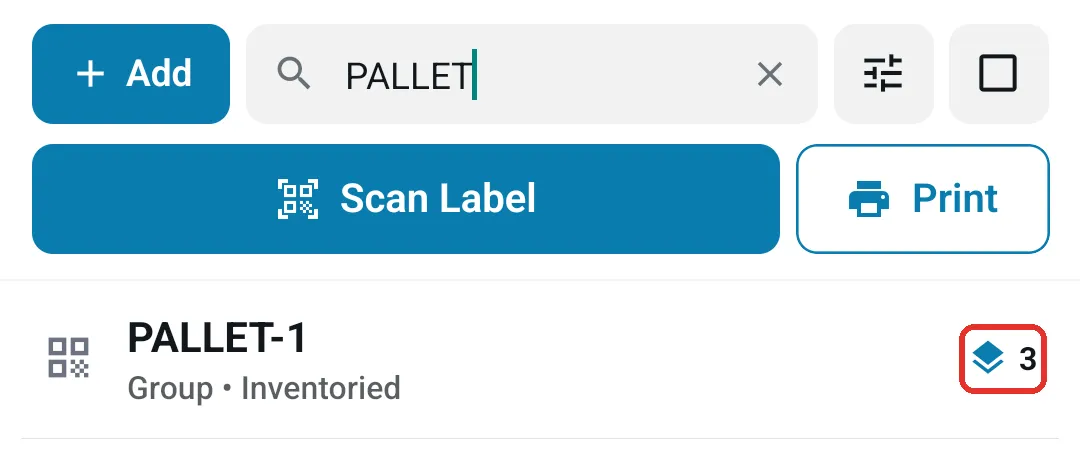
A grouping label shows the type Group and a layers icon with the number of labels it holds.
-
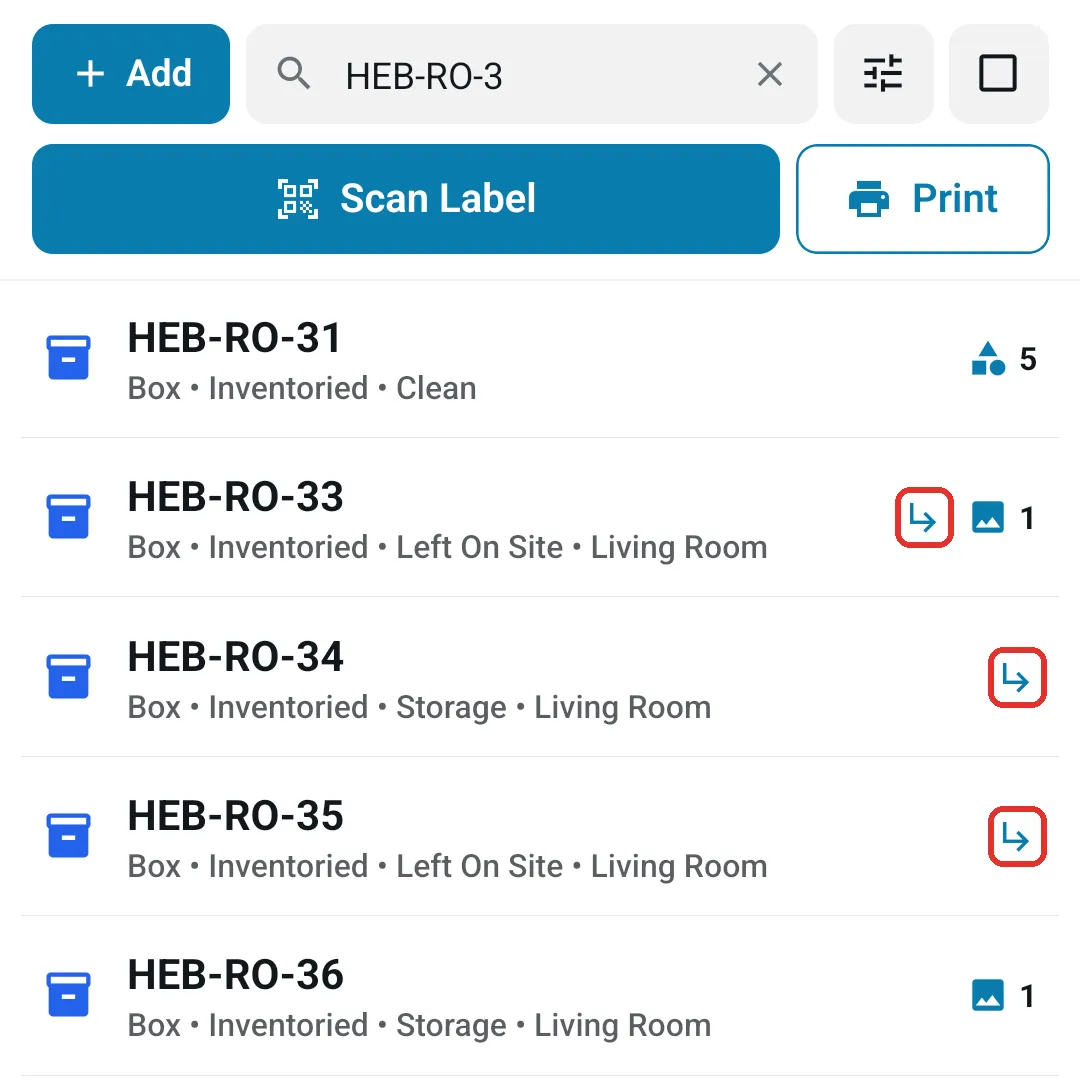
A label inside a group shows a small ↳ arrow.
Group Labels
Section titled “Group Labels”-
Tap the Select checkbox icon next to the filters and tick the labels that belong together.
-
Tap Group in the bar at the bottom.
-
Tap Scan group label and scan the label that will hold the group — the pallet’s label, for example. The app asks you to confirm, then groups the selected labels under it straight away. Tap View group on the confirmation to open the grouping label.
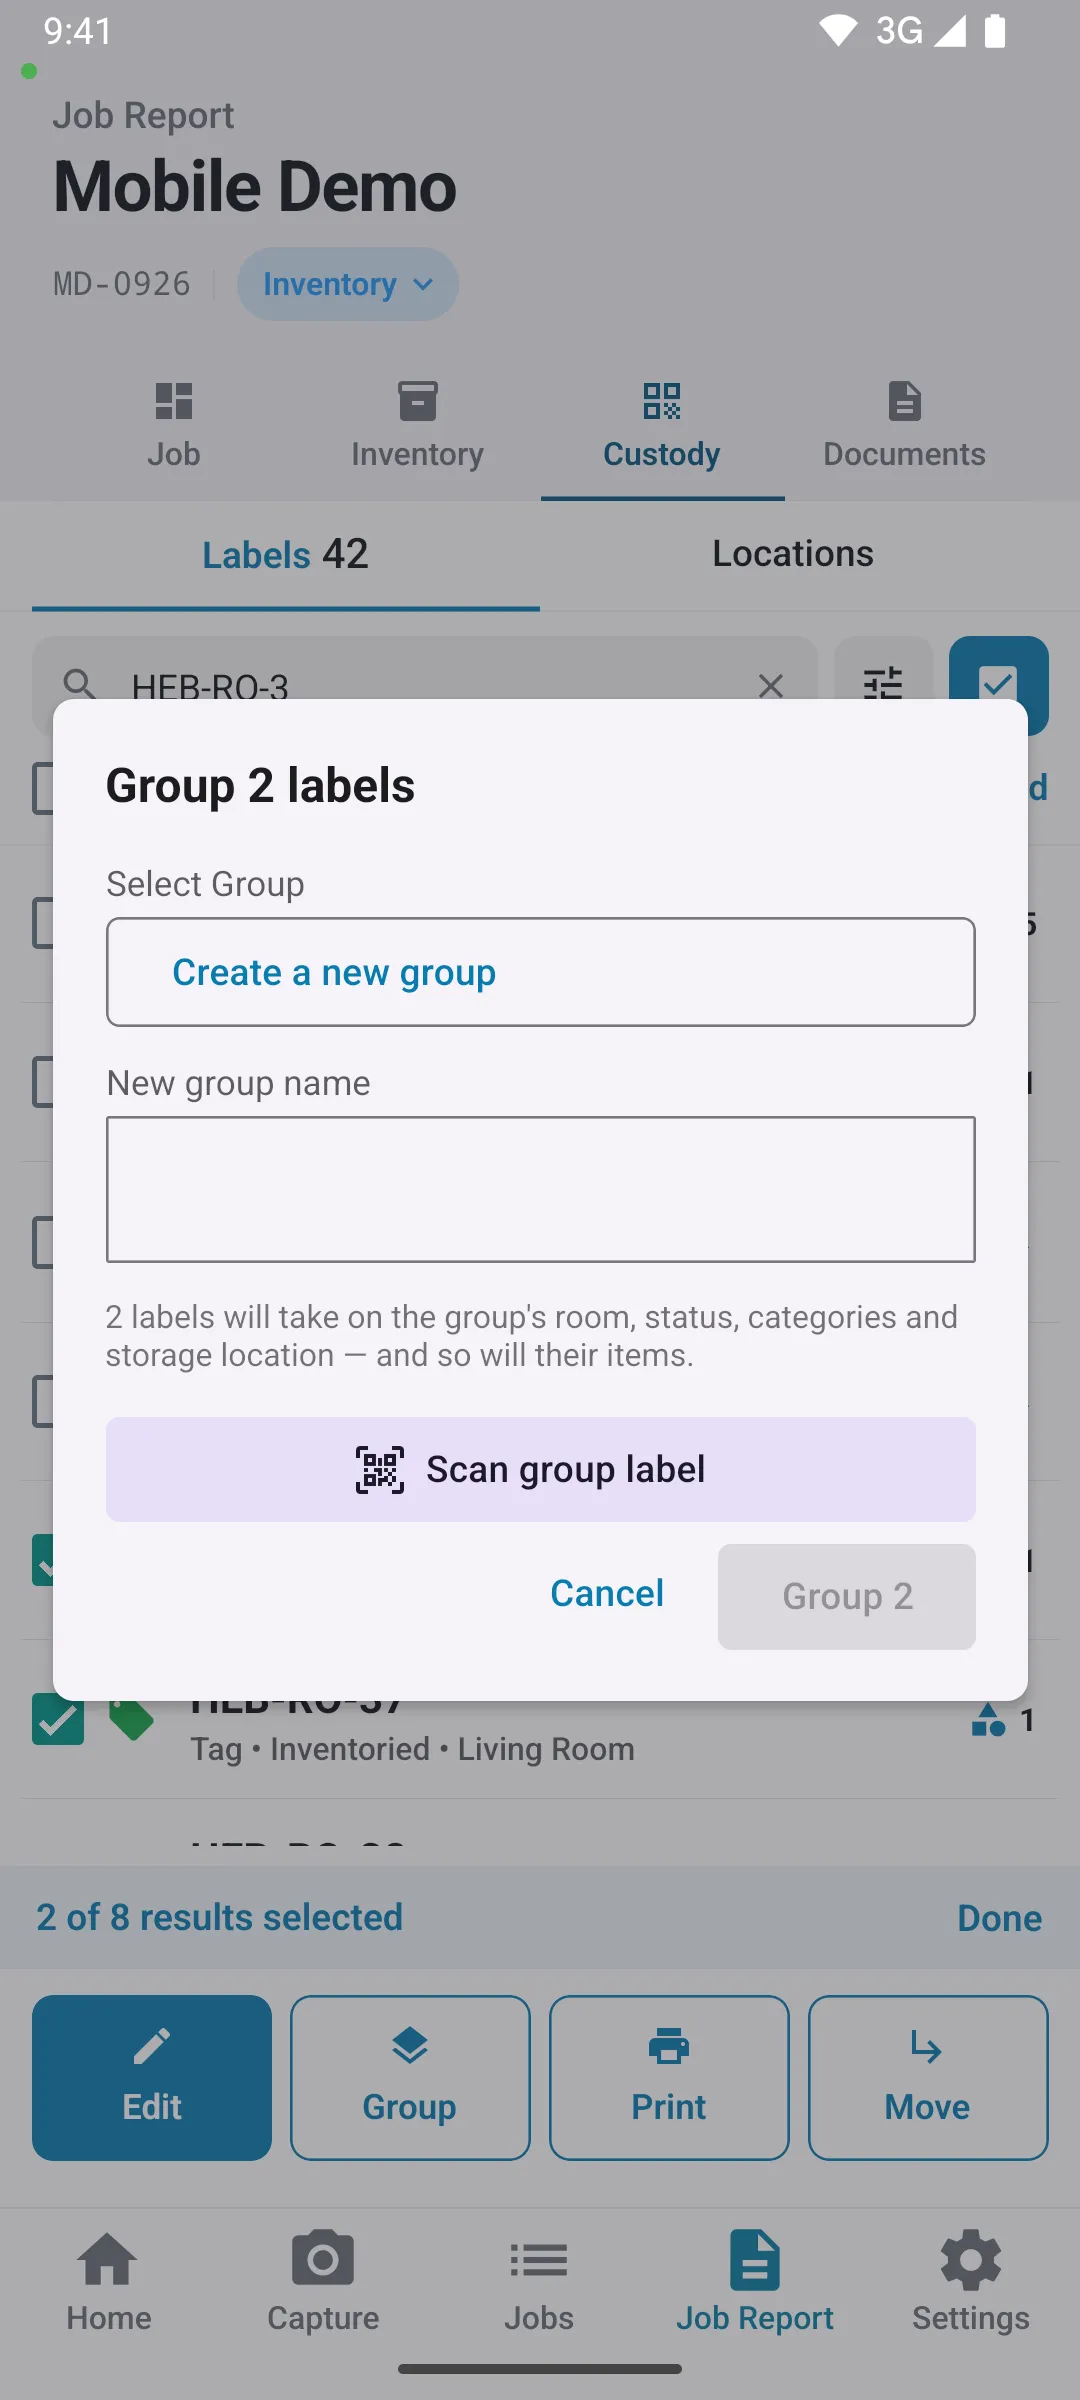
No label to scan? Tap Choose from list or create new instead and pick Create a new group (then type the New group name), an existing group, or an unused label marked Unused label — becomes the group. Then tap Group N.
A new group — whether you create it or turn an unused label into it — needs at least two labels. A single label can still join a group that already exists.
To create a grouping label from scratch, tap Add on the Custody tab and tick Group other labels instead of holding items.
Edit the Group
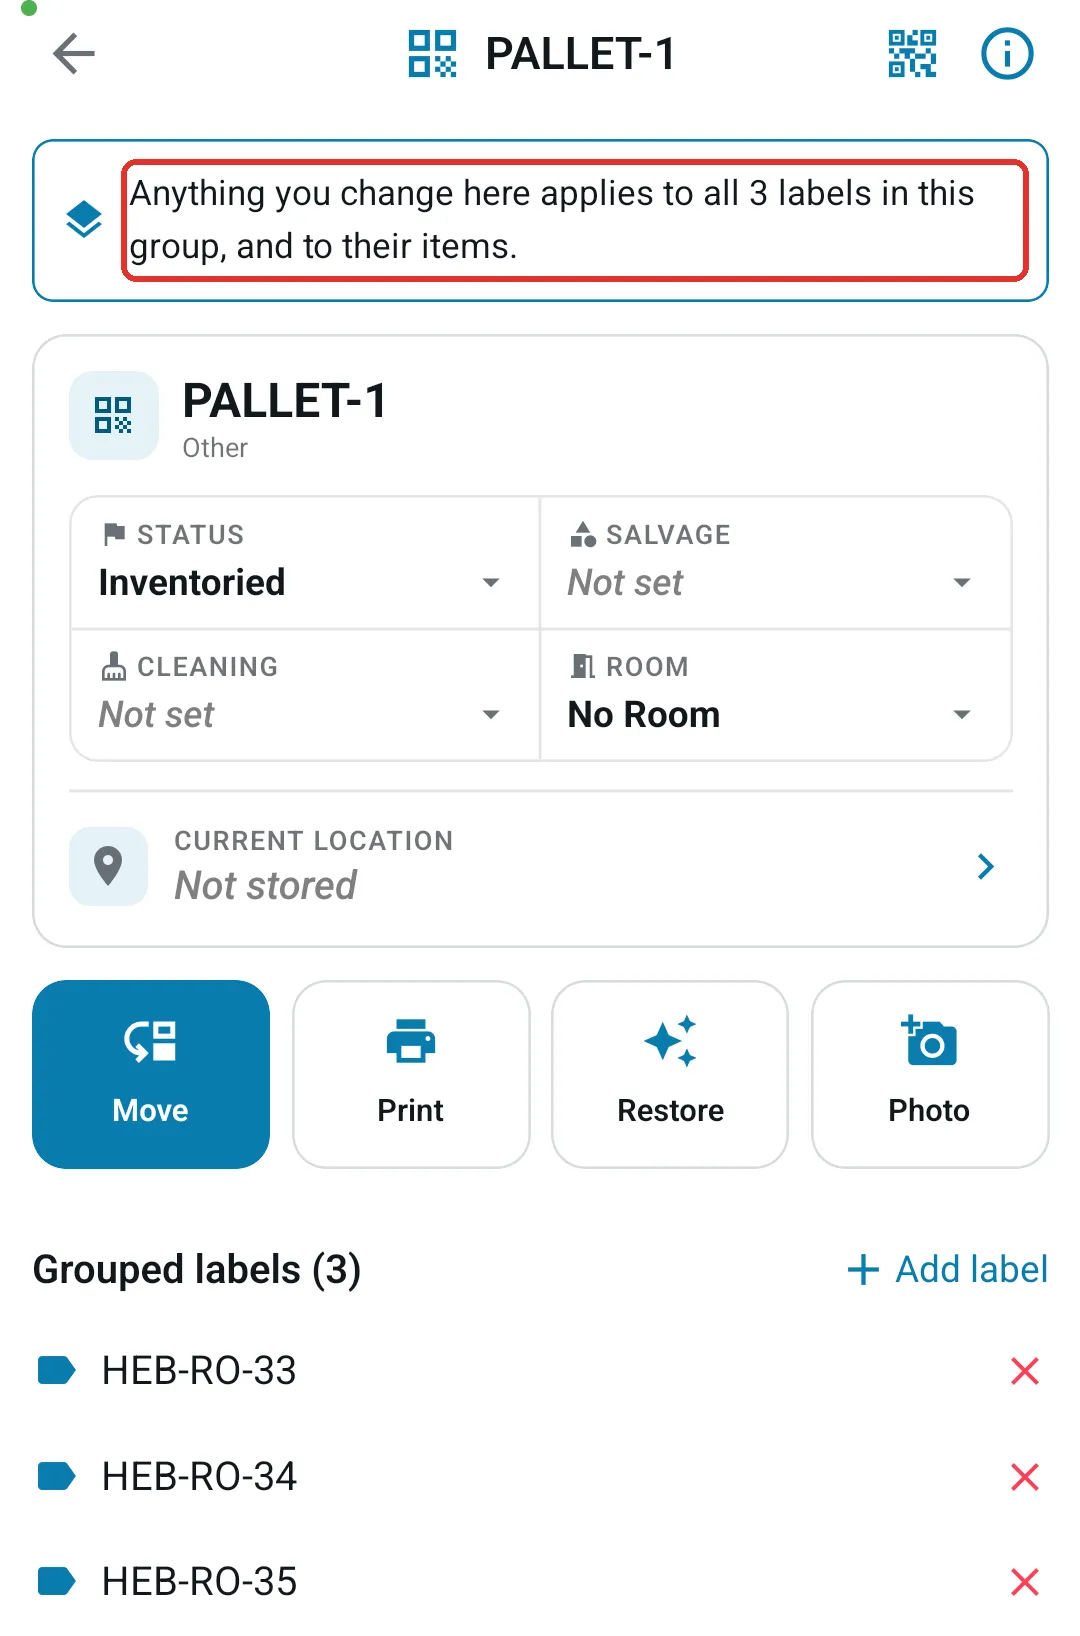
Section titled “Edit the Group”Tap the grouping label to open it. The banner at the top says your changes apply to every label in the group and to their items. Set its Status, Salvage, Cleaning, and Room on the card, tap Move to put the whole group in a location, or edit its hashtags under Details.
Under Grouped labels, tap Add label to add another label, tap a label to open it, or tap ✕ to take it out of the group.
Leave a Group
Section titled “Leave a Group”Open a label that’s in a group. The banner names its group, and the status, categories, room, hashtags, and location show a lock — tapping one explains that the group sets it, with Open group to jump to the grouping label. Move and Restore are blocked the same way.
Tap Leave group on the banner and confirm. The label keeps the values it inherited and can be edited on its own again.
Move a Whole Pallet in Warehouse Mode
Section titled “Move a Whole Pallet in Warehouse Mode”In Warehouse mode, scan the grouping label and every label in its group travels with it — the tray notes how many labels come along from the group. Scanning a label that’s inside a group on its own is refused with a reminder to scan the group’s label instead. You can also group scanned labels right from the Warehouse tray with Group. See Warehouse Mode for the full scanning workflow.
✅ Best Practices
Section titled “✅ Best Practices”-
Print the pallet placard first. Create and print a few spare labels for pallets and racks; the first time you group boxes under one, it becomes the grouping label.
-
Set the room on the group only when the whole pallet came from one room. A group with no room leaves each box’s own room in place when the boxes join.
-
Move pallets by the group’s label. In Warehouse mode, scan the grouping label rather than the boxes, so the pallet never gets split across vaults.
-
Take boxes off with Leave group, not by editing them — grouped labels can’t change their room, status, categories, or location while they’re in the group.
🧩 Troubleshooting
Section titled “🧩 Troubleshooting”I can’t change a label’s status, room, or location. It’s in a group, and the group sets those fields. Change them on the grouping label, or use Leave group first.
Group Labels skipped some of my labels. A label that’s already a grouping label, or already in another group, can’t join. Take it out of its current group first.
A label I want to use as the group isn’t in the list. Only labels that are still Created and hold no items can become a group. Pick another unused label, or create a new group.
A scan in Warehouse mode says the label is in a group. That label moves with its group. Scan the group’s label to move them all, or open the label in the Custody tab and tap Leave group if it should travel alone.
Moving labels to another job broke up a group. A group stays together only when the grouping label and its labels move to the new job together. Labels that move without their group arrive ungrouped.
For creating, printing, and filtering labels in general, see Managing Custody Labels.