
Inventorying Specialty Items
Learn how to inventory specialty textile items individually in Single Mode to capture high-value garments and items with upcharges.
🧭 Summary
Section titled “🧭 Summary”Single Mode is designed for specialty textile items that need individual attention—items that typically have upcharges or higher value. Unlike Bulk Mode where you charge by weight, Single Mode lets you photograph and document each item separately.
This is similar to how you’d inventory tagged items in regular hard contents, but optimized for textiles. You can capture multiple photos of the same item (brand labels, material tags, condition details) to help AI find the best match and correct Xactimate codes with appropriate upcharges.
Single Mode also supports Multi-mode for quickly capturing several similar items at once. Every item you add in Single Mode is placed on a Single Textile label that appears in the Custody tab—whether or not you scan a QR code—so each item shows up in both Inventory and Custody.
⚙️ Prerequisites
Section titled “⚙️ Prerequisites”-
Textiles Mode must be enabled in the mobile app (Settings → Mode → Textiles)
-
You’re in Single Mode (not Bulk or Pack mode)
-
Correct room is selected before starting inventory
-
Good lighting for capturing garment details, brands, and labels
🚀 Step-by-Step Instructions
Section titled “🚀 Step-by-Step Instructions”1. Enter Single Mode
Section titled “1. Enter Single Mode”-
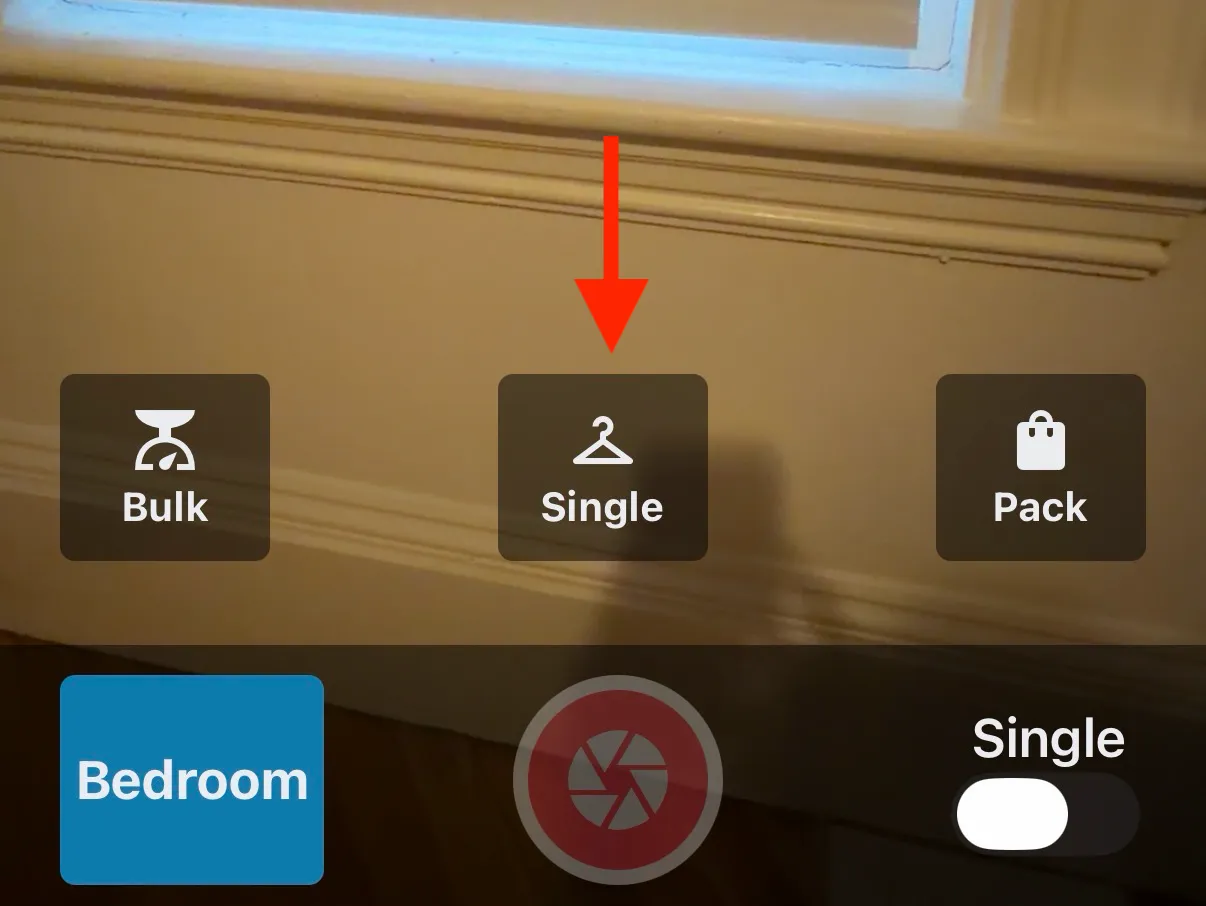
At the bottom of the camera screen, tap Single
-
This activates Single Mode for specialty items
2. Take Pictures of the Item
Section titled “2. Take Pictures of the Item”-
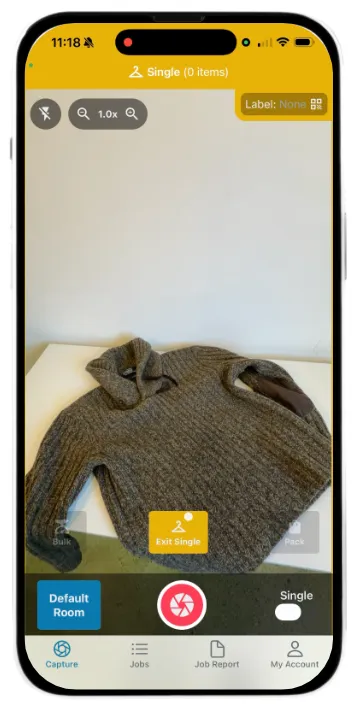
Point your camera at the specialty garment
-
Tap the capture button to take the first photo
-
Take additional photos to capture important details:
-
Brand labels
-
Material tags
-
Care labels
-
Condition details
-
3. Complete the Item
Section titled “3. Complete the Item”-
When you’re finished photographing the item, tap Done
-
The item is added to your inventory
The app will:
-
Send photos to AI for identification
-
Match the item with appropriate Xactimate codes
-
Apply any upcharges based on brand, material, or condition
-
Add the item to the selected room
4. Use Multi-Mode for Multiple Similar Items (Optional)
Section titled “4. Use Multi-Mode for Multiple Similar Items (Optional)”If you have multiple similar items to inventory at once:
-
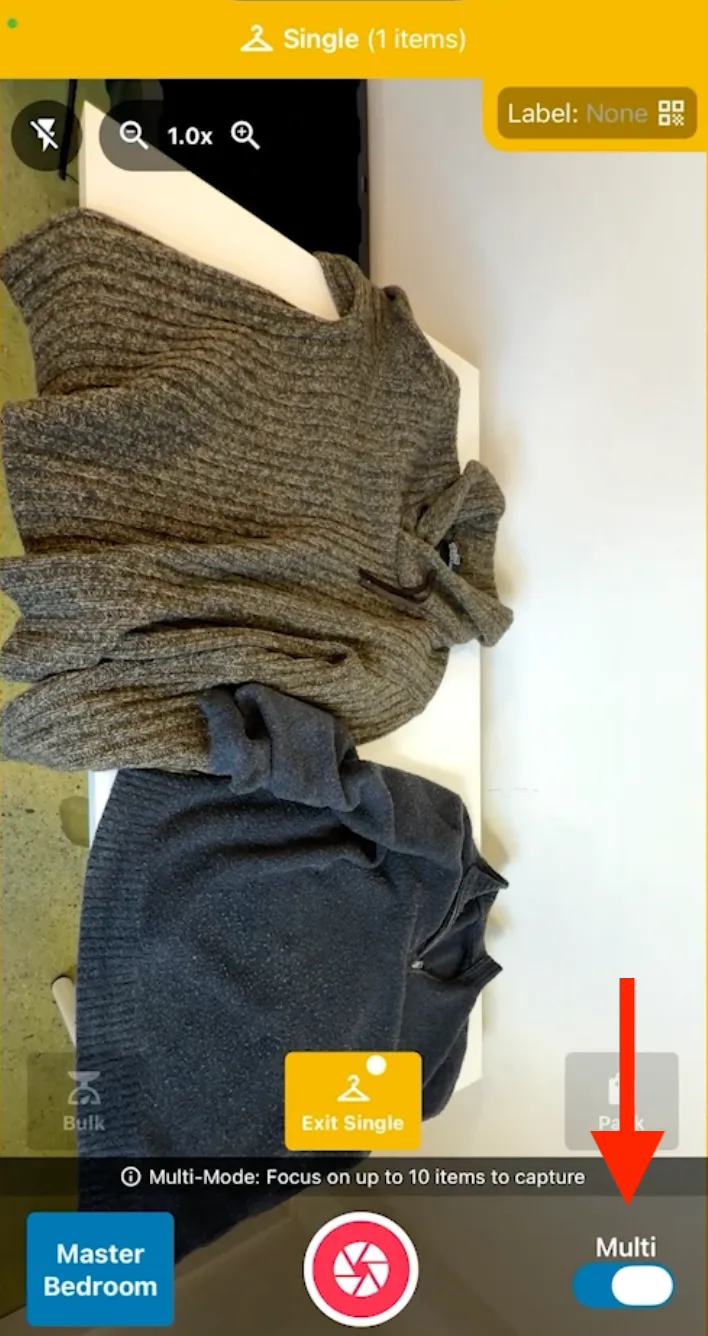
Tap the Single / Multi toggle at the bottom of the screen so it shows Multi
-
Take a single photo showing all the items
-
Tap Done to add them all to your inventory
5. Scan a QR Code Label (Optional)
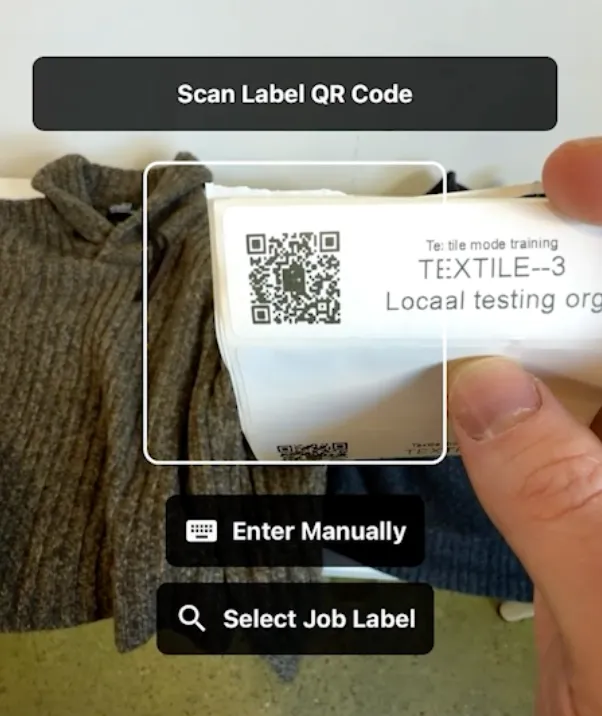
Section titled “5. Scan a QR Code Label (Optional)”Every Single Mode session already creates a label in the Custody tab. Scanning a QR code is optional—it links the printed label on the garment or bag to that label, so you can scan it later:
-
Tap Label
-
Scan the QR code on the label
-
The label is associated with the current item(s)
How Label Association Works:
Section titled “How Label Association Works:”For single items:
-
If you scan one item, the label associates with just that item
-
Exit Single Mode before scanning the next item if you want a different label
For multi-mode:
- If you’re in multi-mode, the label associates with ALL items in that batch
For grouped items:
-
If you want multiple garments under the same label (like multiple pieces in one garment bag), keep adding items while staying in Single Mode
-
All items added before you exit will share that label
Exiting Single Mode:
-
Tap Exit Single, then tap Close Single in the confirmation message
-
If you didn’t scan a label, one is generated automatically when you close
📋 What You’ll See in Inventory View
Section titled “📋 What You’ll See in Inventory View”After inventorying items, check the Inventory screen to see:
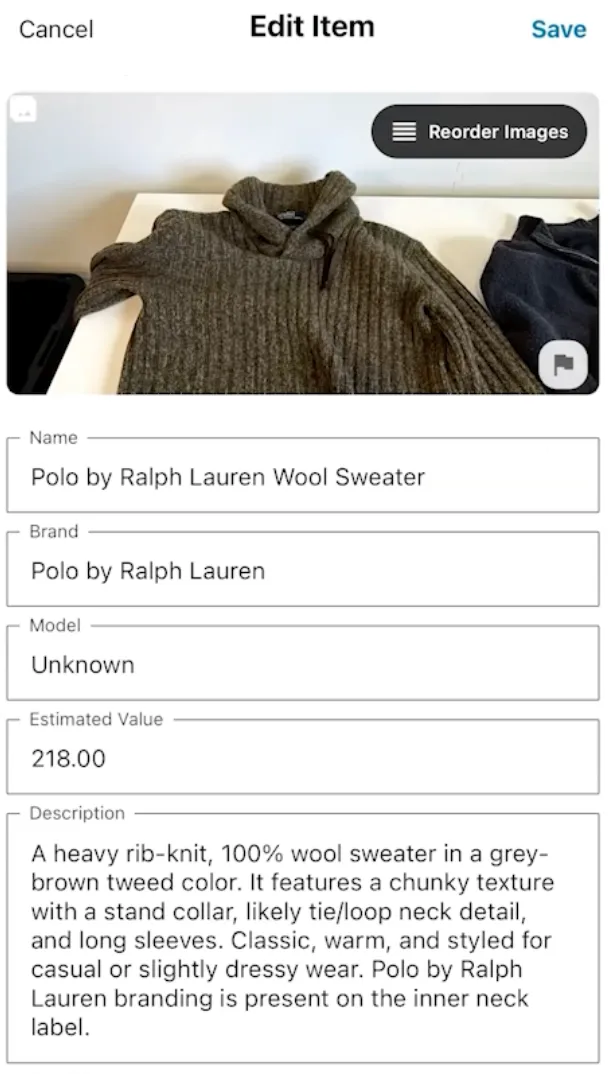
For each item you’ll see:
-
Identified brand (if detected from labels/photos)
-
Condition assessment
-
Age estimation
-
Suggested upcharges (dry cleaning, specialty fabric, designer brand)
-
Xactimate code matched by AI
-
Room assignment
Multi-mode indicator: Items captured together in multi-mode show a small blue icon and share the same label. When you open them, you’ll see a cropped version of the original group photo focused on that specific item.
🔑 Automatic Label Generation
Section titled “🔑 Automatic Label Generation”Even if you don’t manually add a label, the system creates one automatically for tracking purposes.
Why this matters:
-
Every item gets a QR code or label in the Custody tab
-
This is why specialty items appear in both Inventory (the item) and Custody (its label)—you haven’t inventoried them twice
-
This ensures proper tracking even if you’re not actively scanning labels
-
Items marked Needs Cleaning are added to the estimate with their textile cleaning codes
-
If you later scan a physical QR code, it associates with the right item
✅ Best Practices
Section titled “✅ Best Practices”-
Select the correct room first: Make sure the right room is selected in your sorting facility before inventorying—items will be assigned to that room
-
Take multiple photos for high-value items: Capture brand, material, and condition details to get accurate identification and appropriate upcharges
-
Use Multi-mode strategically: Great for similar bulk items, but photograph expensive or unique pieces individually
-
Understand label behavior: Know when labels associate with single vs. multiple items to avoid confusion later
-
Review inventory after capture: Check the Inventory screen to verify AI identified items correctly and applied proper codes
-
Don’t worry about manual labels: Auto-generated labels ensure tracking even if you don’t scan QR codes
🧩 Troubleshooting
Section titled “🧩 Troubleshooting”The AI didn’t identify my item correctly: Review the photos you provided. If brand labels or material tags aren’t clear, take additional photos with better lighting and closer angles. You can also manually change the Xactimate code from the Inventory screen.
I accidentally associated the wrong label: Labels can be reassigned in the Custody tab. Find the item and scan a new QR code to change it to a different existing one.
Items went to the wrong room: Always check which room is selected before starting your inventory session. Items are assigned to the active room at the time of capture. You can change room assignment later in the Inventory view.
Multi-mode split my items incorrectly: This can happen if items overlap in the photo. For best results, arrange items with clear separation when using Multi-mode, or photograph them individually.
My specialty items show in both Inventory and Custody: This is expected. Each item is listed in Inventory, and the Single Textile label it was captured on is listed in Custody. You don’t need to inventory them again when you pack them.
My specialty items aren’t in the estimate: They’re probably marked As Is. In the web app’s Inventory tab, select the items, click Batch Edit, set Cleaning Category to Needs Cleaning, and save. Then open the Estimate tab and click Rebuild.
I packed items into a wardrobe box, but the label shows as a Garment Bag: In the web app, open the label in the Custody tab, change Type to Box, and set Box size to Wardrobe. See Managing Custody Labels for more on editing labels.
🔑 Key Takeaways
Section titled “🔑 Key Takeaways”-
Single Mode is for specialty items with upcharges or higher value
-
Take multiple photos of labels, brands, and materials for accurate AI identification
-
Multi-mode lets you capture several items at once from a single photo
-
Every Single Mode item is on a label in the Custody tab—scanning a QR code is optional
-
Only items marked Needs Cleaning appear in the estimate
-
Select the correct room before inventorying to ensure proper assignment
-
Review the Inventory screen to verify codes and upcharges are correct