
✨ Restore Mode
Track cleaning and restoration work on your labeled items in real time. Restore Mode turns the mobile app into a focused tool for the cleaning floor — scan a label, start a process (like Ultrasonic or Ozone), and watch a live timer count toward the target time, all visible to your whole team.
🧭 Summary
Section titled “🧭 Summary”Restore Mode is a streamlined mode for restoration and cleaning technicians. Instead of the usual capture-and-inventory screens, the app shows a single Restore board: a live list of every label currently being cleaned across your organization.
For each label you can:
-
Start a process — pick from built-in cleaning processes (Ultrasonic, Ozone Chamber, Hand Wash, Dry Clean, HEPA Vacuum), each with a target time.
-
Track time live — a countdown ring shows elapsed time against the process target and flags labels that go Over target.
-
Log photos — attach before/after photos to the work.
-
Mark as Restored — when cleaning is done, mark the label Cleaned, optionally reprint its sticker, and clear it from the active board.
The board is LIVE: because the active list is shared across your organization, every technician and station sees the same labels and timers update in real time.
⚙️ Prerequisites
Section titled “⚙️ Prerequisites”-
The ContentsPal mobile app (iOS or Android)
-
You’re signed in and have an organization selected
-
Items have already been labeled (QR labels) during packout or inventory — Restore Mode works on existing labels rather than creating new items
🚀 Turn On Restore Mode
Section titled “🚀 Turn On Restore Mode”Restore Mode is a personal setting — turning it on only changes the app for you, not your teammates. (Your organization admin can lock the app mode from the web app so members can’t switch it — if the Mode row shows a lock, ask your admin.)
1. Open Settings
Section titled “1. Open Settings”Open the Settings tab and tap Mode at the top.
2. Choose “Restore”
Section titled “2. Choose “Restore””Tap Restore in the list of modes and confirm the prompt.
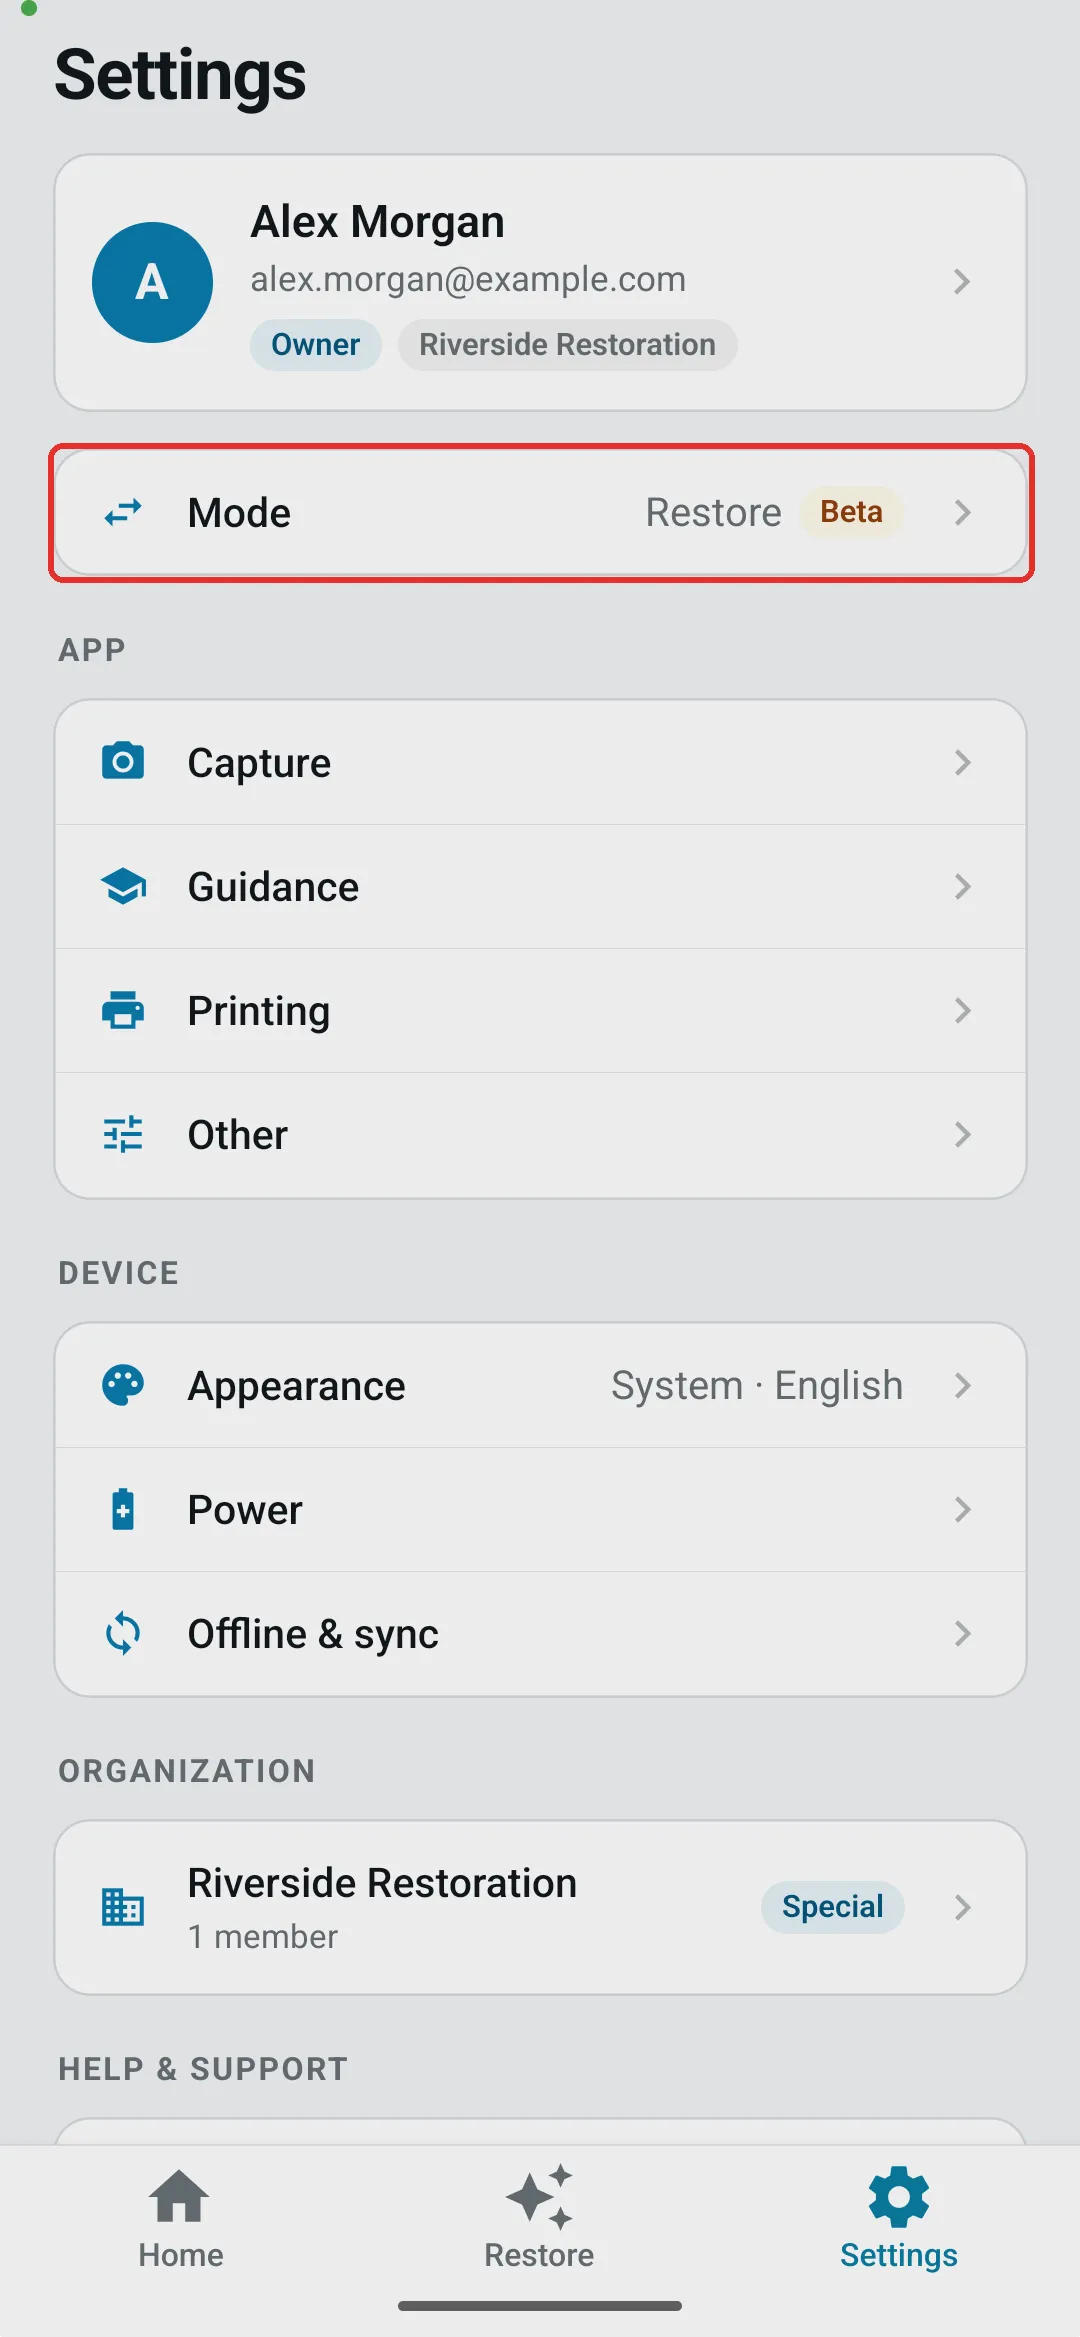
As soon as Restore Mode is on, the app simplifies down to three tabs — Home, Restore, and Settings. The usual Capture, Jobs, and Report tabs are hidden so the cleaning workflow stays front and center. Home stays: it’s your account-wide screen, with your daily figures and the shortcuts into the rest of the app. Tap Restore for the board.
🗂️ The Restore Board
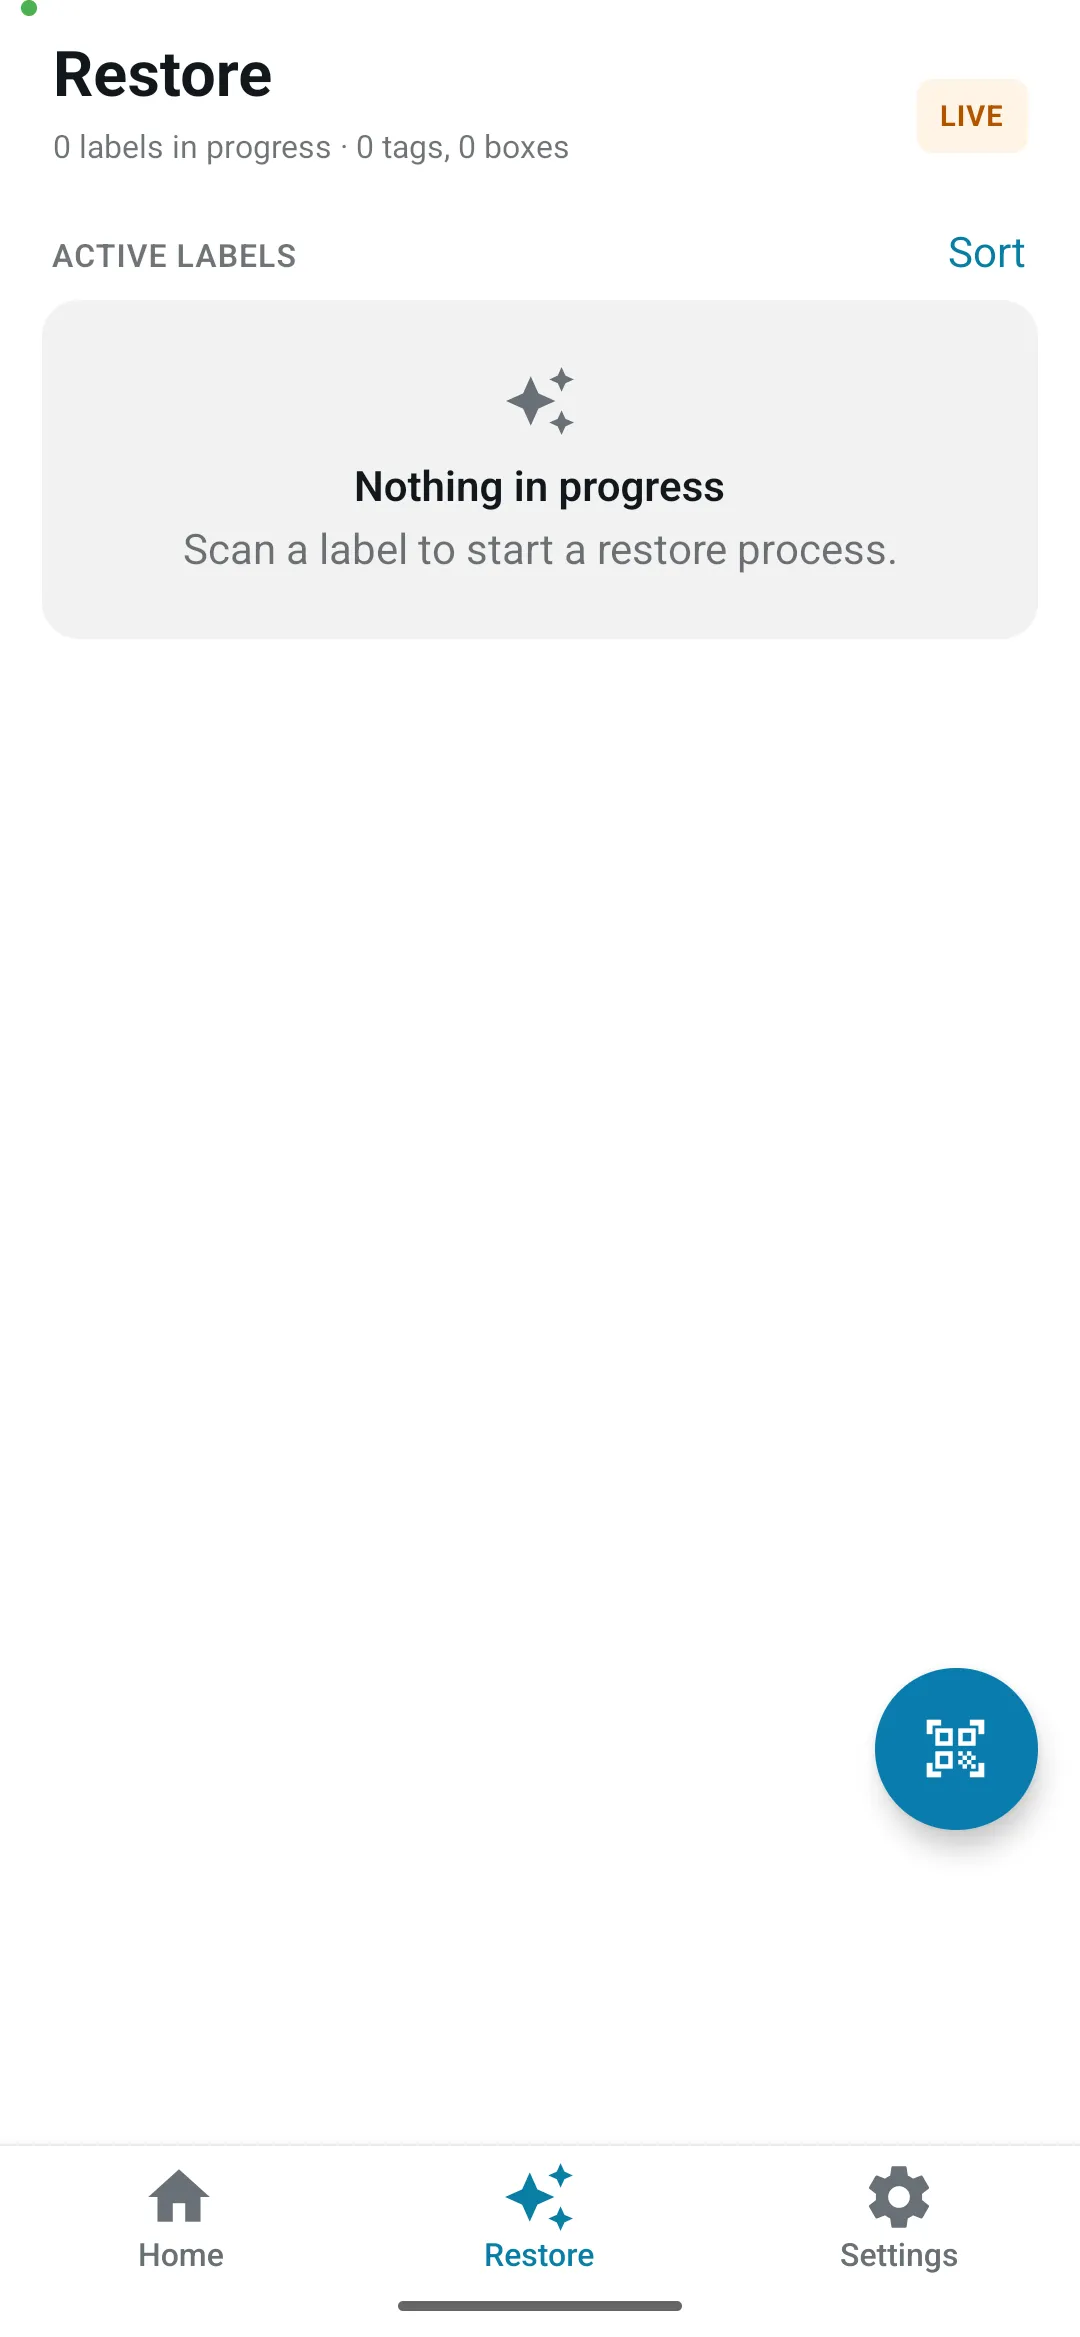
Section titled “🗂️ The Restore Board”The Restore tab is your live work board. The header shows how many labels are in progress and the mix of tags vs. boxes, and a LIVE badge confirms the list is updating in real time.
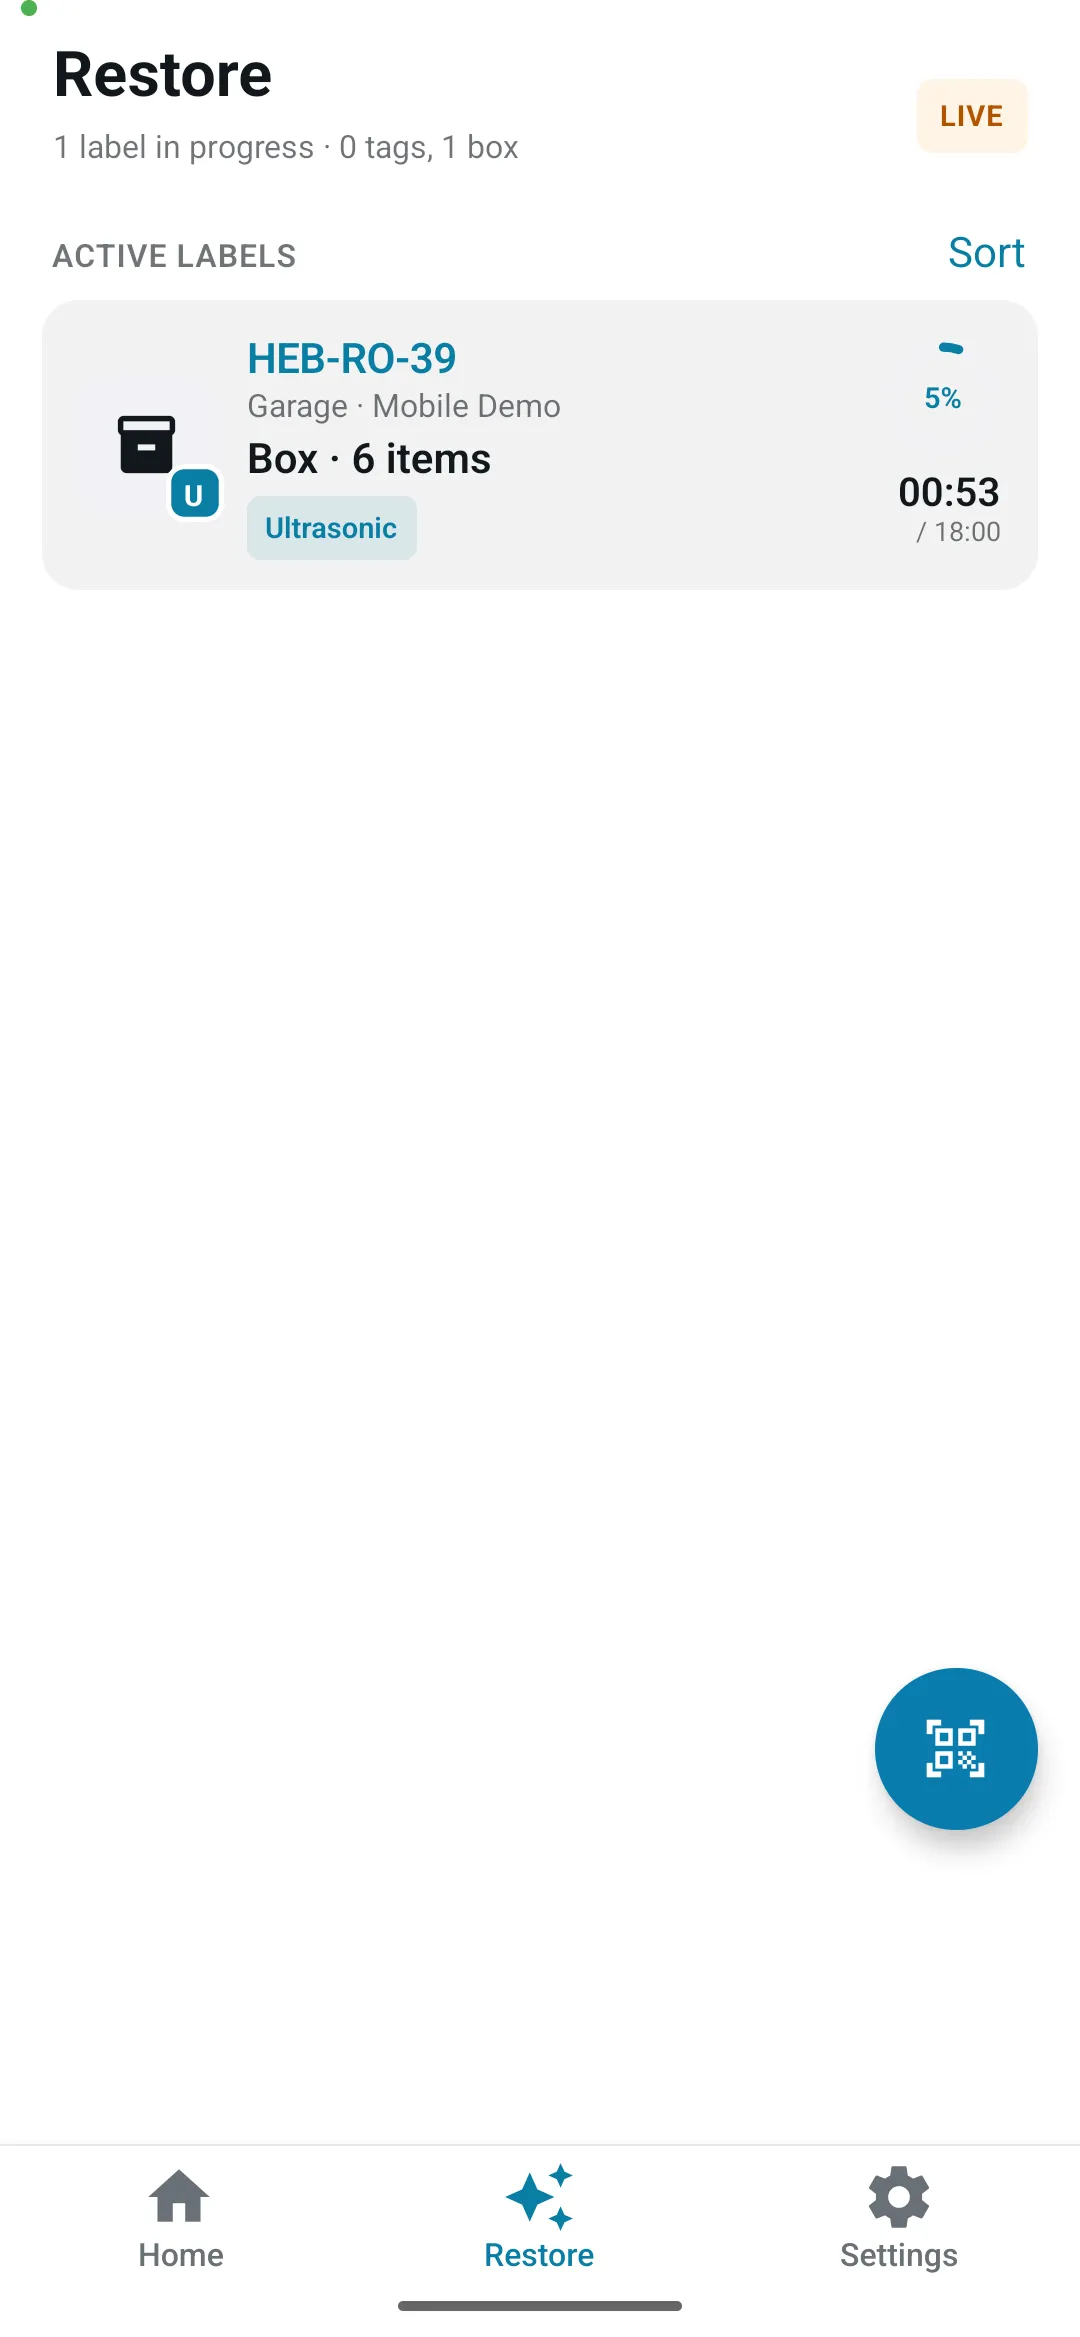
Each card under Active Labels shows everything you need at a glance:
-
Label code (for example,
BULK-IMA-1) with a tag or box icon, and a colored letter badge for the current process (for example, U for Ultrasonic) -
Location — the room and job the label belongs to (for example, Basement · Inventory Demo)
-
Contents — the item name for a tag, or Box · N items for a box
-
Process pill — the process currently running, plus an Over target flag if it has run longer than the target time
-
Timer ring — a circular progress indicator with the elapsed time and the target time below it (for example,
00:05 / 18:00). The ring fills as time approaches the target.
When nothing is being cleaned, the board shows an empty state inviting you to scan a label.
📷 Scan a Label
Section titled “📷 Scan a Label”Tap the round scan button in the bottom-right corner of the Restore board to open the scanner.
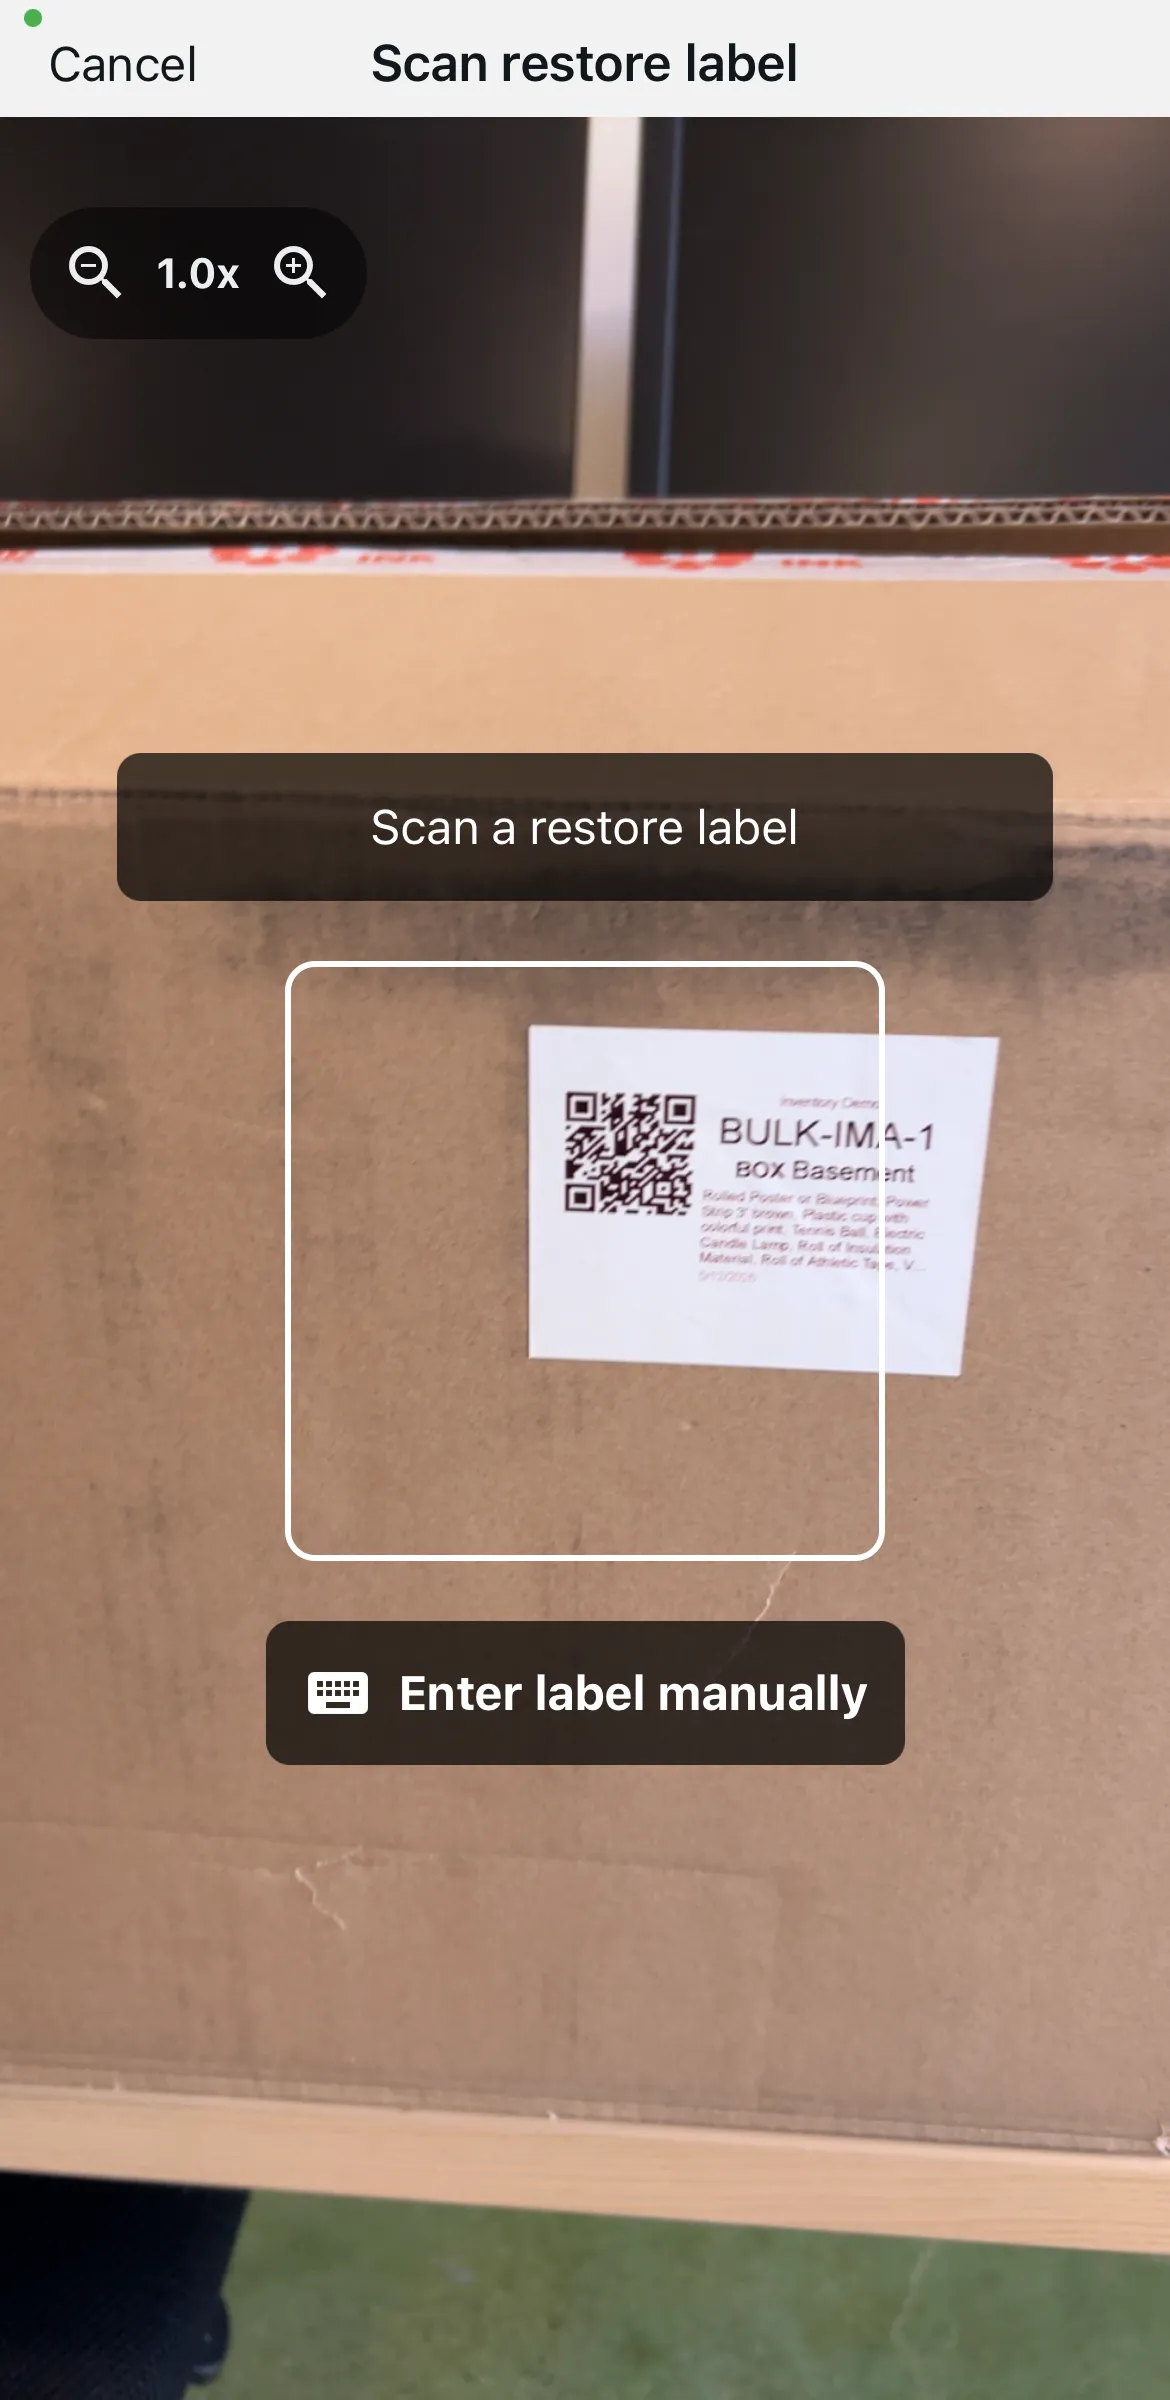
Point the camera at the label’s QR code. You can also tap Enter label manually if a code is damaged or hard to scan.
-
If the label is already on the board, scanning jumps straight to its detail screen.
-
If it’s a label from elsewhere in your organization, the app looks it up, adds it to the active list, and opens its detail screen so you can start a process.
🧴 Work a Label
Section titled “🧴 Work a Label”Opening a label (by scanning it or tapping its card) brings up the label detail screen. The header card shows the label, its location, and a chevron — tap it to open the item’s full custody details.
Start a process
Section titled “Start a process”A label that isn’t being cleaned shows a Not in process card with its current status (for example, Inventoried) and a green Start button.
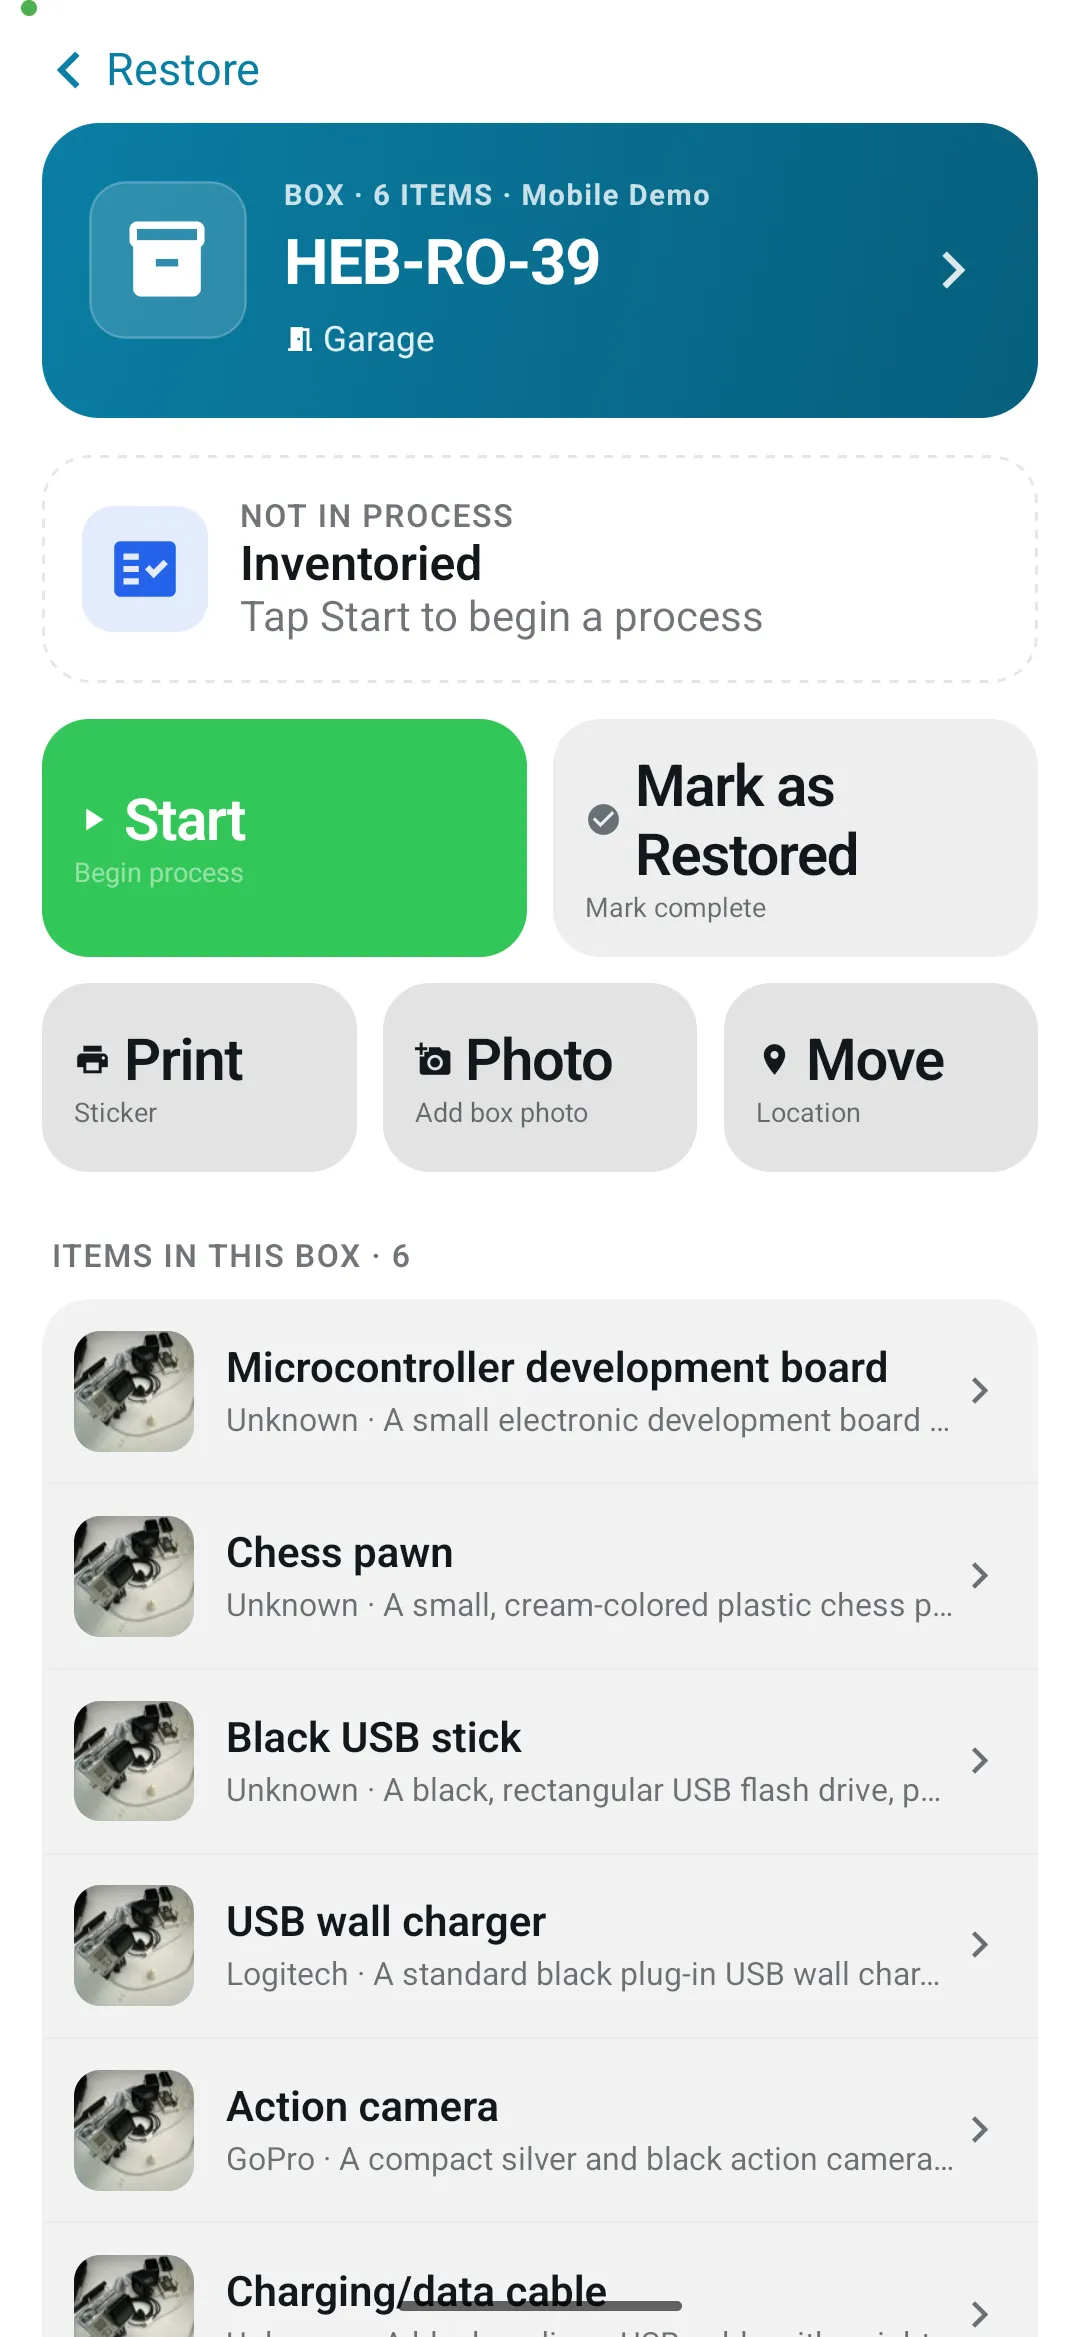
Tap Start to open the process picker.
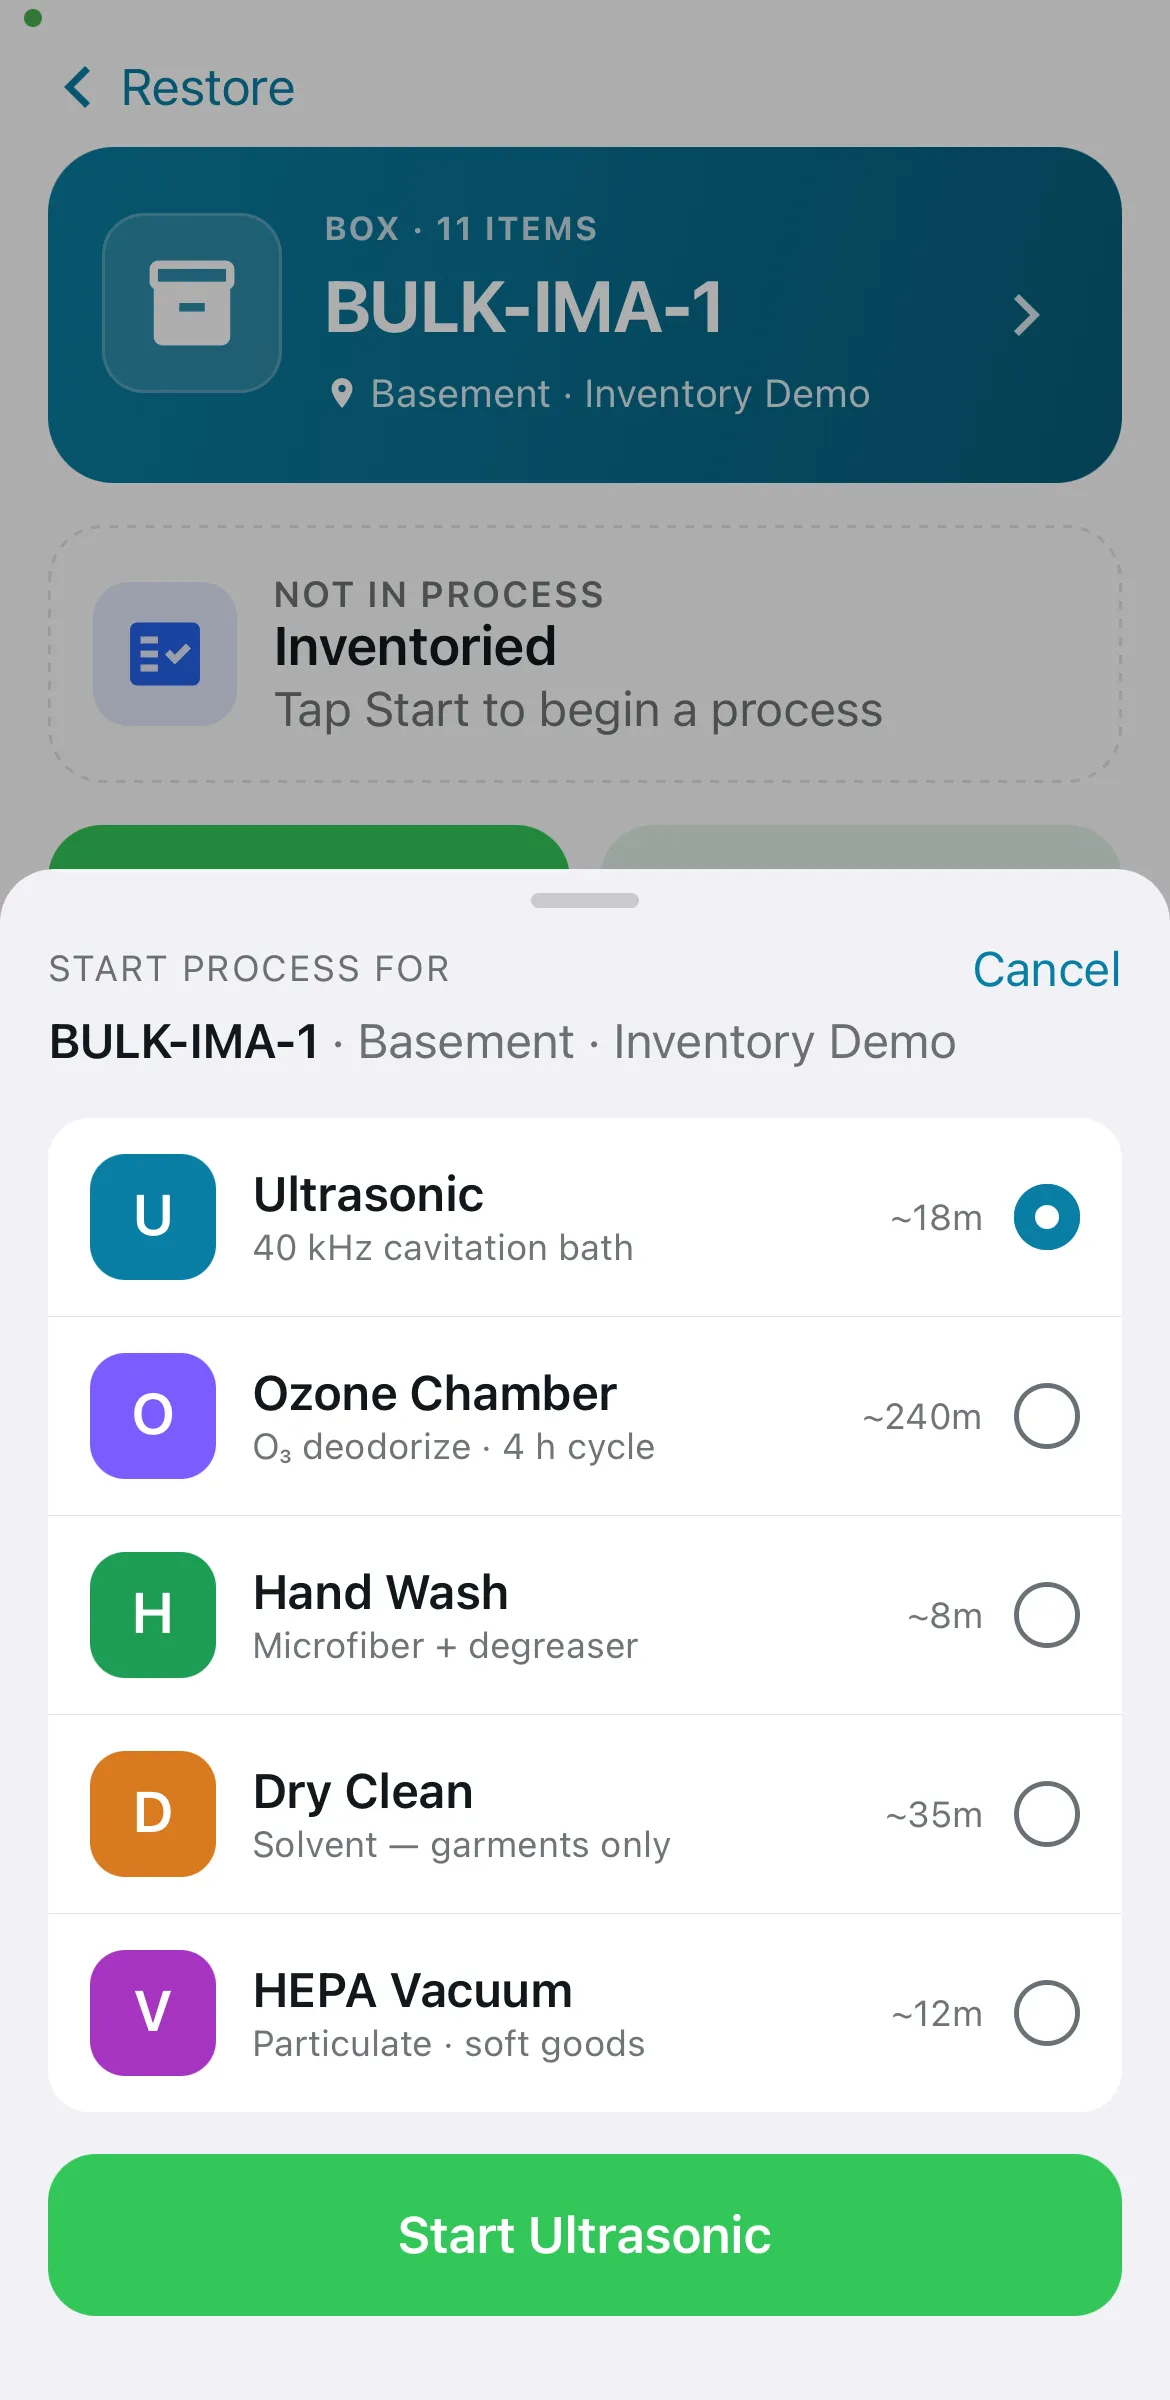
Choose the process you’re about to run, then tap Start [Process]. The built-in processes are:
| Process | What it’s for | Target time |
|---|---|---|
| Ultrasonic | 40 kHz cavitation bath | ~18 min |
| Ozone Chamber | O₃ deodorize · 4-hour cycle | ~4 hours |
| Hand Wash | Microfiber + degreaser | ~8 min |
| Dry Clean | Solvent — garments only | ~35 min |
| HEPA Vacuum | Particulate · soft goods | ~12 min |
Track and finish a step
Section titled “Track and finish a step”Once a process is running, the detail screen shows the Current process card with the live timer, the time it started, and the target. The Start button becomes Done.
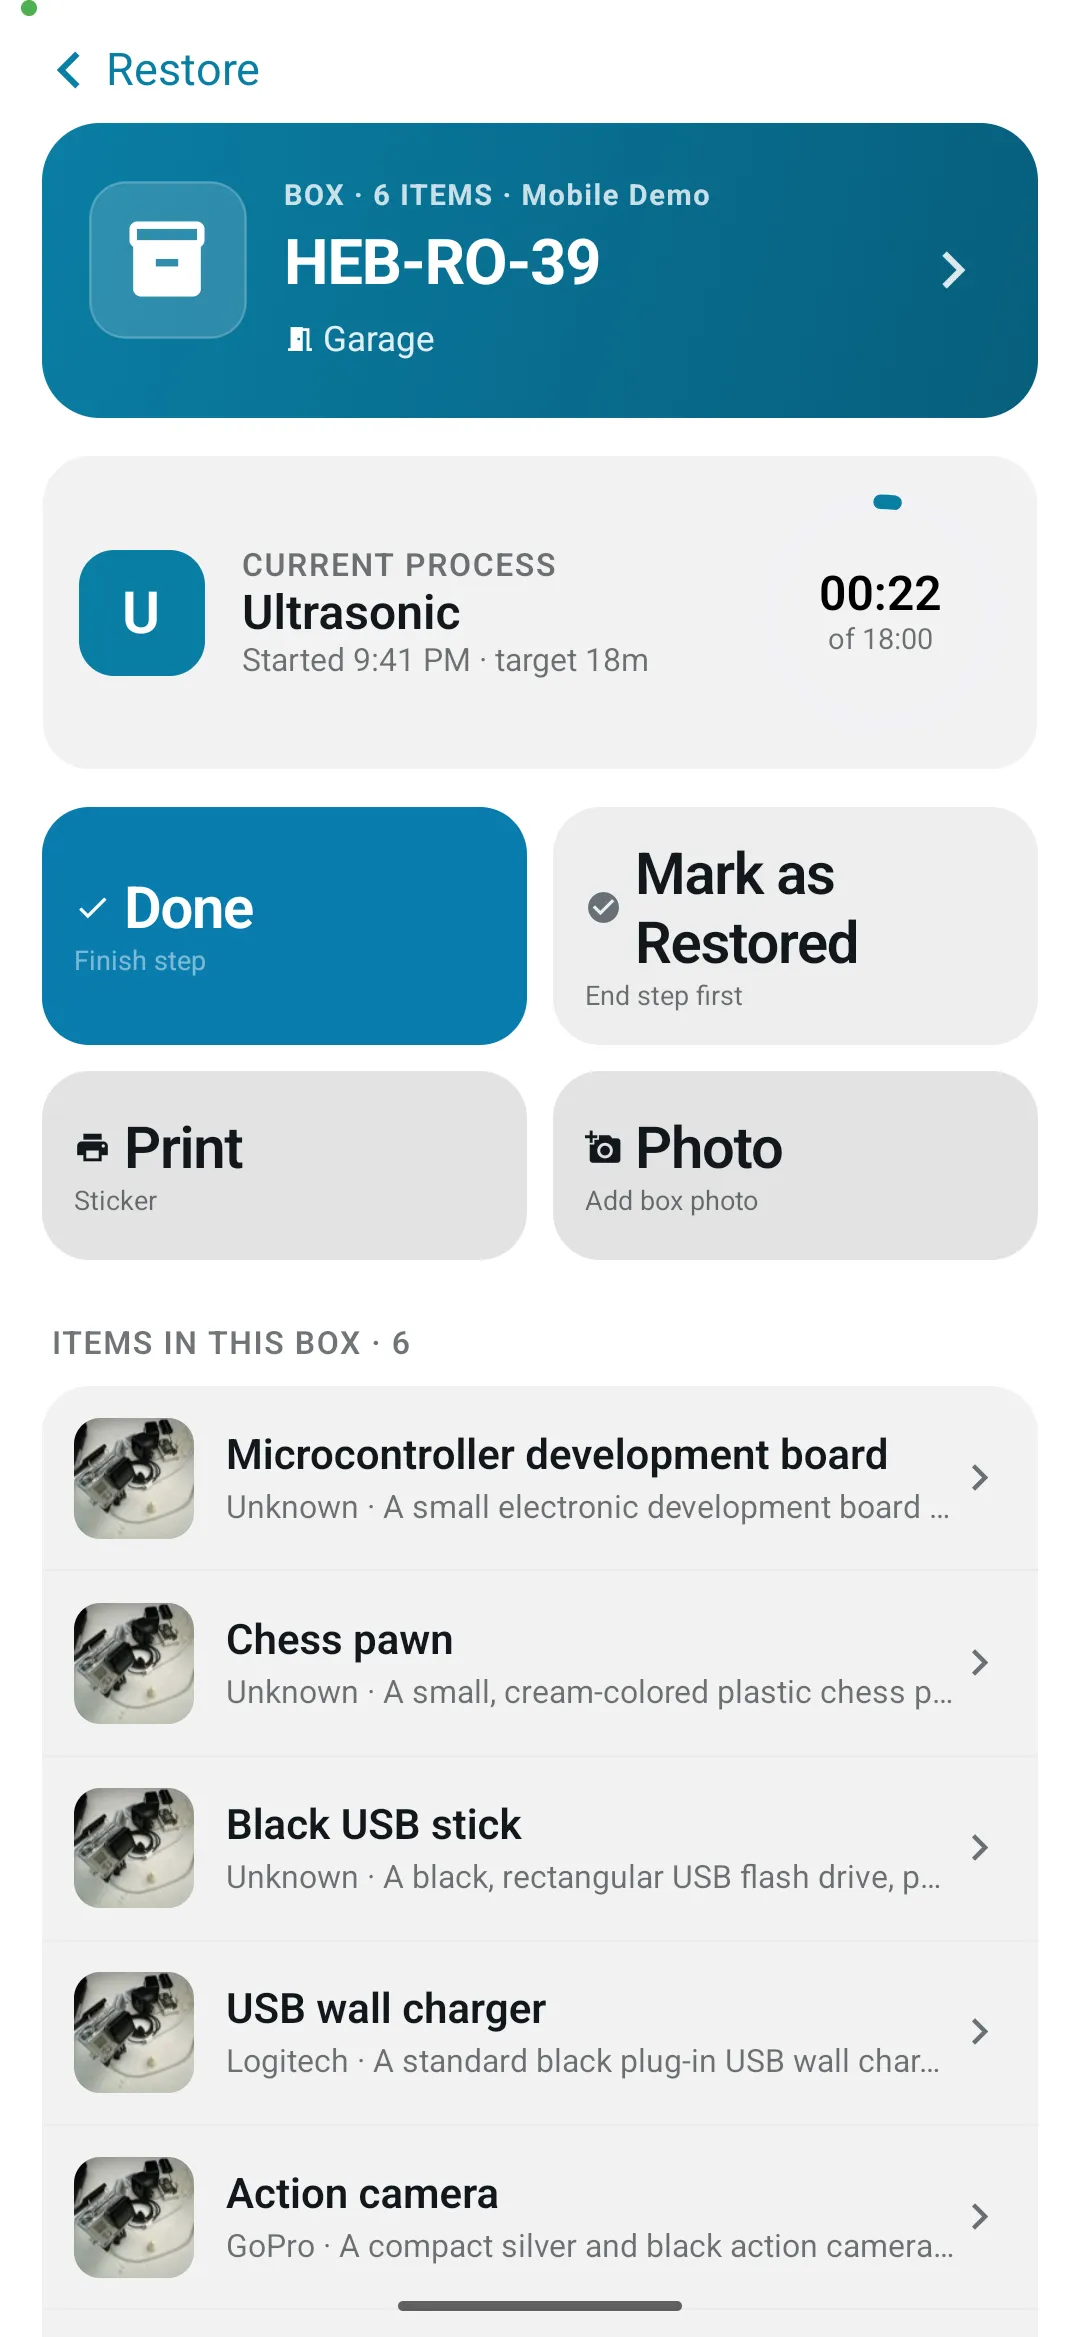
The actions are:
-
Done — ends the current step and stops its timer. The completed step is saved to the label’s process history, and the label returns to the idle state so you can start the next process (for example, Ultrasonic, then Ozone). A label only shows on the Restore board while a process is running on it.
-
Mark as Restored — marks the whole label finished (see below).
-
Print — reprints the label’s sticker (shown when Show Print Functions is turned on in Settings). See How to Print Labels for layouts and printer options.
-
Photo — adds a photo to the work in progress. Photo counts appear on the label’s card and in its history.
-
Move — shown while no process is running: moves the label to another storage location, by scanning the location’s QR code or picking it from the list.
Below the actions you’ll find the items on the label (every item in the box, or the single tagged item), the label’s photo gallery, and a Restoration History list of the completed steps — each with its process, when it ended, how long it took, and how many photos were logged.
✅ Mark a Label as Restored
Section titled “✅ Mark a Label as Restored”When a label is fully cleaned, open it and tap Mark as Restored. A confirmation dialog appears.
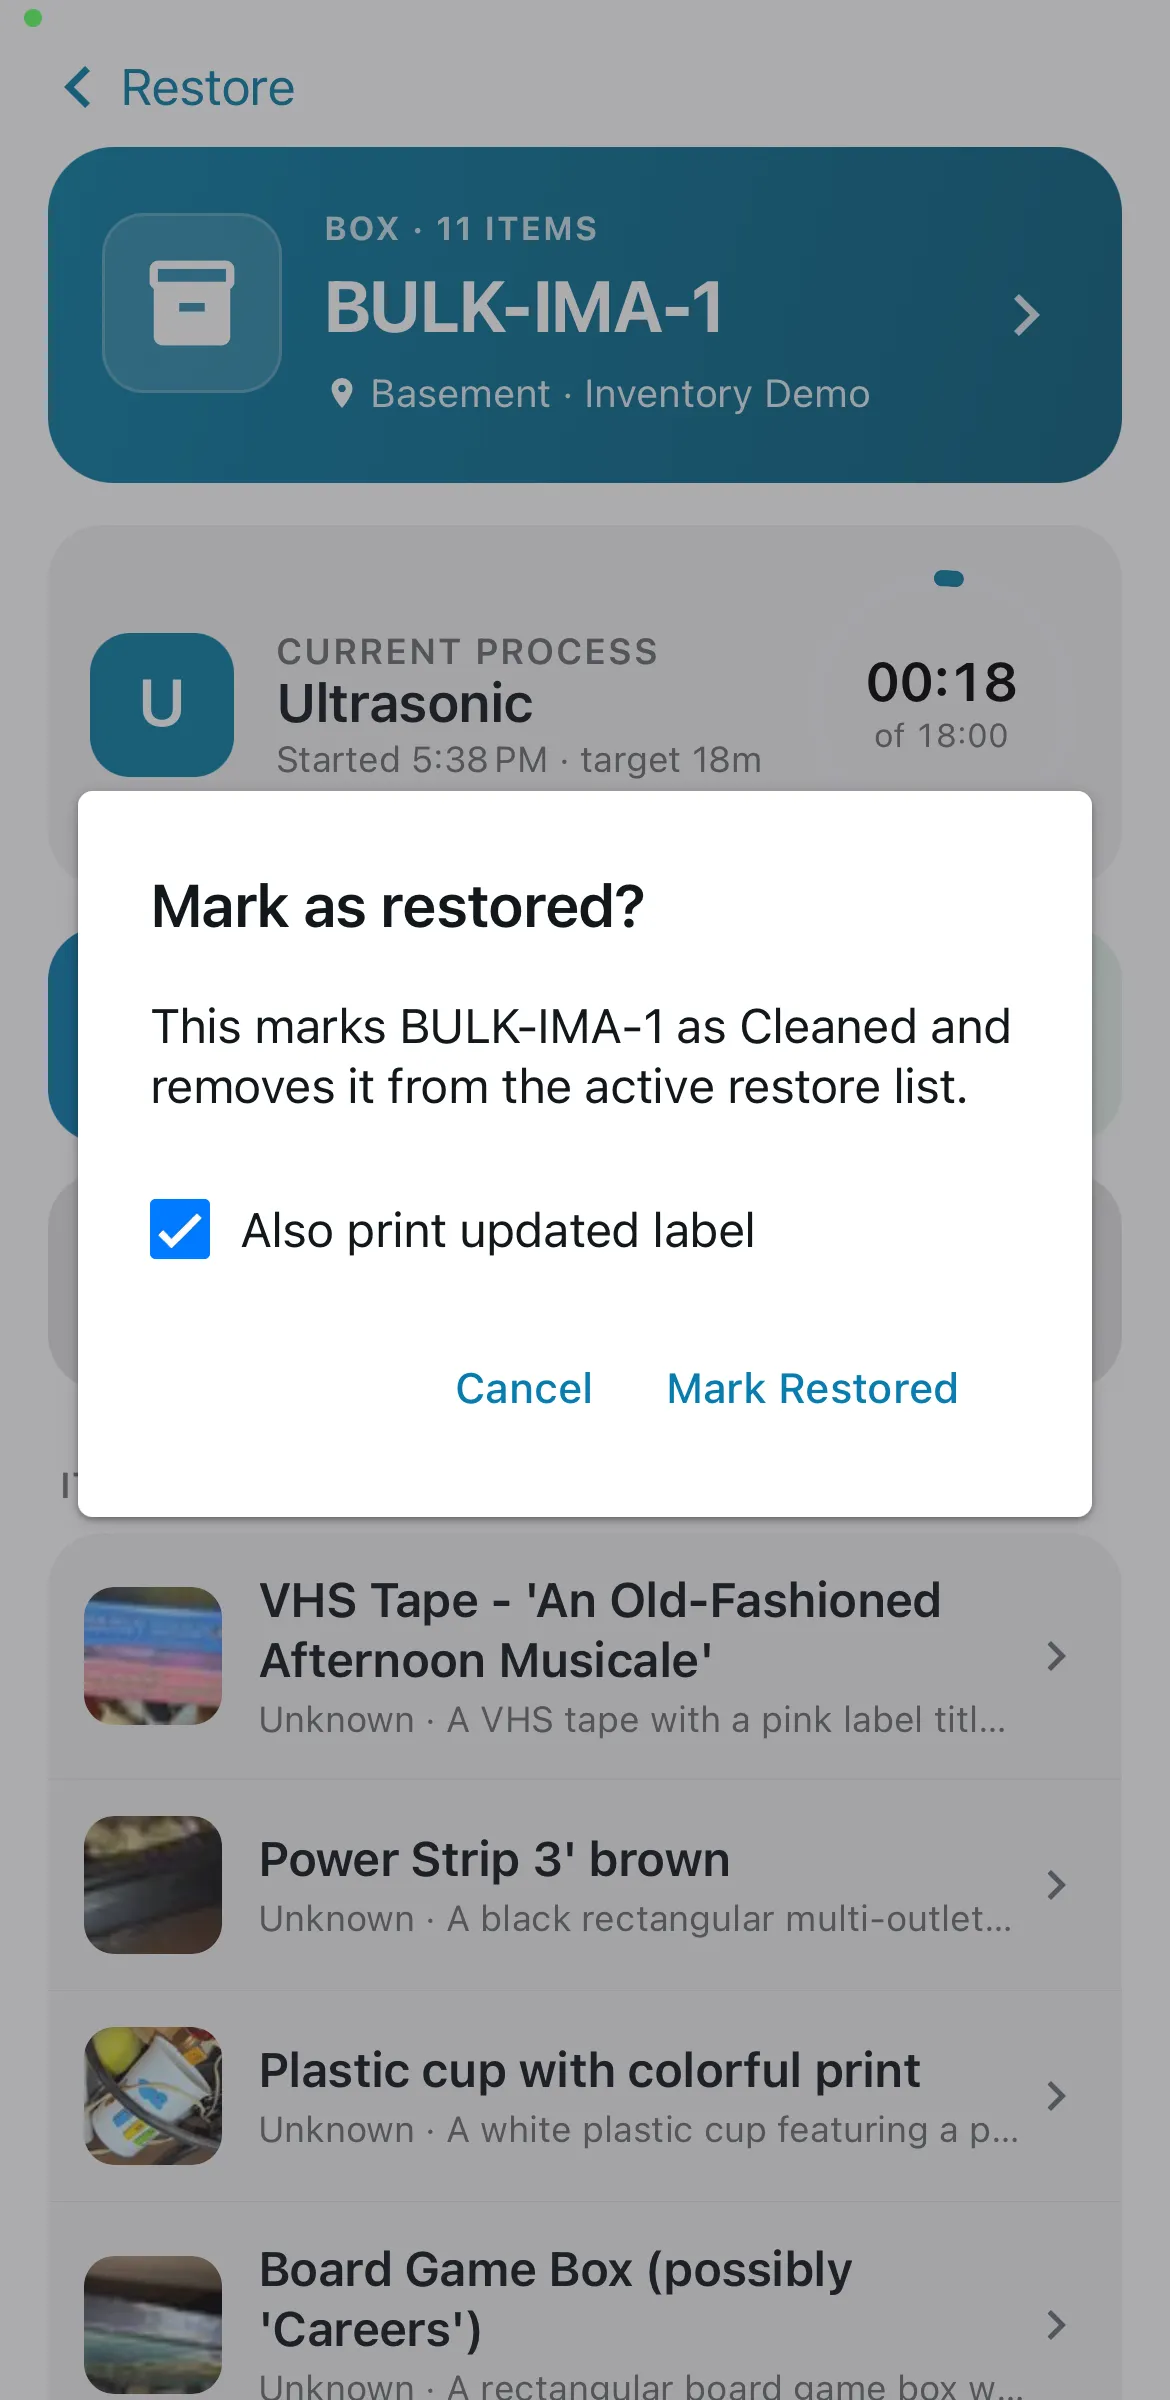
The dialog explains that this marks the label as Cleaned and removes it from the active restore list. Leave Also print updated label checked to reprint the sticker with its new Cleaned status, or uncheck it to skip printing. Tap Mark Restored to confirm.
After confirming:
-
The label’s storage status becomes Cleaned.
-
The label drops off the live Restore board.
-
Any step still running is closed out automatically, so you can mark a label restored without tapping Done first.
💡 Best Practices
Section titled “💡 Best Practices”-
Scan as you go. Scan a label right when it reaches your station so the timer reflects the real start time and the board stays accurate for the rest of the team.
-
Tap Done between steps. Ending each step keeps the process history clean and lets the next process start with a fresh timer.
-
Photograph the work. Use the Photo action to capture before/after condition — those photos stay attached to the label.
-
Watch the Over target flags. They’re a quick way to spot bottlenecks or items that may need attention without scrolling through every card.
🧩 Troubleshooting
Section titled “🧩 Troubleshooting”The Restore tab isn’t showing. Open Settings and make sure Mode is set to Restore.
A scanned label says it can’t be found. The label must belong to a job in your currently selected organization. Confirm you’re signed in and have the right organization selected, then rescan, keeping the QR code centered in the frame.
The timer looks too high / “Over target.” That’s expected when a step runs longer than its target time — it’s a highlight, not an error. Tap Done to close out the step when it’s finished.
I marked the wrong label as Restored. Marking a label Restored sets its status to Cleaned and removes it from the active board, but it doesn’t delete the label or its items. You can find the label again from the job’s inventory and adjust its status if needed.