
Add Job Images
This article explains how you can add job images such as exterior photos, team working photos, site condition documentation, and other general job-related images on ContentsPal.
🧭 Summary
Section titled “🧭 Summary”Job images allow you to document the overall job site with photos that aren’t tied to specific items or boxes. Common examples include exterior building shots, team photos, damage documentation, weather conditions, or before/after comparisons. These images are stored at the job level and can be accessed by anyone viewing the job.
⚙️ Prerequisites
Section titled “⚙️ Prerequisites”-
A job must be created before adding images
-
Camera permissions enabled (mobile app)
-
Supported image formats: JPG, JPEG, PNG, WEBP, HEIC, GIF
-
Maximum file size: 10MB per image (20MB for 360° photos)
🚀 How to Add Job Images
Section titled “🚀 How to Add Job Images”From the Mobile App
Section titled “From the Mobile App”1. Access Job Images
Section titled “1. Access Job Images”-
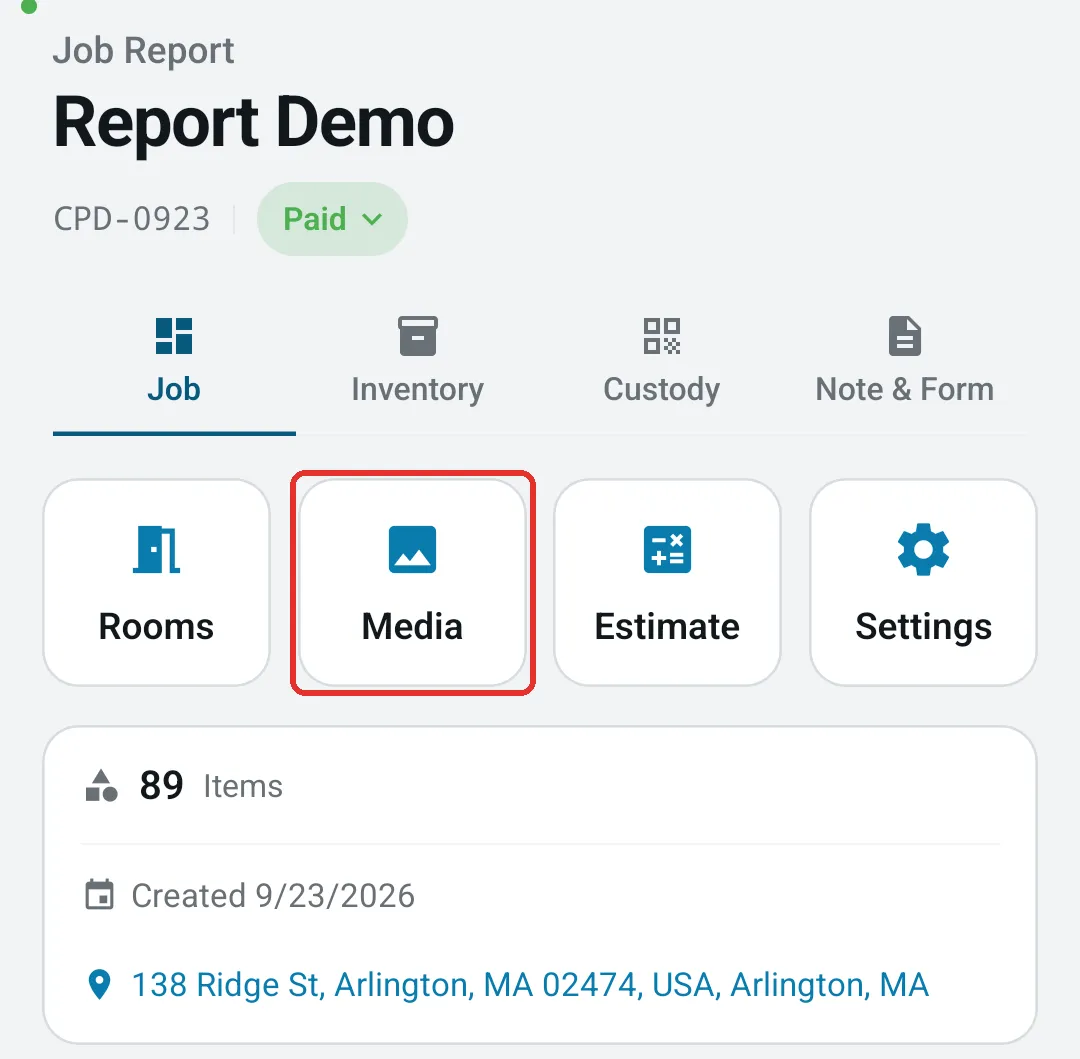
Open your job from the Jobs list (this opens the Job Report on its Job tab)
-
Tap the Media tile
2. Capture New Photos
Section titled “2. Capture New Photos”-
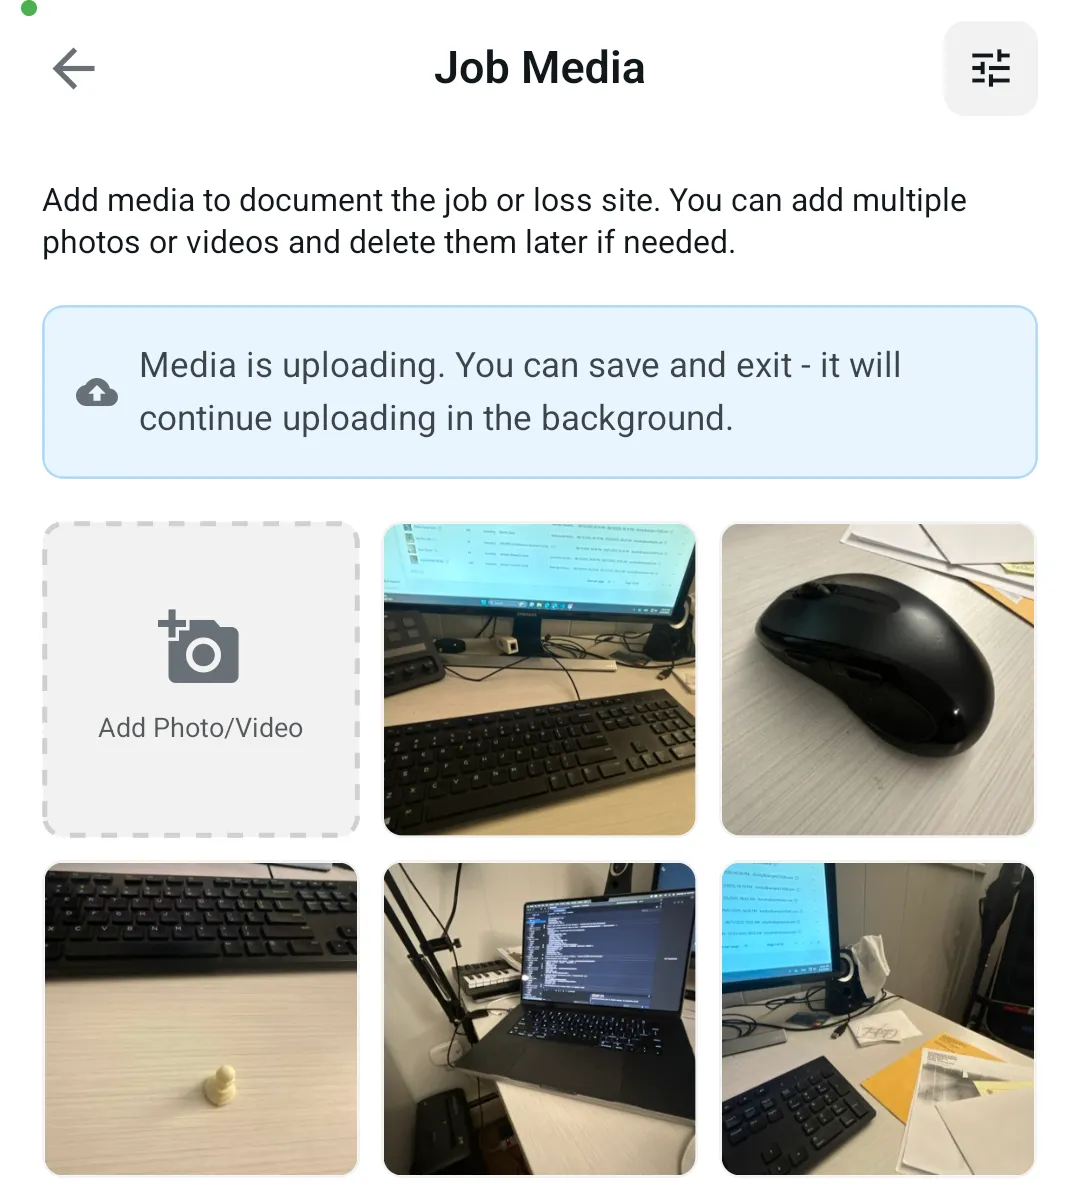
In the Job Media gallery, tap the Add Photo/Video tile to take a new photo (you can also record video, choose from your library, or add a 360° photo)
-
The camera interface opens in job photo mode (optimized for site documentation)
-
Tap the shutter button to capture your photo
-
The photo is saved to your device first, then uploads to the cloud in the background
3. Take Multiple Photos
Section titled “3. Take Multiple Photos”-
After taking one photo, you can immediately take another
-
All photos appear in the gallery as they upload
-
A Media is uploading banner shows while photos upload
-
You can continue working while photos upload in the background
4. View and Manage Photos
Section titled “4. View and Manage Photos”-
Tap any photo in the gallery to view it full screen
-
Swipe between photos in full-screen view
-
Tap the delete icon to remove unwanted photos
-
AI automatically generates labels and titles for your photos
From the Web App
Section titled “From the Web App”1. Access Job Photos
Section titled “1. Access Job Photos”-
Navigate to your job from the Jobs dashboard
-
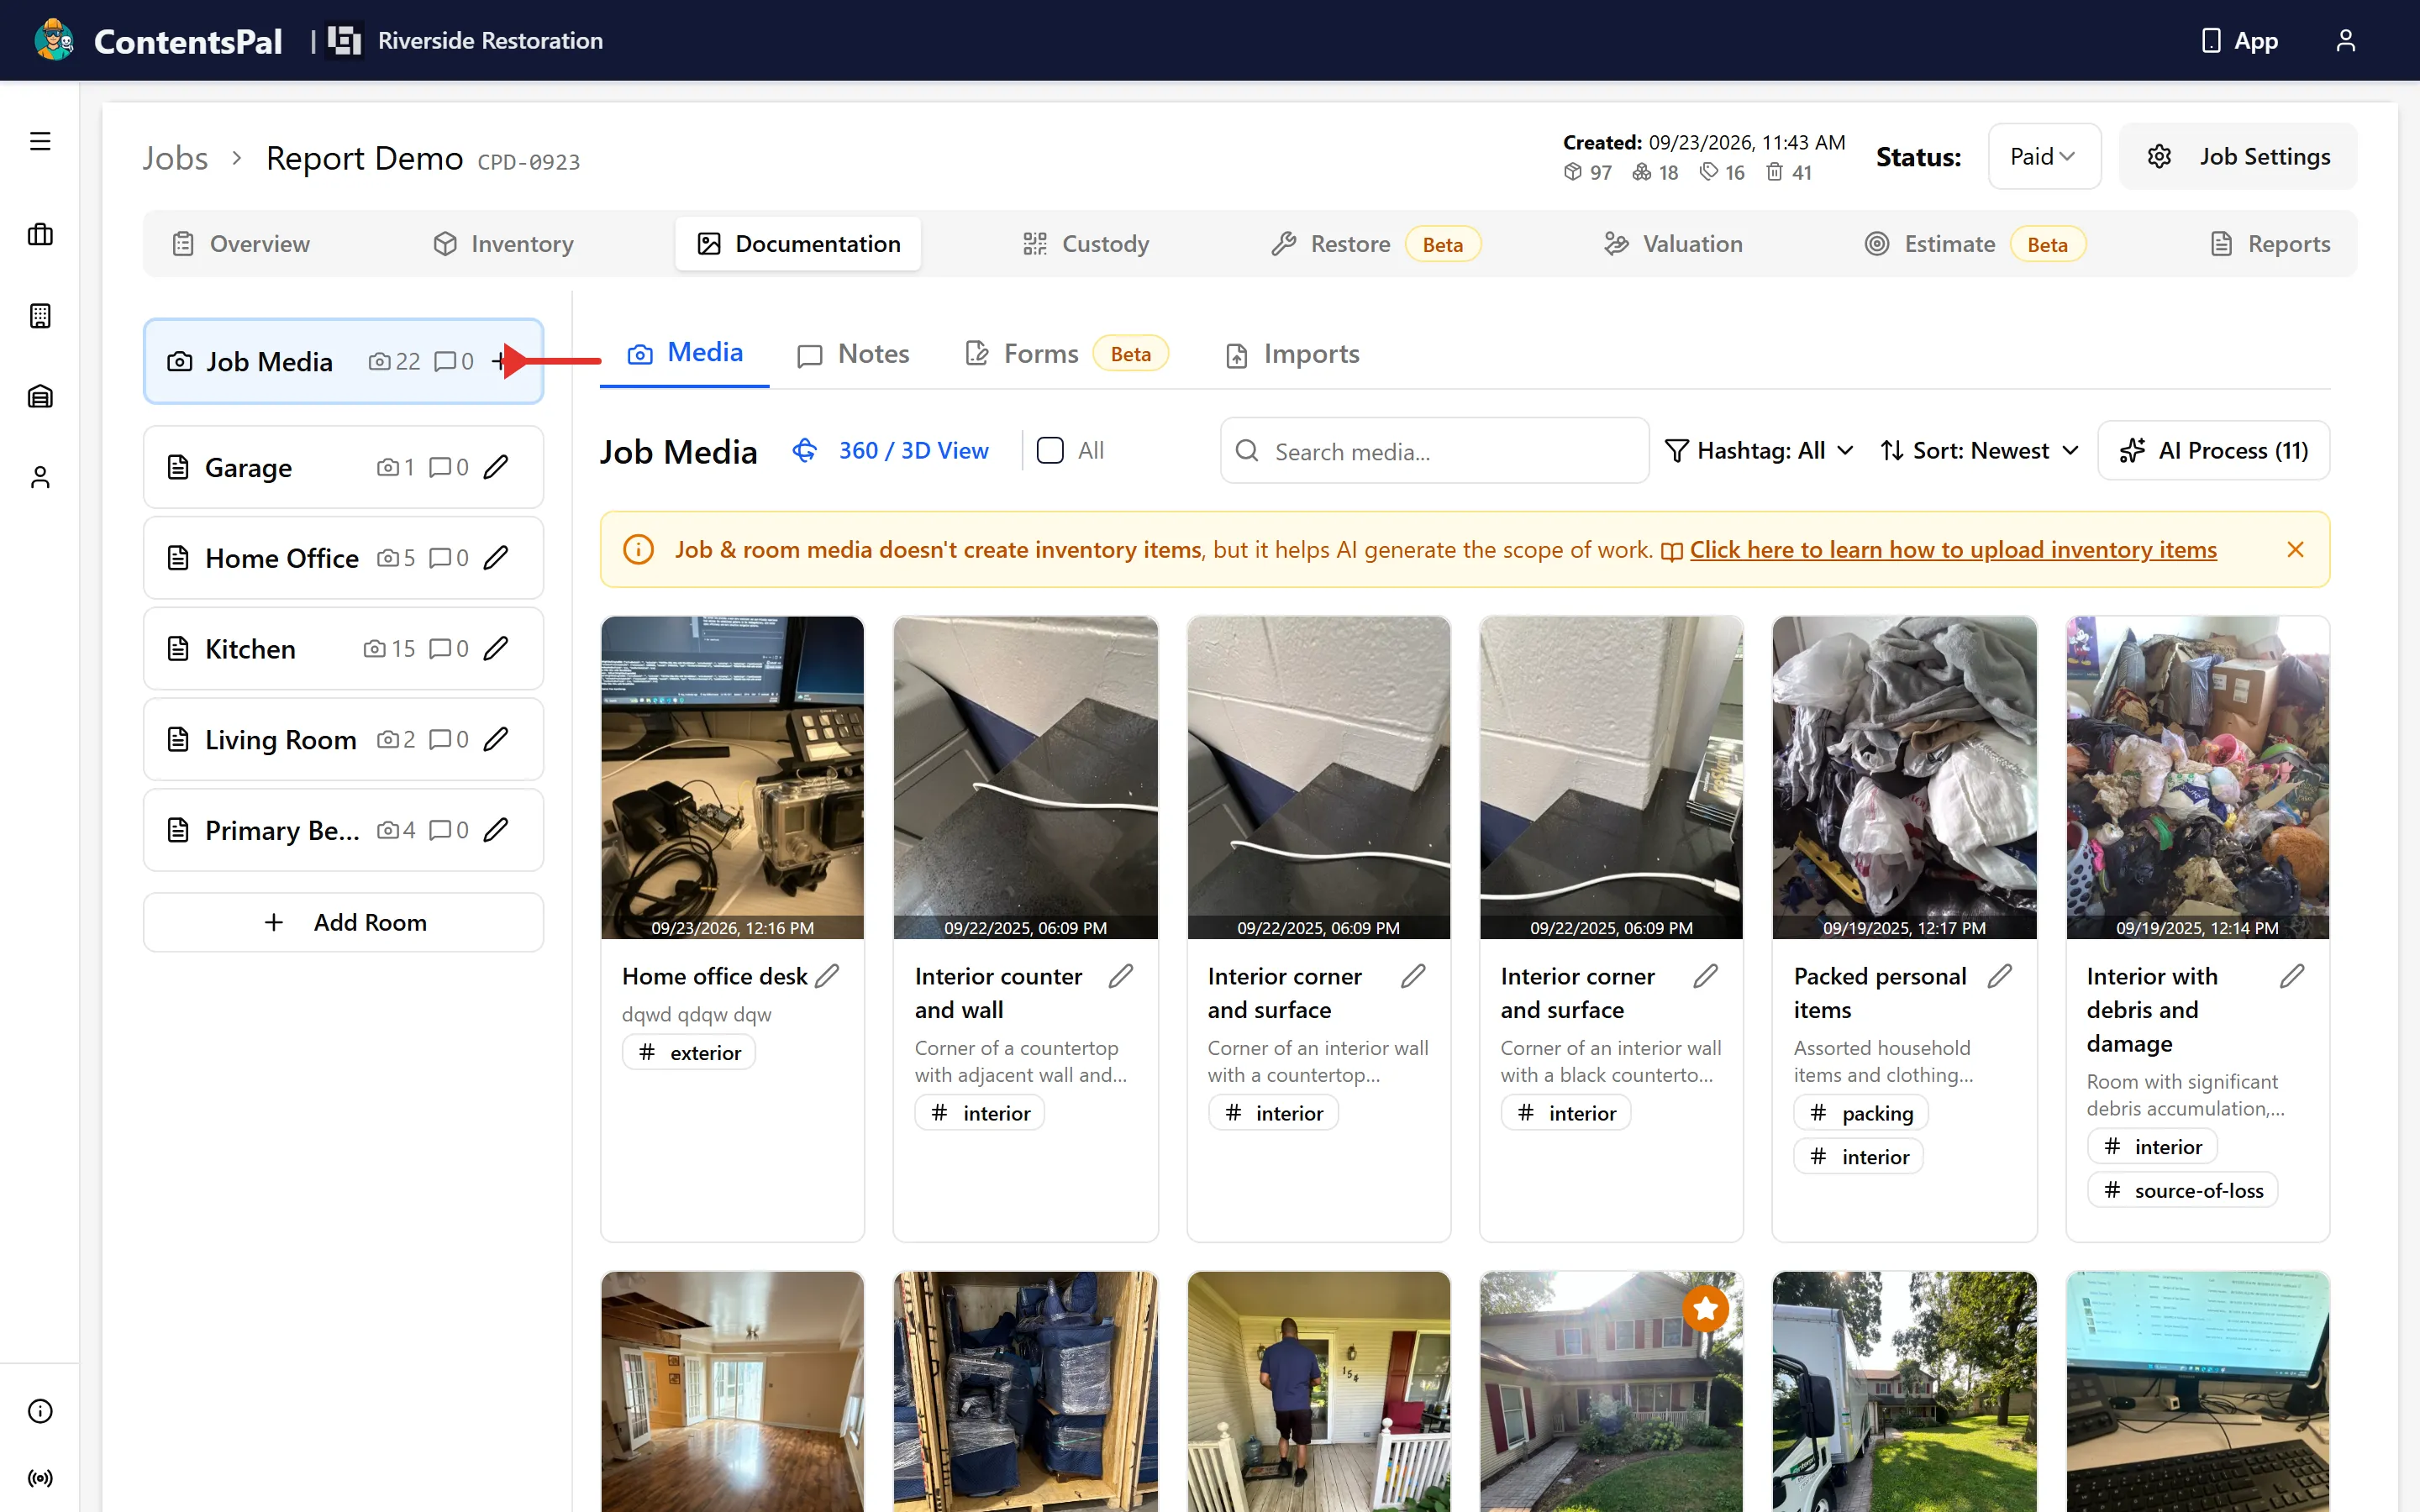
Click on the Documentation tab and make sure the Media view is selected
-
Find the Job Media section at the top of the left sidebar
-
Press the Add Media button at the top of the media area, or the plus (+) button next to Job Media
2. Upload Images
Section titled “2. Upload Images”-
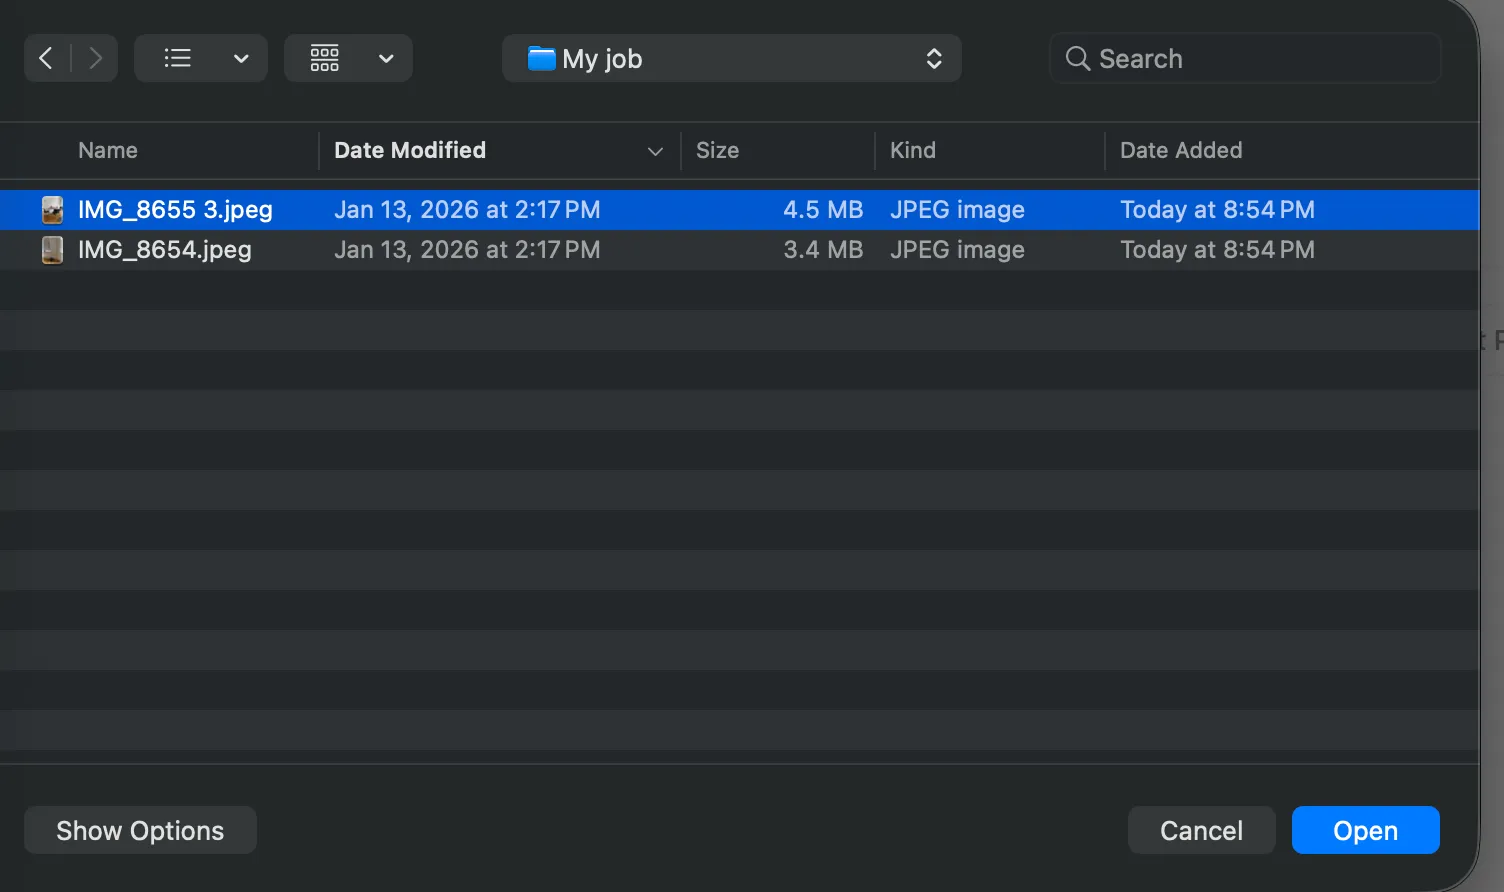
Select one or multiple image files from your computer
-
Click Open to start uploading
3. Review Uploaded Images
Section titled “3. Review Uploaded Images”-
Images appear in a grid layout as they upload
-
Thumbnails are automatically generated
-
AI processes each image to suggest titles and labels
-
Click any image to view it full screen
-
Hover over images to see delete options
📋 Job Images vs. Item Images
Section titled “📋 Job Images vs. Item Images”It’s important to understand the difference between job-level and item-level images:
| Job Images | Item Images |
|---|---|
| General site documentation | Specific item documentation |
| Exterior photos, team photos, site conditions | Photos of individual furniture, equipment, belongings |
| Accessed via the Media tile (mobile) or Job Media (web) | Created during item tagging/boxing workflow |
| Stored with the job | Stored with individual Item records |
| Not used for item identification | Used for AI item identification and pricing |
When to use Job Images:
-
Building exterior/interior overview shots
-
Team members on site
-
Before/after comparisons
-
Document weather conditions
-
Site damage documentation
-
Equipment setup photos
When to use Item Images:
-
Individual furniture pieces
-
Electronics with serial numbers
-
Damaged items needing documentation
-
Items going to storage or cleaning
✅ Best Practices
Section titled “✅ Best Practices”-
Capture exterior shots at the start of the job to document site conditions
-
Take before photos of rooms before packing begins
-
Document your team working on site for client transparency
-
Use good lighting - outdoor photos work best in daylight
-
Include context - show the full building, not just close-ups
-
Take after photos when the job is complete to show the site was left clean
-
Upload regularly throughout the job rather than waiting until the end
-
Review AI-generated labels to ensure images are properly categorized
🧩 Troubleshooting
Section titled “🧩 Troubleshooting”Photos aren’t uploading on mobile:
-
Check your Wi-Fi or mobile data connection
-
Photos save on your device first and upload when connection is available
-
Check for the Media is uploading banner in the gallery
Upload fails on web:
-
Verify file format is supported (JPG, PNG, WEBP, HEIC, GIF)
-
Check file size is under 10MB (360° photos can be up to 20MB, videos up to 100MB)
-
Try compressing large images before uploading
-
Ensure browser has stable internet connection
AI labels aren’t generating:
-
Wait a few moments - AI processing happens in the background
-
Refresh the page or reopen the gallery
-
Check that the image uploaded successfully (no error icons)
Can’t find the Media tile:
-
Ensure you have an active job selected
-
Check that you’re on the Job tab of the Job Report (mobile)
-
Verify you have permissions to edit the job
🔑 Key Takeaways
Section titled “🔑 Key Takeaways”-
Job images document the overall site, not individual items
-
Photos can be added from both mobile (camera) and web (upload)
-
Mobile saves offline first, ensuring no photos are lost
-
AI automatically generates labels and titles for organization
-
Images are shared with everyone who has access to the job
-
Use job images for site documentation, item images for inventory
-
To download all of a job’s photos as one ZIP file, see How to Download Job Images