
Non-Salvageable Report
A complete record of all items marked as non-salvageable, ready for total-loss documentation and claim support.
What’s Included
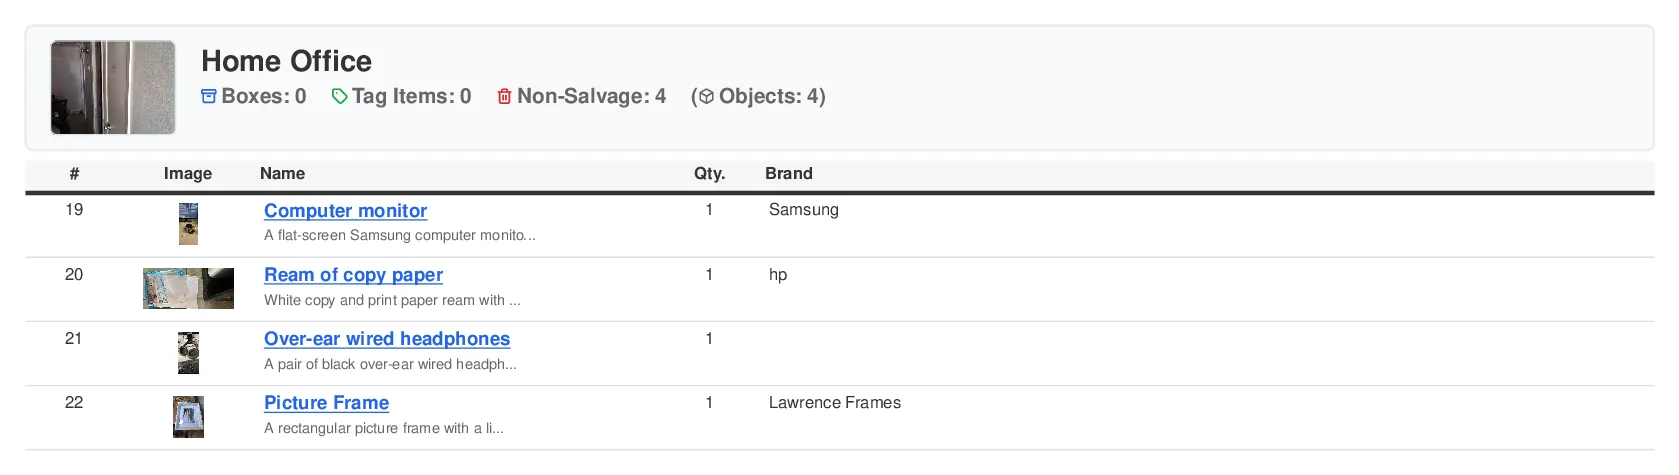
Section titled “What’s Included”The Non-Salvageable Report shows by default:
-
Item Photos: Visual documentation
-
Item Details: Name, description, quantity, brand
-
Room Location: Items grouped by the room where they were found
You can add more columns — such as model, size, label, or replacement price — under Column Selection (see below).
This report is pre-configured to show only non-salvageable items, making it perfect for disposal documentation and total-loss claims.
Available as: PDF or Spreadsheet (XLSX). PDFs include photos and professional formatting, while spreadsheets provide sortable data you can filter and manipulate.
When to Use This Report
Section titled “When to Use This Report”Best for:
-
Documenting items for disposal approval
-
Total-loss claims documentation
-
Sharing with adjusters for non-salvage verification
-
Recording items that cannot be restored
Not ideal for:
-
Salvageable items (use Salvageable Report)
-
Visual presentations (use Photo Report)
-
Quick overviews (use Job Summary Report)
How to Generate
Section titled “How to Generate”-
Open your job in the web app
-
Click the Reports tab (top right)
-
Click Generate Report
-
Select Non-Salvageable Report from the list
-
Choose PDF or Spreadsheet format
-
Customize your options under Advanced Options (see below)
-
Click Generate Report
Note: Most reports download immediately. Large jobs (2000+ items) are emailed to you when ready.
Customization Options
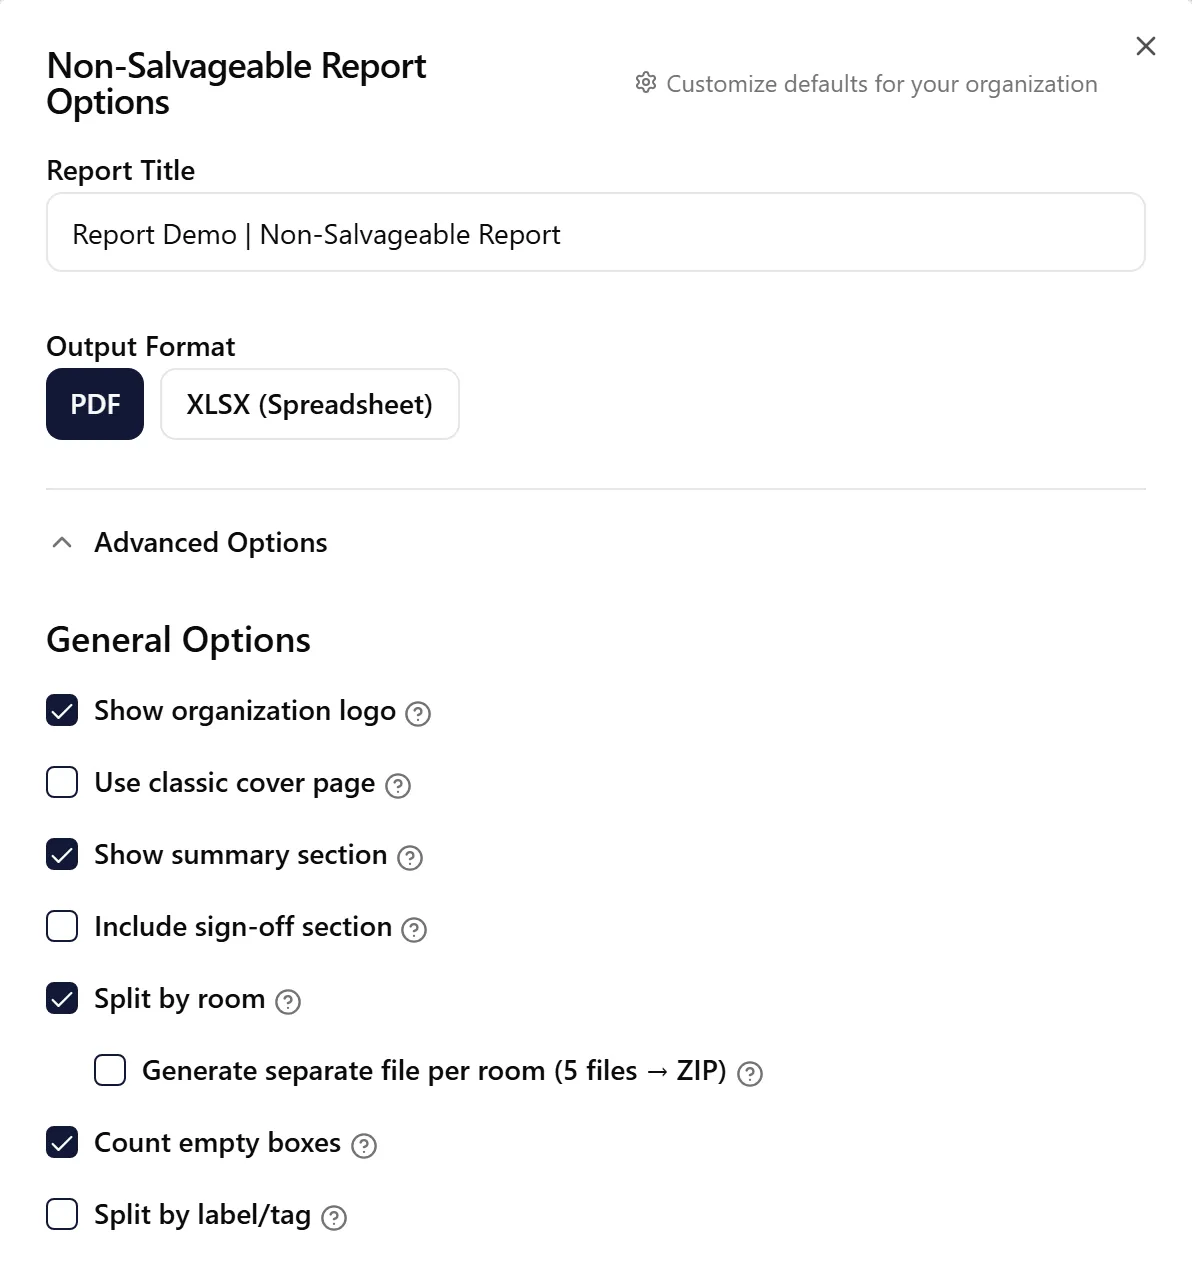
Section titled “Customization Options”Show Organization Logo
Section titled “Show Organization Logo”Default: Enabled
Adds your organization’s logo to the report header.
Show Summary Section
Section titled “Show Summary Section”Default: Enabled
Includes a summary section with total counts and statistics.
Count Empty Boxes
Section titled “Count Empty Boxes”Default: Disabled (shown when Show Summary is on)
Also counts boxes that were created but never had any items scanned into them, and shows how many of them are empty, for example Boxes: 20 (3 empty; S: 12, M: 8). Leave it off to count only boxes that hold at least one item, which matches the Boxes count on the job page.
Split by Room
Section titled “Split by Room”Default: Enabled
Organizes the report into separate sections for each room.
Split by Label/Tag
Section titled “Split by Label/Tag”Default: Disabled (PDF only)
Creates separate sections for each box or bag label.
Include Sign-Off Section
Section titled “Include Sign-Off Section”Default: Disabled (PDF only)
Adds a confirmation sign-off section with an empty signature line at the end of the report.
Include Additional Item Photos
Section titled “Include Additional Item Photos”Default: Disabled (Spreadsheet only)
Adds up to five of each item’s additional photos to the spreadsheet, one photo per column, at the far right of the table after every other column. These columns are left out of the column filters, so sorting and filtering still work on the item data. Jobs with many photos take longer to generate with this turned on.
Item Filters
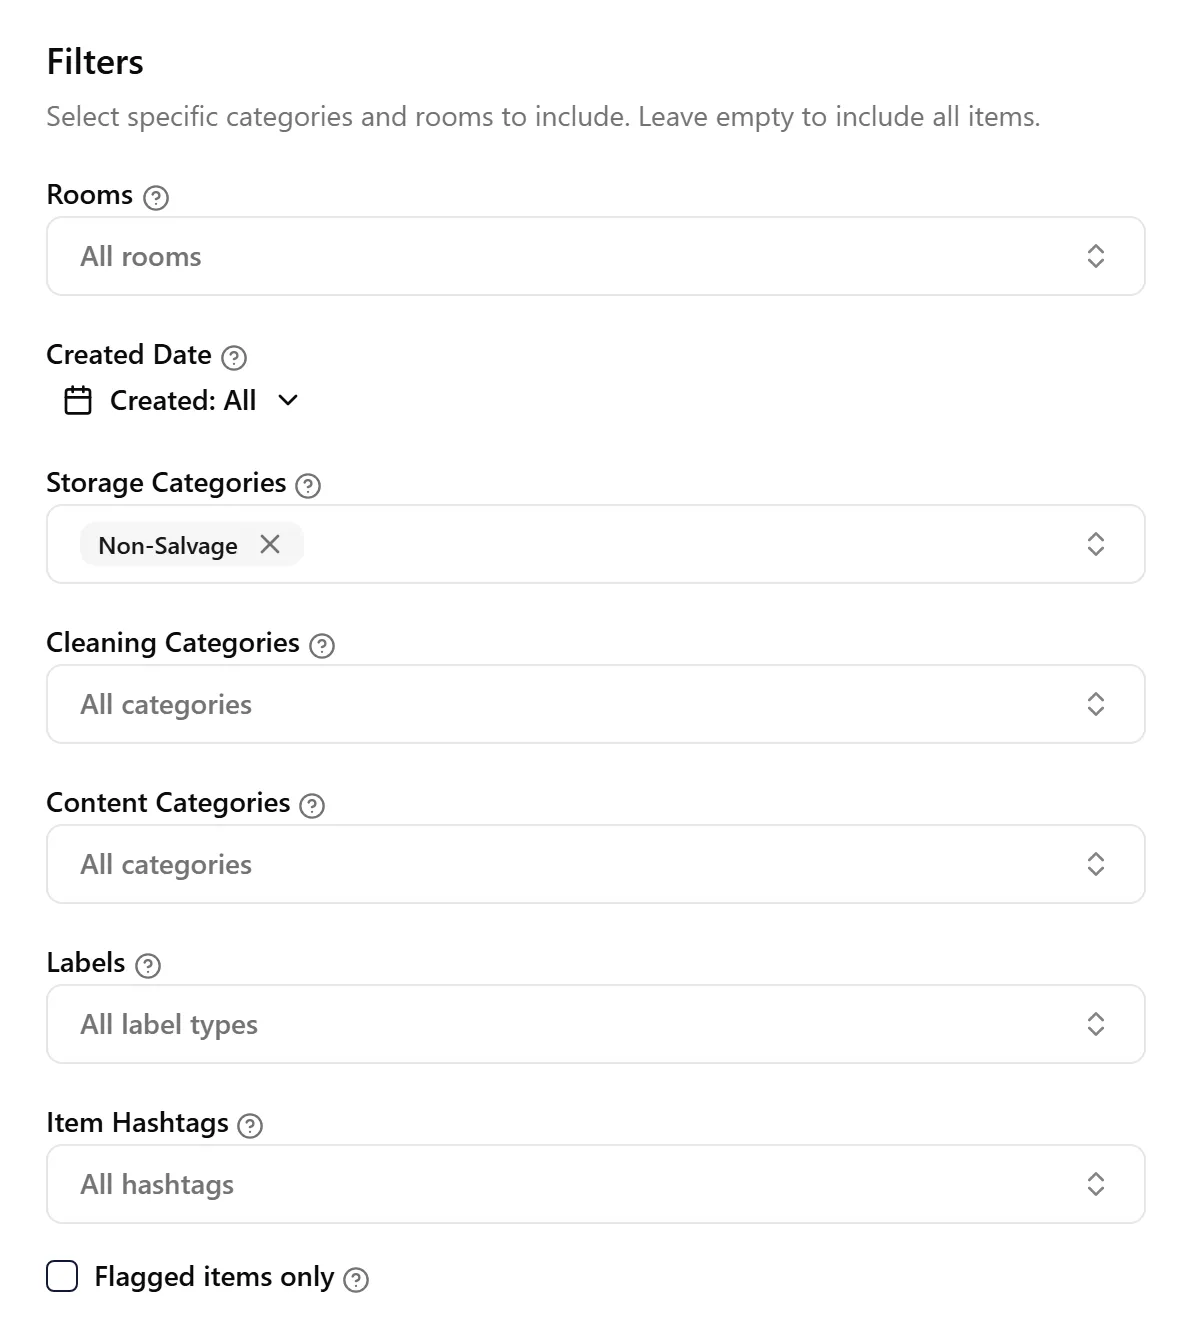
Section titled “Item Filters”Default: Storage Categories set to Non-Salvage (all non-salvageable items included)
Use filters to include only specific items in the report. The Storage Categories filter starts on Non-Salvage — if you clear it, items from every storage category are included.
Available filters:
-
Rooms: Filter by specific rooms. Select “No Room” to include unassigned items
-
Created Date: Include only items created within a date range
-
Storage Categories: Filter by where items are stored (Storage, Left On Site, Third Party, Non-Salvage, Other)
-
Cleaning Categories: Filter by cleaning requirements (As Is, Needs Cleaning, Biohazard, Unknown)
-
Content Categories: Filter by content type (e.g., Electronics, Kitchenware)
-
Labels: Filter by label type (Box, Tag, Textile, Garment Bag, Non-Salvageable, Other, or No Label)
-
Item Hashtags: Include only items with specific hashtags
-
Flagged items only: Include only items flagged for review
When you select multiple options in a filter, the report includes items matching any of those selections.
Column Selection
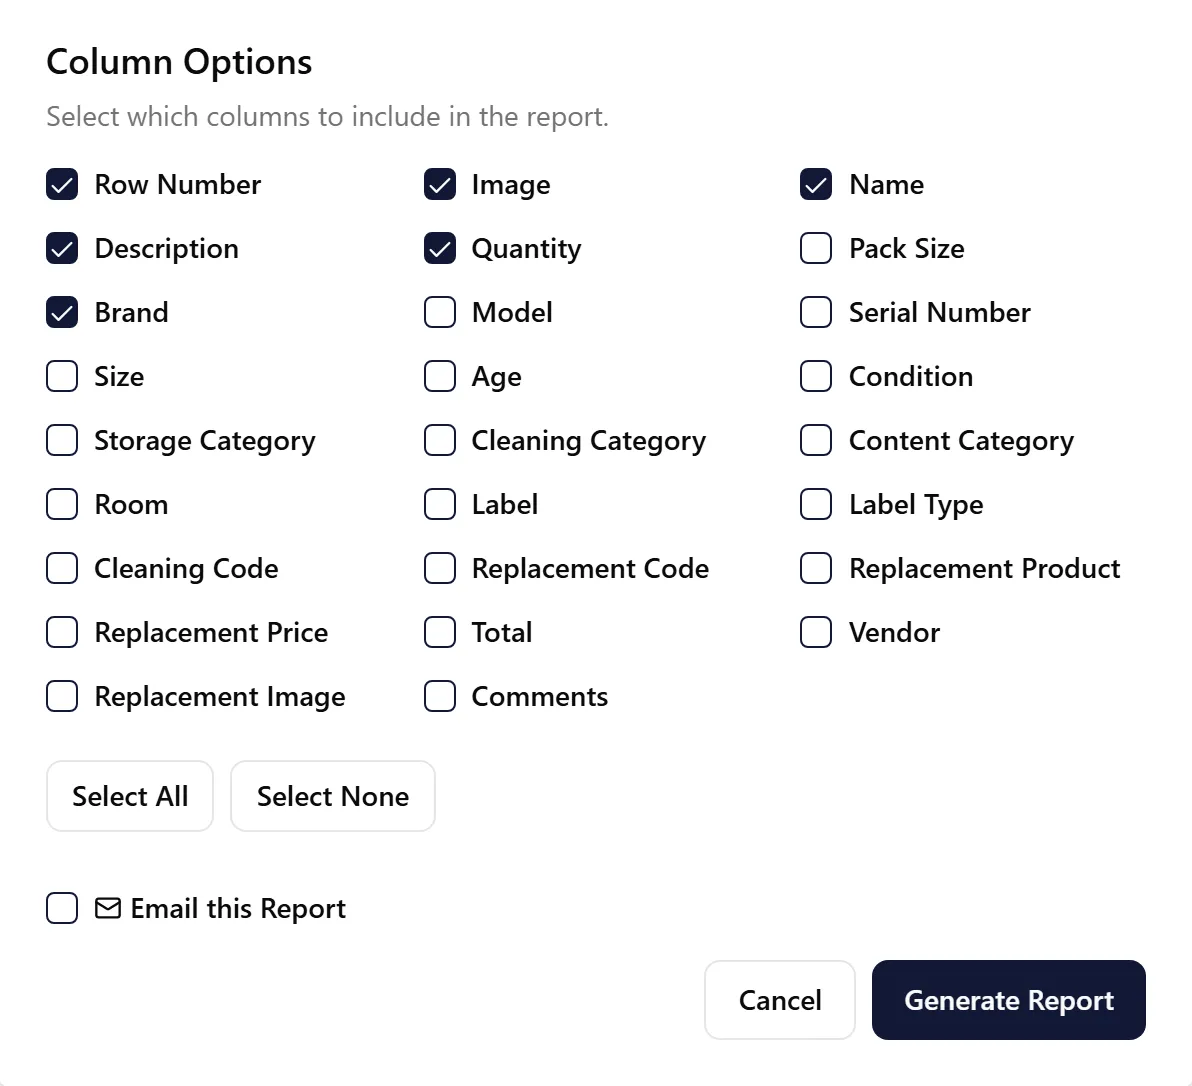
Section titled “Column Selection”Default columns shown:
-
Row Number
-
Image
-
Name
-
Description
-
Quantity
-
Brand
Optional columns you can toggle:
-
Pack Size
-
Model
-
Serial Number
-
Size
-
Age
-
Condition
-
Storage Category
-
Cleaning Category
-
Content Category
-
Room
-
Label
-
Label Type
-
Cleaning Code
-
Replacement Code
-
Replacement Product
-
Replacement Price
-
Total
-
Vendor
-
Replacement Image
-
Comments
Use “Select All” or “Select None” buttons, then toggle individual columns as needed.
Viewing Report History
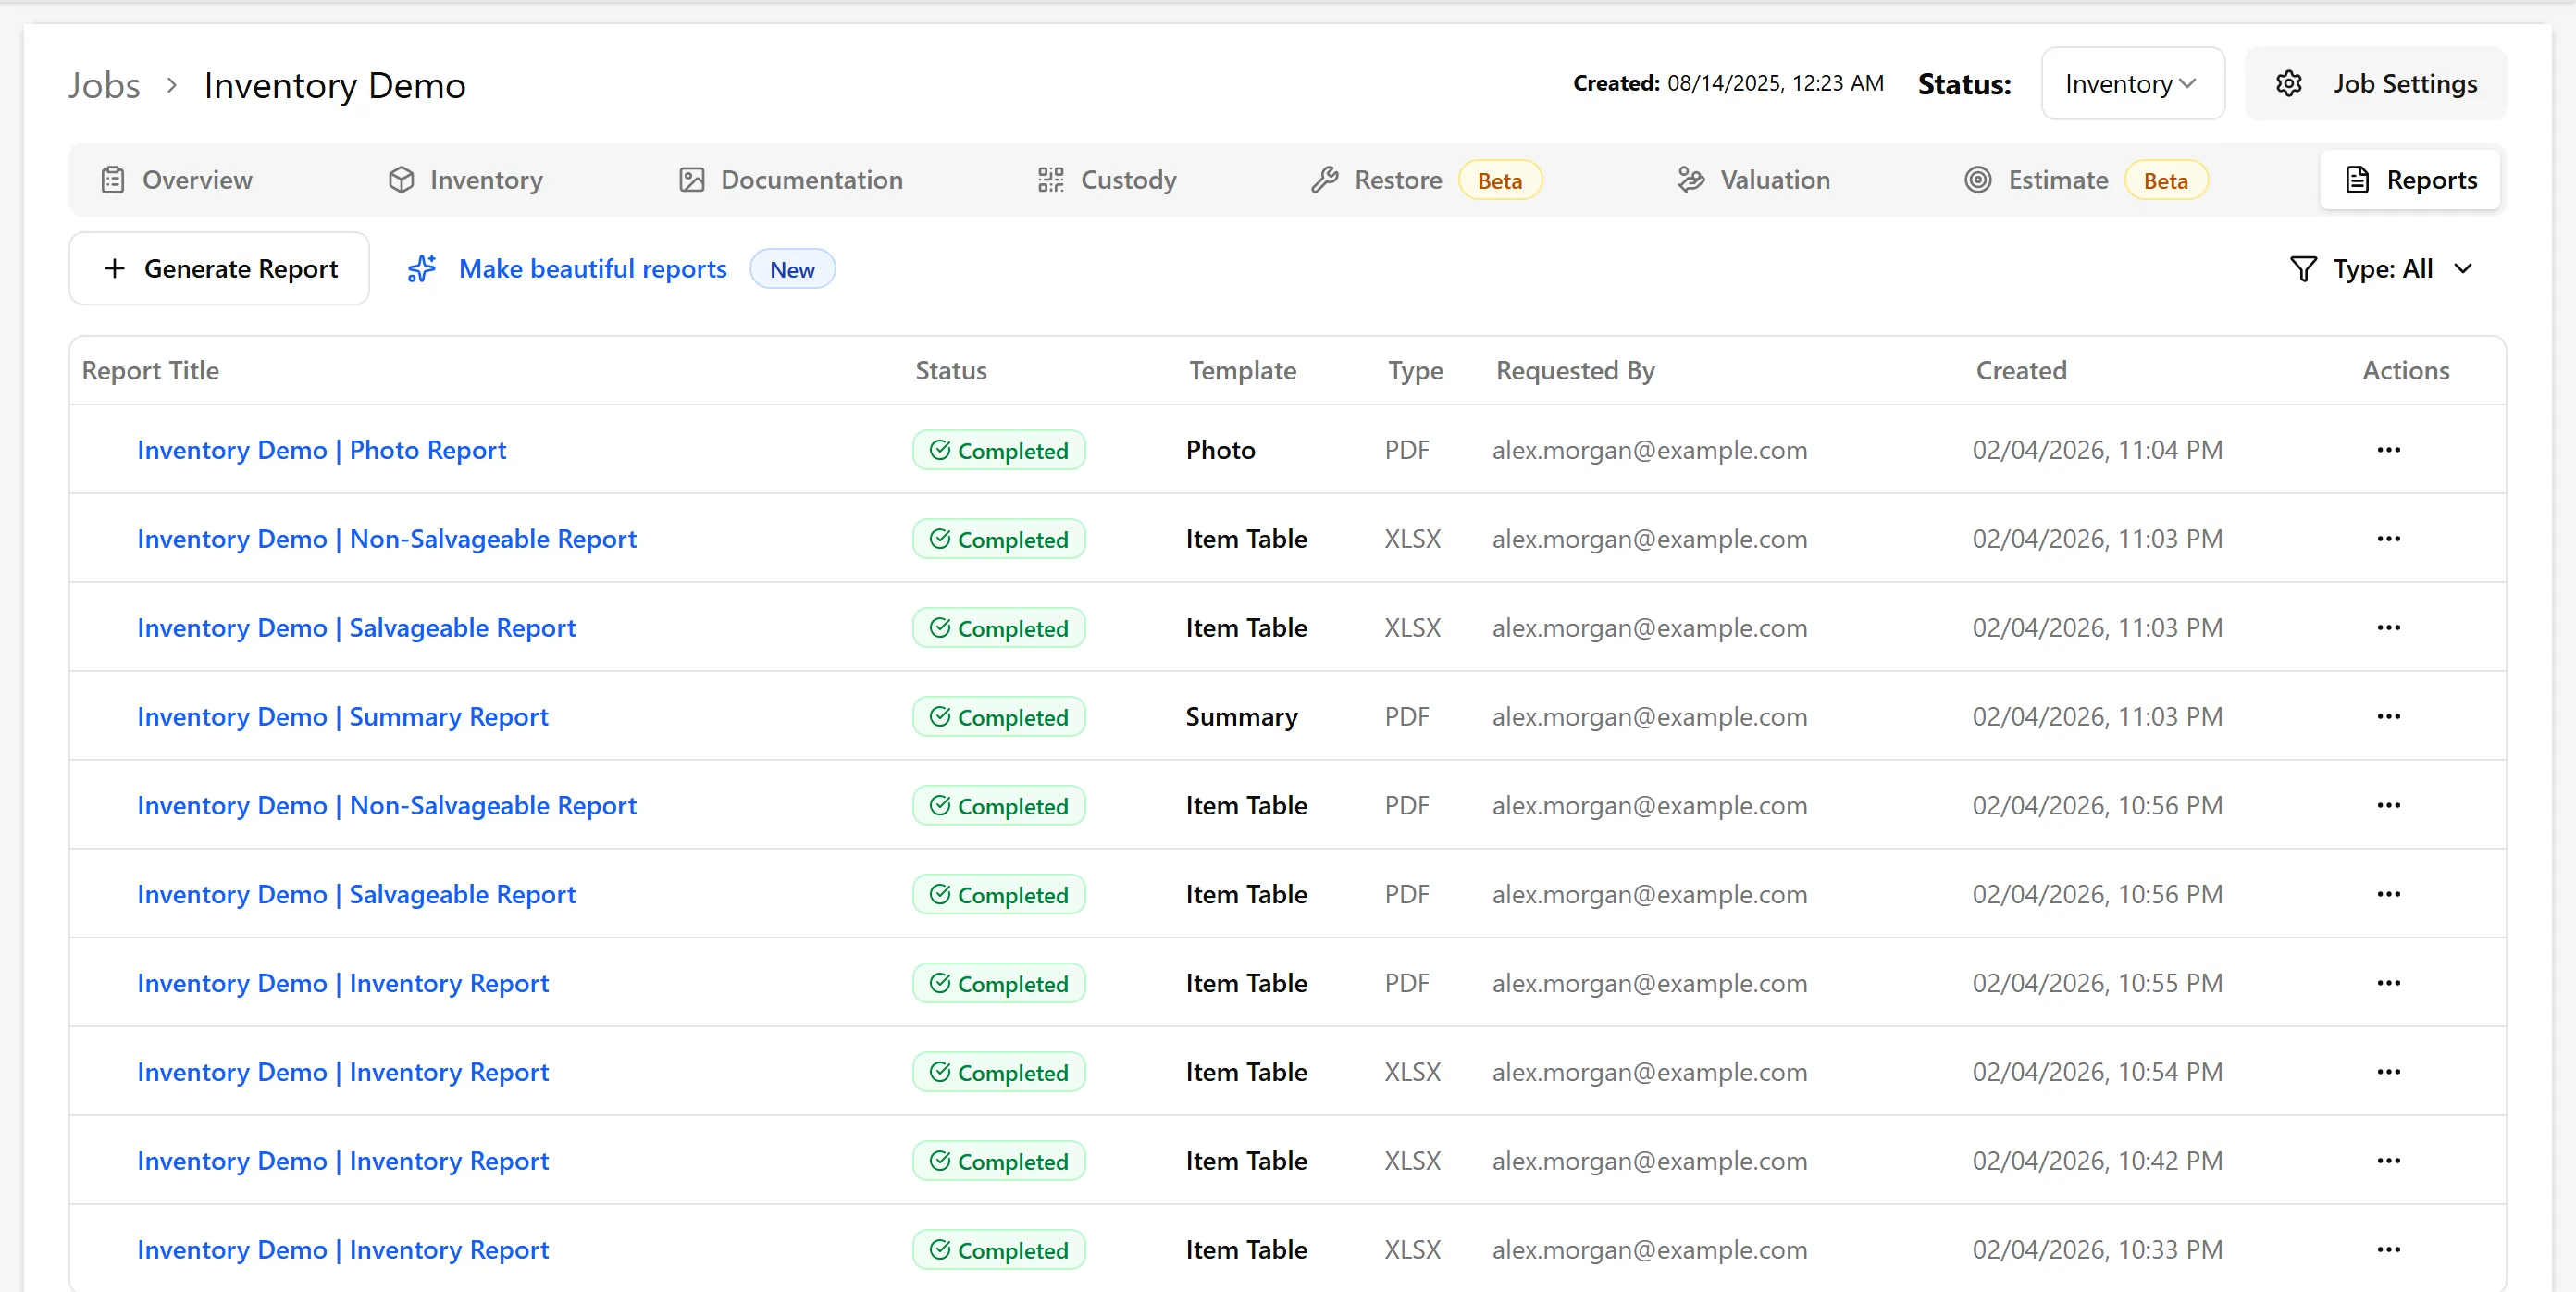
Section titled “Viewing Report History”All generated reports are stored in the Reports tab of your job where you can:
-
View past reports
-
Download reports again anytime
-
See generation status
-
Track who requested each report
-
Use this report for disposal approval documentation
-
Include replacement pricing when submitting to adjusters
-
Remove pricing columns when sharing with third parties
-
Split by room for large properties
-
Use filters to generate reports for specific areas
Disposal Approval Workflow
Section titled “Disposal Approval Workflow”For policyholder or adjuster approval of non-salvageable items:
-
From the job page, click Request Non Salvageable Disposal Approval
-
Enter the recipient’s email address
-
Customize the message if needed
-
Recipient receives a link to review all non-salvageable items
-
They can adjust details, leave comments, and approve electronically
This creates a verified digital approval record.
Troubleshooting
Section titled “Troubleshooting”Report doesn’t include items I expect
-
Verify items are marked as non-salvageable
-
Make sure Item Filters are including the items
-
Clear all filters to see all non-salvageable items
Can’t find the report
-
Check your browser downloads
-
Check email (including spam) for large reports
-
Look in the Reports tab