
Converting Job and Room Photos to Items
This guide explains how to convert job site and room photos into inventory items after they’ve been uploaded.
When taking photos in the app, make sure you’re uploading to the correct location:
-
Documentation photos (job site overviews and room shots) should be uploaded as Jobsite Photos or Room Photos
-
Inventory photos (items) should be captured using the Capture tab
If you accidentally uploaded inventory items as documentation photos, this guide will help you convert them into proper inventory items.
When to Use This
Section titled “When to Use This”Use this workflow when you have:
-
Job site photos that should be individual items
-
Room photos that need to be converted to inventory
-
Documentation photos taken before starting the inventory process
Quick Option: Convert Photos Directly in the Web App
Section titled “Quick Option: Convert Photos Directly in the Web App”You can convert photos into items without downloading and re-uploading them:
-
In the web app, open your job and go to the Documentation tab (Media view)
-
In the left sidebar, select Job Media or the room that holds the photos
-
Tick the checkbox on each photo you want to convert (or tick All)
-
Click Batch Actions → Convert to Items
-
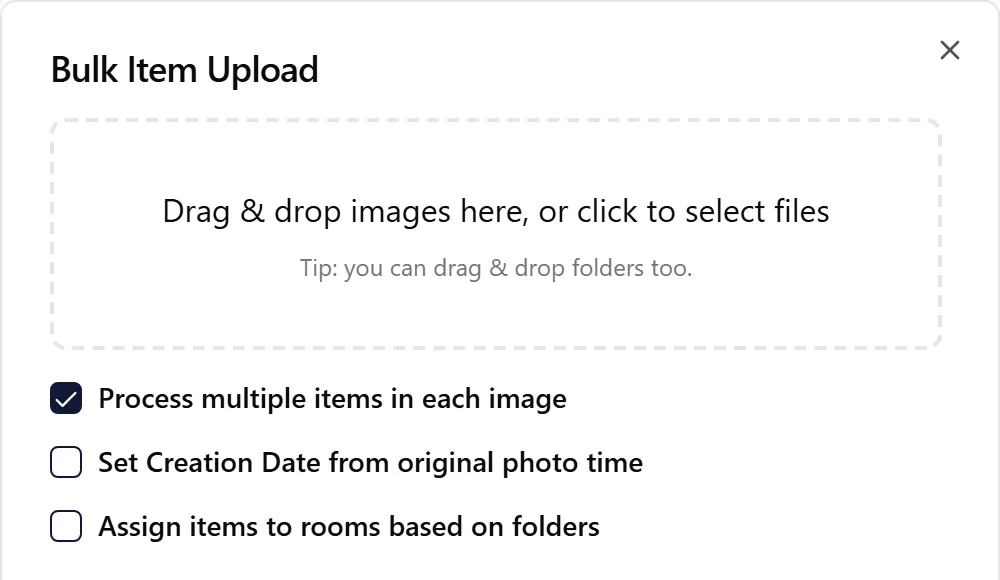
(Optional) Tick Process multiple items in each image if a photo shows several items
-
Click Convert to Items
New items are created in the same room as the photos, and AI identification runs automatically. Videos are skipped.
The steps below cover the alternative route: exporting the photos and bulk-uploading them as items.
Step 1: Export All Job Images
Section titled “Step 1: Export All Job Images”-
Open your job
-
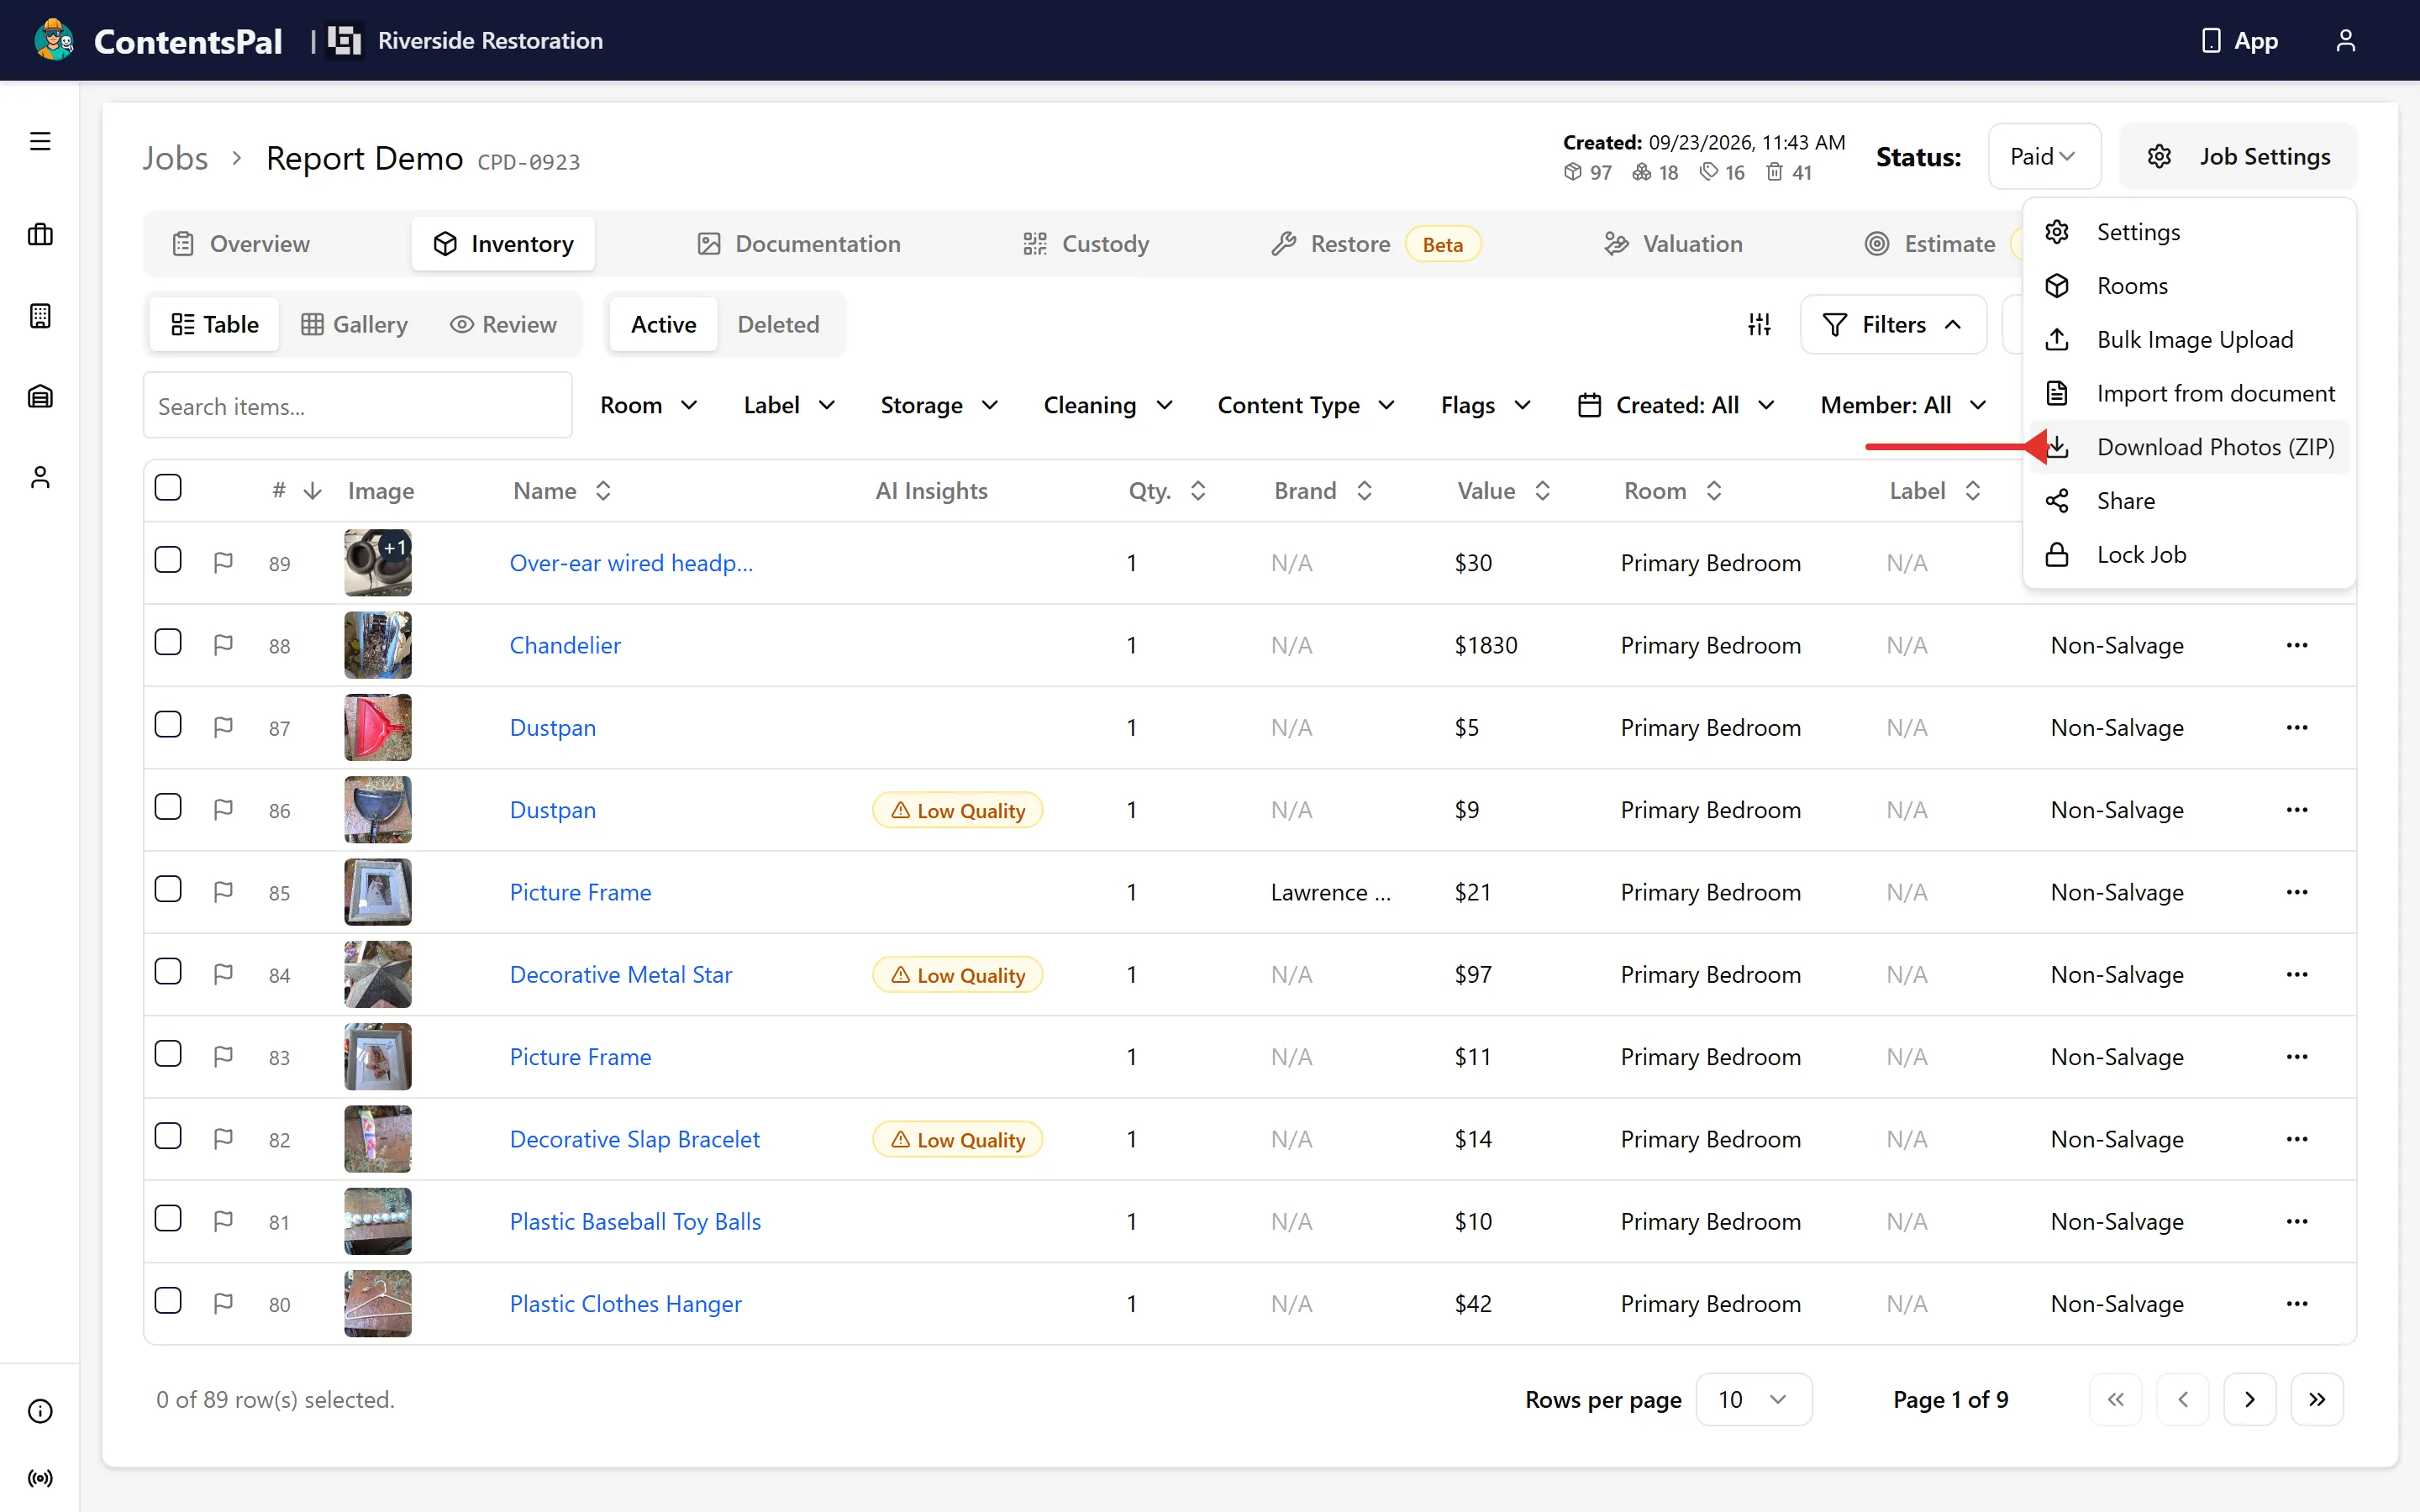
Click on Job Settings in the top right of the window
-
Select Download Photos (ZIP), then click Download Images
-
Wait for the email notification (typically a few minutes). You can also find the download link in the Reports tab
Step 2: Download and Extract the ZIP
Section titled “Step 2: Download and Extract the ZIP”-
Open the email notification
-
Click the download link
-
Extract the ZIP file to your computer
-
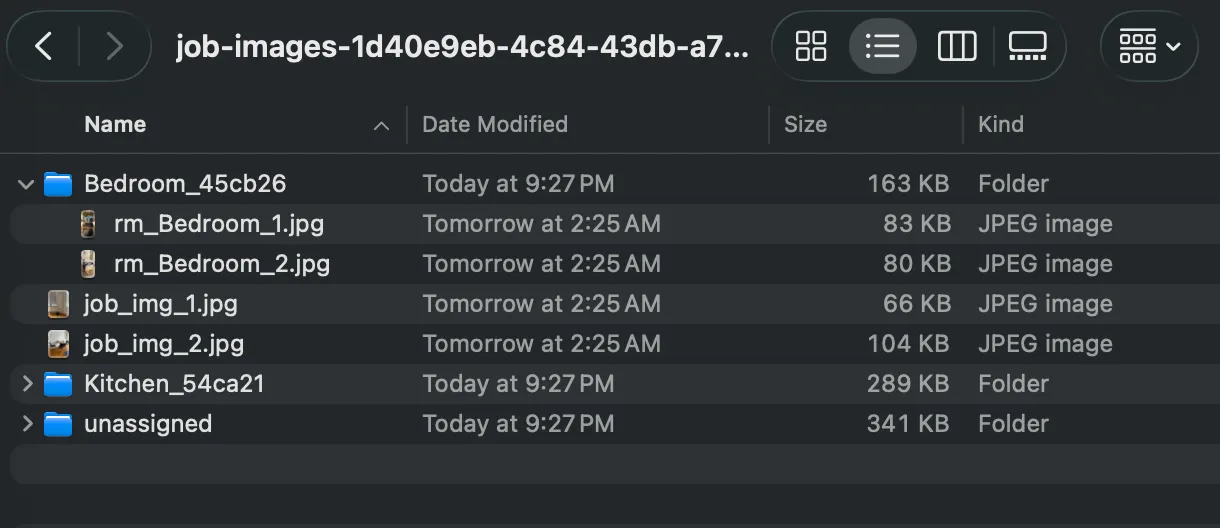
Navigate to find the photos you want to convert
Example: If you have room overview photos that show individual items, navigate to the folder for that room and find the room images inside it (their file names start with rm_).
Step 3: Bulk Upload Photos as Items
Section titled “Step 3: Bulk Upload Photos as Items”-
In the web app, open your job
-
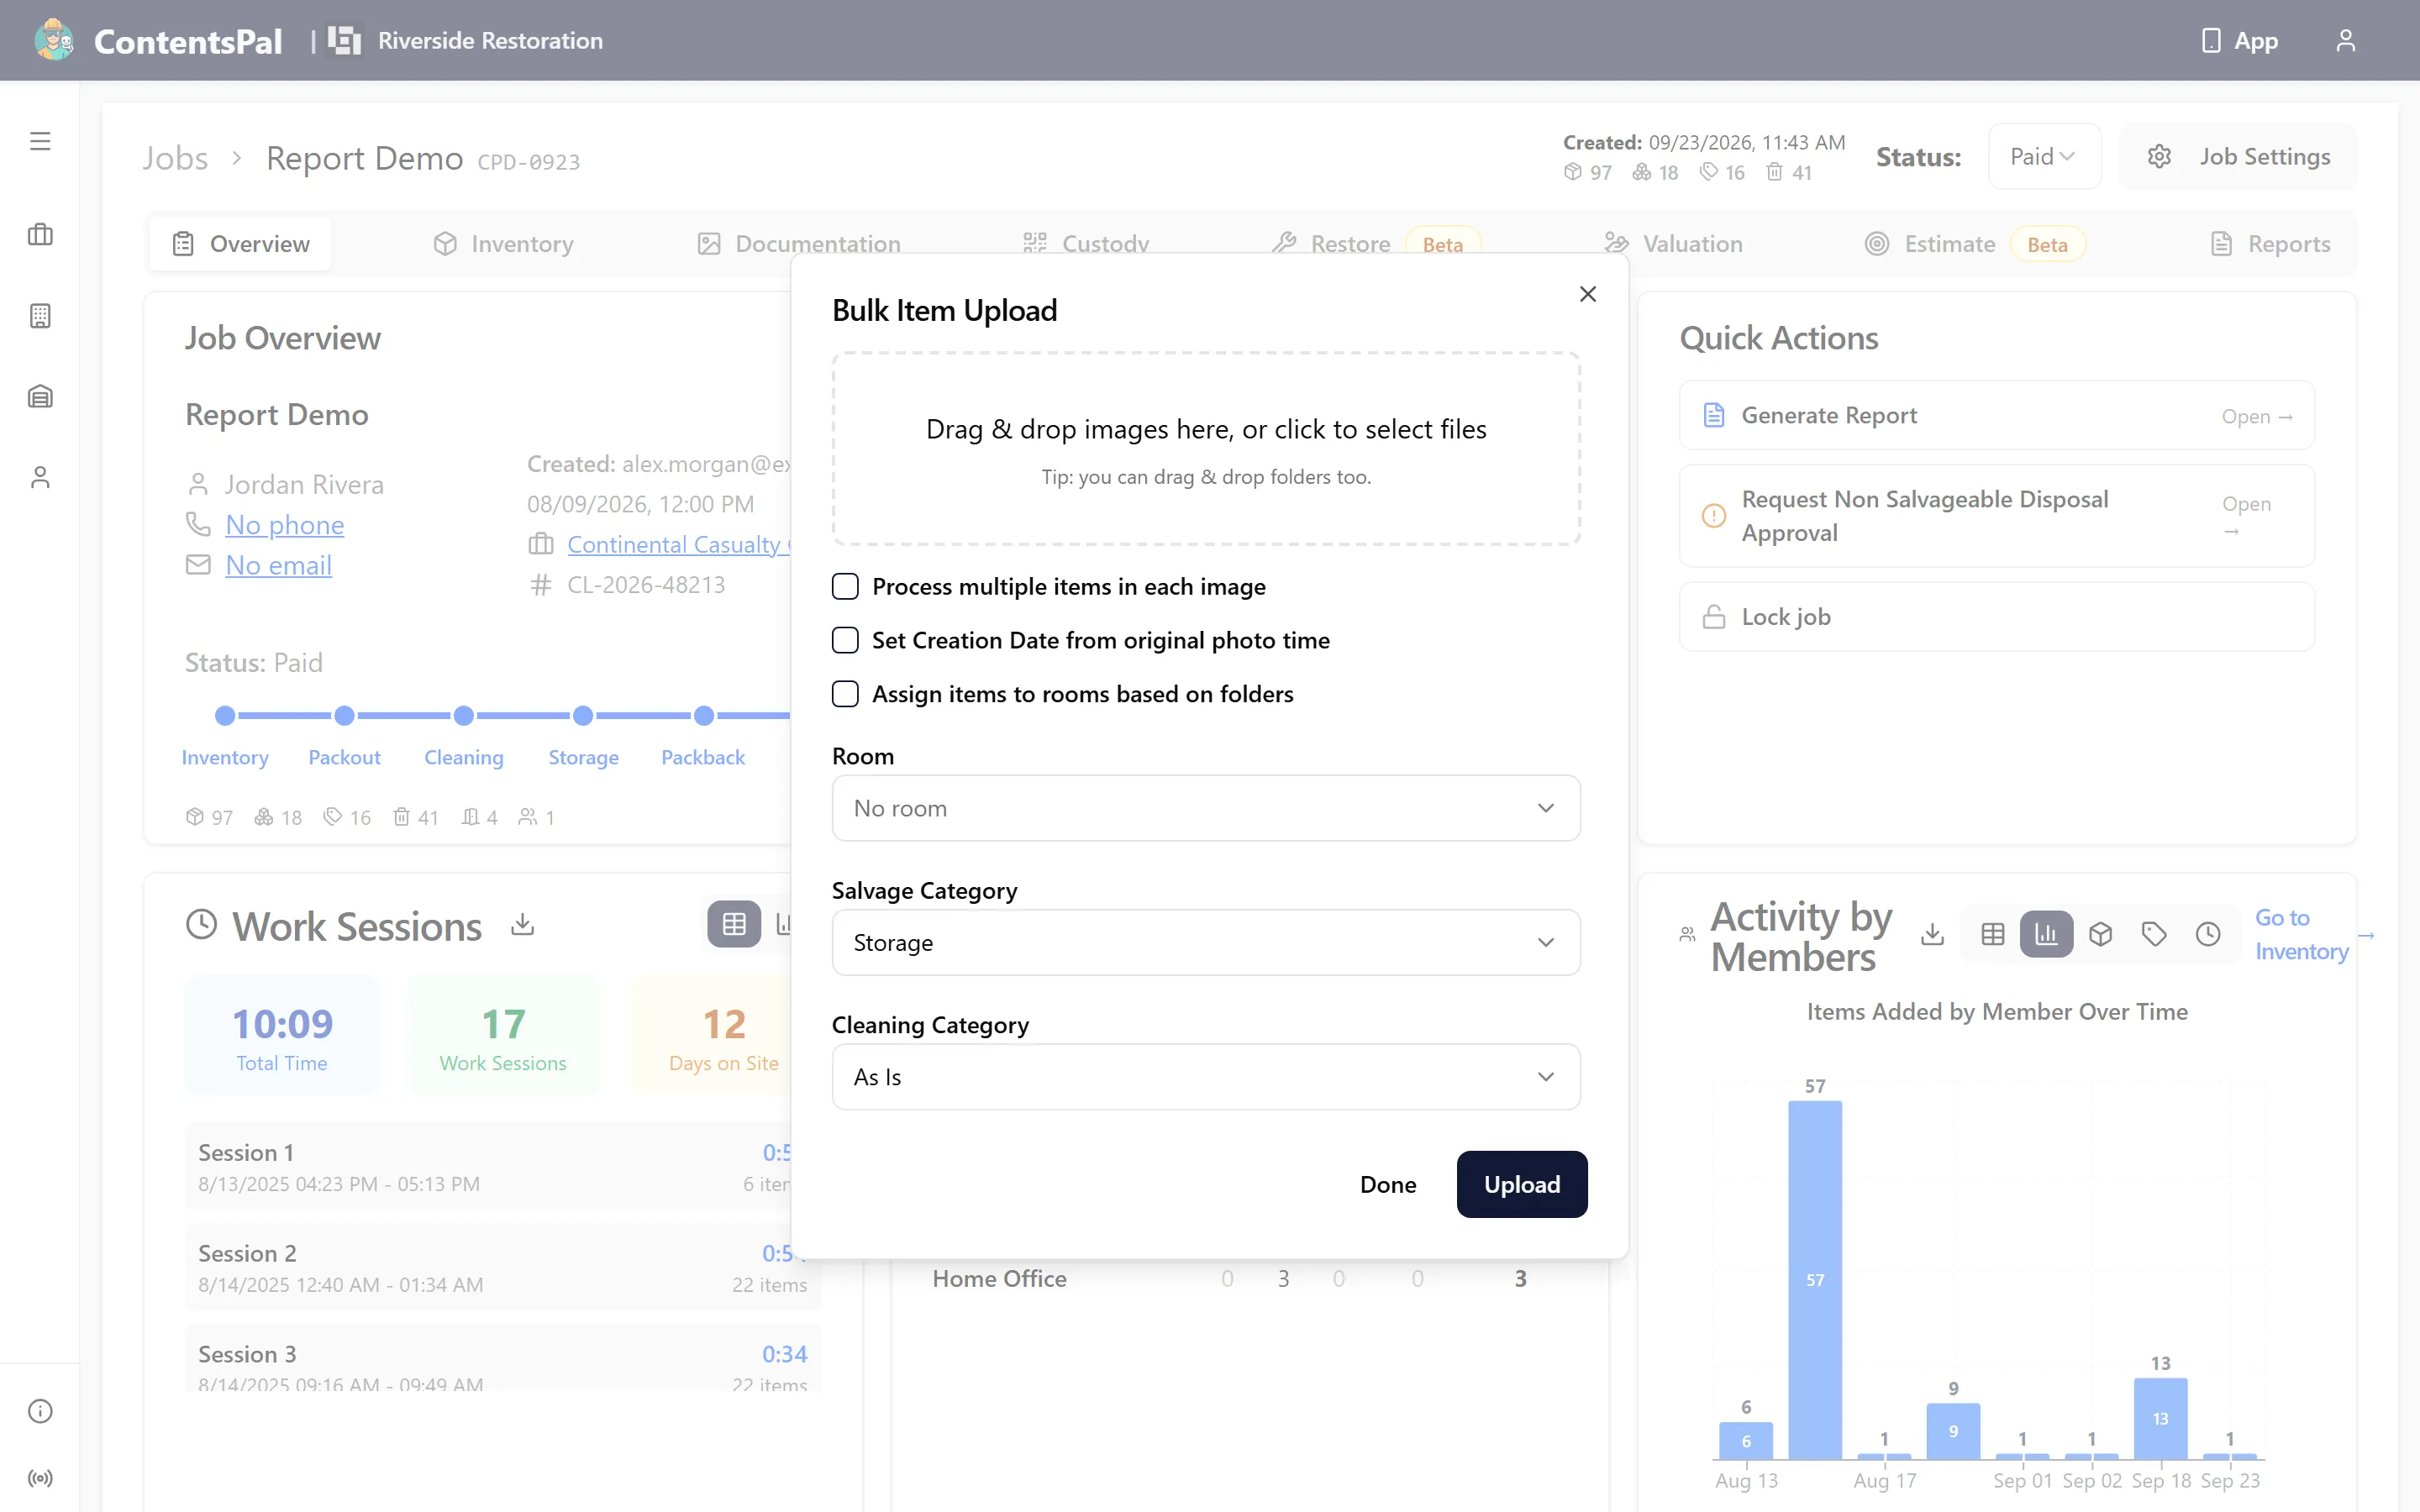
Go to Job Settings → Bulk Image Upload
-
Select and drag and drop the photos you want to add as inventory items
-
Configure Upload Settings:
-
Processing Mode:
-
Single item (default) - AI identifies one main item per photo
-
Process multiple items in each image - tick this checkbox so AI detects multiple items in each photo
-
-
Optional Settings:
-
Room - Assign all items to a specific room
-
Salvage Category - Set category for all items (Storage, Salvageable, etc.)
-
Cleaning Category - Set cleaning status
-
-
-
Click Upload
-
Wait for email notification when AI processing is complete
Step 4: Review and Organize
Section titled “Step 4: Review and Organize”After processing completes:
-
Refresh your job page
-
Review the newly created items
-
Edit any items that need corrections:
-
Update names and descriptions
-
Assign to correct rooms
-
Add or change tags
-
Adjust salvage categories
-
Common Scenarios
Section titled “Common Scenarios”Converting Room Overview Photos
Section titled “Converting Room Overview Photos”Situation: You took wide shots of each room before starting inventory.
Solution:
-
Export job images
-
In the extracted ZIP, open the folder for the room you want
-
Look for the room photos inside (file names starting with
rm_) -
Select clear photos showing items
-
Bulk upload with Process multiple items in each image ticked
-
Assign correct room during upload
Converting Job Site Documentation
Section titled “Converting Job Site Documentation”Situation: You have general job site photos from initial walkthrough.
Solution:
-
Export job images
-
Find the job photos at the top level of the ZIP (file names starting with
job_img_) -
Bulk upload with appropriate mode
-
Manually assign rooms to items after processing
Handling Photos from Multiple Rooms
Section titled “Handling Photos from Multiple Rooms”Situation: You have photos from several rooms to convert.
Solution:
-
Export once to get all images
-
Upload photos from each room separately
-
Assign the correct room for each batch
This keeps items organized by location.
Tips for Best Results
Section titled “Tips for Best Results”Before Uploading:
-
Review photos and remove poor quality images
-
Organize photos by room if possible
-
Remove duplicates
During Upload:
-
Tick Process multiple items in each image for room overview shots
-
Leave it unticked for focused object photos
-
Assign rooms during upload to save time later
After Upload:
-
Check AI-identified items for accuracy
-
Add tags to important items
-
Print QR code labels if needed
Limitations
Section titled “Limitations”-
Maximum 5,000 images per upload
-
Maximum 3GB total file size per upload
-
Supported formats: JPG, JPEG, PNG, WEBP, HEIC, GIF
-
Processing time varies based on number of images
Troubleshooting
Section titled “Troubleshooting”Q: I can’t find my job/room photos in the ZIP file A: Check if photos were actually taken at the job level. Some photos may be under unassigned/ if no room was set.
Q: The ZIP file didn’t arrive A: Check your spam folder. If still missing after 15 minutes, request the export again.
Q: AI didn’t detect items correctly A: You can manually edit items after upload. Go to the item, click edit, and update the details.
Q: Can I upload the same photos multiple times? A: Yes, but this will create duplicate items. Delete unwanted duplicates from your inventory.
Q: Photos are in wrong rooms A: After upload, select the items in the Inventory tab, then use Edit rows → Batch Edit and choose the correct Room.
Need Help?
Section titled “Need Help?”If you encounter issues with this process:
-
Go to Help and Support in the sidebar
-
Visit our support portal: https://support.contentspal.com
-
Use the chat widget for further support
Last Updated: September 2026